
Are you ready to dive into the exciting world of electronics right from the comfort of your home? Imagine the thrill of creating your own electronic devices, seeing your projects come to life, and understanding the technology that powers our daily lives.
Whether you’re a curious beginner or a seasoned hobbyist, making electronic projects at home is not only fun but also incredibly rewarding. You don’t need a fancy lab or expensive tools. With the right guidance and a few affordable components, you can start building your own gadgets today.
So, why wait? Discover the secrets to creating amazing electronic projects that will amaze your friends and unlock your potential. Let’s get started on this electrifying adventure together!
Gather Basic Tools
Gathering the right tools is the first step to start electronic projects at home. Having basic equipment ready makes building easier and more fun. Tools help you work precisely and avoid mistakes. Safety gear protects you from accidents and ensures a safe workspace. Investing time in collecting these items pays off throughout your projects.
Essential Equipment
- Soldering iron – for joining components firmly
- Wire cutters – to cut wires cleanly
- Multimeter – to measure voltage, current, and resistance
- Breadboard – for testing circuits without soldering
- Needle-nose pliers – to bend and hold small parts
- Insulated wires – for making connections
- Screwdrivers – to tighten or loosen screws
- Desoldering pump – to remove solder when needed
- Electrical tape – for insulation and securing wires
Safety Gear
- Safety glasses – to protect eyes from sparks or debris
- Heat-resistant gloves – to avoid burns from soldering iron
- Ventilation fan or mask – to avoid inhaling fumes
- Fire extinguisher – for emergency fire situations
- Non-slip mat – to keep tools stable while working

Credit: www.youtube.com
Choose Simple Projects
Choosing simple projects is the best way to start making electronic projects at home. Simple projects build confidence and teach basic skills. They use fewer parts and less complex steps. This makes learning faster and more fun. Beginners can focus on understanding how things work without feeling overwhelmed.
Starter Ideas
Starter ideas are small, easy projects anyone can try. These projects often use basic components like LEDs, batteries, and switches. They help you learn important concepts like circuits and connections. Some popular starter ideas include:
- Making a blinking LED light
- Building a simple buzzer circuit
- Creating a basic flashlight
- Assembling a small motor circuit
These projects need only a few parts and easy tools. They let you practice soldering and wiring safely. Each success motivates you to try harder projects next.
Project Kits
Project kits come with all parts and instructions included. They guide you step-by-step through a complete project. Kits are great for beginners who want clear directions. Many kits focus on fun and useful gadgets. Examples of kits include:
- Simple robot kits
- Electronic piano kits
- Weather station kits
- Basic radio kits
Kits save time and reduce confusion about what parts to buy. They usually provide detailed manuals and diagrams. This helps build understanding and skill as you work.
Learn Basic Components
Understanding basic electronic components is essential for starting any project at home. These parts form the building blocks of circuits. Knowing their roles helps in designing and fixing devices easily. Each component has unique functions and symbols. Learning these basics makes complex projects manageable.
Resistors And Capacitors
Resistors control the flow of electric current. They reduce current to safe levels for other parts. Capacitors store and release electrical energy. They smooth out voltage changes in circuits. Both come in many sizes and values. Reading their color codes is important. This helps identify their resistance or capacitance.
Transistors And Diodes
Transistors act like switches or amplifiers. They control large currents with small signals. Diodes allow current to flow in one direction only. They protect circuits from damage by reversing current. Both are key in controlling electricity flow. Understanding their pins and symbols is useful.
Microcontrollers
Microcontrollers are small computers on a chip. They run simple programs to control devices. They read inputs like sensors and control outputs like lights. Popular types include Arduino and Raspberry Pi. Learning how to program them opens many project possibilities. They make projects smart and interactive.
Create A Workspace
Creating a dedicated workspace is essential for making electronic projects at home. It helps keep all your materials organized and your mind focused. A good workspace improves efficiency and reduces mistakes. Setting up a space that fits your needs makes every project smoother and more enjoyable.
Organizing Tools
Keep your tools easy to find and reach. Use small bins or drawer organizers to separate screws, wires, and components. Label containers clearly for quick access. A pegboard on the wall can hold pliers, screwdrivers, and other hand tools. This setup saves time and avoids clutter.
Lighting And Comfort
Good lighting prevents eye strain and improves precision. Use a bright desk lamp with adjustable angles. Natural light is helpful but not always enough. Choose a comfortable chair that supports your back. Keep your workspace at a height that avoids bending. Comfort boosts focus and helps you work longer without fatigue.
Follow Step-by-step Guides
Following step-by-step guides is essential for success in electronic projects at home. These guides break down complex tasks into manageable pieces. They help you avoid common mistakes and build your confidence as you progress.
Reading Schematics
Schematics are like maps for your electronic projects. You might feel overwhelmed at first, but learning to read them is a skill that opens many doors. Focus on understanding symbols for components like resistors, capacitors, and transistors.
Try comparing the schematic with the physical components you have. This hands-on approach makes the abstract symbols more real. Ask yourself, how do these parts connect to make the circuit work? This question guides your learning.
Keep a reference sheet of common symbols nearby. Over time, you’ll recognize patterns that speed up your reading. Remember, every expert once struggled with schematics too.
Circuit Assembly Tips
Building your circuit requires patience and attention to detail. Start by organizing your components before you begin. Label wires and parts if needed to avoid confusion.
Use a breadboard for initial testing. It lets you connect and disconnect components easily without soldering. This flexibility saves time and prevents damage if you need to make changes.
Check each connection twice before powering the circuit. A loose wire or wrong connection can cause your project to fail or even damage components. Have you ever powered a circuit only to realize a tiny wire was out of place? That moment teaches the value of careful assembly.
Keep tools like tweezers and wire cutters close by. Small tools can make a big difference in precision and ease. Taking these simple steps makes your project smoother and more enjoyable.
Test And Troubleshoot
Testing and troubleshooting are key steps in creating electronic projects at home. These processes help find errors and ensure the device works correctly. Testing checks if each part functions as expected. Troubleshooting finds and fixes problems in the circuit or components.
Effective testing saves time and prevents damage. It also improves your skills in electronics. Even simple projects need careful checking. Small mistakes can stop the whole system from working.
Using A Multimeter
A multimeter is a handy tool for testing electronics. It measures voltage, current, and resistance. These readings show if parts work well or have faults.
- Set the multimeter to the right measurement type.
- Touch the probes to the circuit points carefully.
- Compare the readings with expected values.
- Check for broken wires or bad connections.
- Test batteries and power supplies for proper voltage.
Using a multimeter helps spot open circuits, shorts, or wrong component values. It gives clear data to guide repairs.
Common Issues
Some problems appear often in home electronics projects. Recognizing these helps fix them faster.
- Loose Connections:Wires or components not firmly connected.
- Wrong Wiring:Components placed incorrectly or reversed.
- Damaged Components:Burned resistors, broken LEDs, or faulty chips.
- Power Problems:Insufficient voltage or wrong polarity.
- Cold Solder Joints:Poor soldering causing weak electrical contact.
Check these areas carefully before moving to complex troubleshooting. Many issues come from simple mistakes.
Expand Skills Gradually
Expanding your skills gradually is key to making electronic projects at home both fun and effective. Jumping straight into complex circuits can be frustrating and overwhelming. Instead, build your knowledge step-by-step, allowing each project to add new skills and confidence.
Advanced Components
Once you’re comfortable with basic parts like resistors, LEDs, and simple ICs, try adding advanced components to your projects. Components such as microcontrollers, sensors, and wireless modules open up many possibilities.
For example, learning to use an Arduino board lets you control motors, read temperature sensors, or even connect to the internet. Start by programming simple tasks, then gradually combine multiple components.
Have you tried working with components that require code? Even a small program can make a big difference in what your project does.
Custom Projects
After mastering various components, challenge yourself by creating custom projects tailored to your interests. Designing your own circuit on a breadboard or PCB pushes your skills further.
Think about problems you want to solve or gadgets you wish existed. Building a custom remote control, a smart plant watering system, or a homemade alarm can be rewarding and educational.
Keep a notebook of ideas and sketch your circuits before assembling them. Planning saves time and reduces errors.
What unique project idea have you considered but haven’t started yet? Taking that first step could teach you more than you expect.

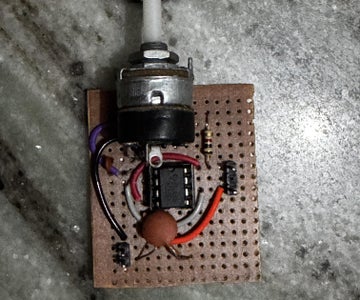
Credit: www.instructables.com
Credit: www.instructables.com
Frequently Asked Questions
What Tools Do I Need For Home Electronic Projects?
Basic tools include a soldering iron, multimeter, wire cutters, and a breadboard. These help with assembling and testing circuits safely and efficiently.
How Can Beginners Start Making Electronic Projects At Home?
Start with simple kits or tutorials online. Learn basic components and circuit design before advancing to complex projects.
Where To Find Affordable Electronic Components For Diy Projects?
Check online stores like Amazon, eBay, or specialized electronics shops. Local electronics markets also offer good deals on parts.
What Safety Precautions Are Essential In Home Electronics Projects?
Always disconnect power before working on circuits. Use insulated tools and work in a well-ventilated area to avoid accidents.
Conclusion
Building electronic projects at home can be fun and rewarding. Start with simple ideas and use easy tools. Practice helps you learn new skills step by step. Mistakes are normal, so keep trying and stay patient. Enjoy the process and watch your projects come to life.
Stay curious and keep exploring new electronics ideas. This hobby can grow with you over time. Happy building!
Leave a Reply