Are you ready to bring your electronic projects to life by combining circuits with wood? Attaching electronic components to wood might seem tricky at first, but with the right tips and tricks, you can do it quickly and securely.
Whether you’re building a custom speaker, a wooden robot, or a unique home gadget, this guide will help you make your ideas stick—literally. Keep reading to discover simple methods that save you time and keep your components safe, so your project works perfectly every time.

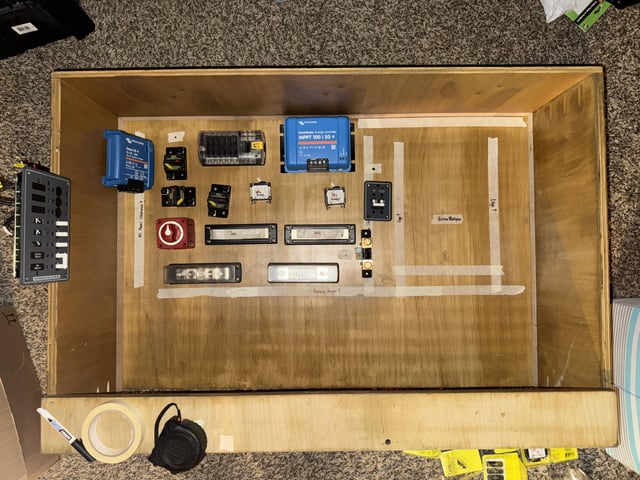
Credit: www.reddit.com
Choosing The Right Tools
Choosing the right tools is crucial when attaching electronic components to wood. The quality and suitability of your tools directly affect how secure and neat your work will be. Using improper tools can damage both the wood and the electronic parts, leading to frustrating repairs or replacements.
Essential Tools For The Job
You’ll need a mix of basic woodworking and electronics tools to get the job done effectively. Start with a reliable drill that offers variable speed settings; it helps prevent overheating sensitive components or splitting the wood.
- Screwdrivers:A set of small Phillips and flathead screwdrivers is perfect for tiny screws on circuit boards.
- Soldering iron:Essential for making strong electrical connections. Look for one with adjustable temperature to avoid burning components.
- Wire cutters and strippers:These help you prepare wires cleanly, ensuring better connections.
- Hot glue gun:Great for securing components without drilling or screwing.
- Measuring tools:A ruler or caliper helps place components precisely.
Think about the scale of your project. Do you need to mount tiny sensors or larger boards? This affects which tools you prioritize.
Safety Gear And Precautions
Safety can’t be overlooked, especially when mixing electronics with woodworking tools. Always wear safety goggles to protect your eyes from wood chips or solder splashes.
- Gloves:Use heat-resistant gloves when soldering to avoid burns.
- Ventilation:Work in a well-ventilated area to avoid inhaling fumes from soldering or gluing.
- Fire extinguisher:Keep one nearby, just in case sparks fly or glue overheats.
Have you ever underestimated how quickly a small spark can turn into a hazard? Taking these precautions saves time and prevents accidents.
Preparing The Wood Surface
Preparing the wood surface is a crucial step before attaching electronic components. It ensures a strong bond, accurate placement, and prevents damage to both the wood and components. Taking the time to prepare your wood properly will save you frustration and improve the durability of your project.
Cleaning And Sanding
Start by removing any dust, dirt, or grease from the wood. Use a clean cloth with a mild detergent or rubbing alcohol to wipe the surface. This simple step helps adhesives stick better and keeps electrical contacts clean.
Next, sand the wood surface gently with fine-grit sandpaper. This evens out rough spots and opens up the wood grain, creating a better grip for glue or tape. Be careful not to over-sand; a smooth but slightly textured surface works best.
Have you ever tried attaching components only to find they peel off easily? Proper cleaning and sanding prevent this common problem and make your work look more professional.
Marking Component Positions
Before attaching anything, mark the exact spots where each component will go. Use a pencil or a non-permanent marker to make light, clear marks on the wood. This helps you avoid misalignment and saves time during assembly.
Consider using a ruler or template to ensure your marks are precise and evenly spaced. Double-check these positions by placing the components temporarily on the marks to confirm fit and orientation.
Taking a few extra minutes to mark your spots can prevent costly mistakes and keep your project neat. How often have you had to redo parts because something was off by a millimeter? This step helps you avoid that hassle.
Selecting Adhesive Methods
Selecting the right adhesive method is vital for attaching electronic components to wood securely. The choice depends on the type of component, wood surface, and environmental conditions. Using the proper adhesive ensures a strong bond and avoids damage to sensitive parts. Understanding the types of adhesives and how to apply them helps achieve the best results.
Types Of Adhesives
Several adhesives work well for bonding electronics to wood. Each has unique features and uses.
- Epoxy:Strong and durable. Good for heavy components and rough surfaces.
- Hot Glue:Quick drying and easy to use. Best for lightweight parts and temporary fixes.
- Silicone Adhesive:Flexible and heat resistant. Ideal for components that need some movement.
- Super Glue (Cyanoacrylate):Fast bonding and precise application. Suitable for small parts.
- Double-Sided Tape:Clean and simple. Works well for light components and testing.
Application Techniques
Proper application improves adhesive strength and component safety. Clean the wood surface before applying any glue.
- Apply a thin, even layer of adhesive to avoid mess and weak spots.
- Press the component firmly but gently to secure the bond.
- Allow enough curing time as per adhesive instructions to ensure full strength.
- Use clamps or weights for heavy components to keep them in place during drying.
- Work in a well-ventilated area to avoid inhaling fumes from adhesives.

Credit: www.specimenproducts.com
Using Screws And Fasteners
Using screws and fasteners is a reliable way to attach electronic components to wood. This method offers strong support and keeps parts secure. Screws provide a firm hold and can be easily removed if needed. Fasteners like clips or brackets help organize wires and small parts neatly. Correct screw choice and preparation ensure a safe and lasting connection.
Choosing The Right Screws
Select screws that match the component size and wood type. Wood screws are best for soft and hard woods. Look for screws with a sharp tip for easy insertion. Choose screws with a length that grips the wood firmly without breaking it. Avoid screws that are too long or too short.
- Use stainless steel screws for durability and rust resistance.
- Flat-head screws sit flush with the surface.
- Pan-head screws provide better grip for small parts.
Drilling Pilot Holes
Drilling pilot holes prevents wood from splitting. Use a drill bit slightly smaller than the screw’s diameter. Mark the spot where the screw goes before drilling. Drill straight and deep enough for the screw to fit easily. Pilot holes guide screws and reduce wood damage. This step improves precision and keeps components steady.
Integrating Mounting Brackets
Integrating mounting brackets is a smart way to attach electronic components to wood securely and neatly. These brackets provide a stable base and help you organize your components efficiently. Whether you’re working on a DIY project or a professional setup, choosing the right bracket and securing it properly makes a big difference.
Types Of Mounting Brackets
There are several types of mounting brackets designed for different needs and component sizes. Here are some common options:
- L-shaped brackets:Great for corner mounting and providing strong support.
- Flat brackets:Ideal for attaching components flush against a surface.
- Adjustable brackets:These allow you to change the angle or position of the component after installation.
- Snap-in brackets:Useful for quick installation and removal without extra tools.
Think about the size and weight of your components before choosing a bracket. Have you ever had a component fall off because the bracket wasn’t strong enough? Picking the right type prevents that hassle.
Secure Attachment Strategies
Using mounting brackets effectively means more than just screwing them into place. Start by pre-drilling holes in the wood to avoid splitting. This step saves you from damaging your project.
Use screws that match the bracket holes and are long enough to grip the wood firmly but not so long they come out the other side. Adding washers can distribute pressure and prevent the screw from loosening over time.
For extra security, consider using a small amount of wood glue before screwing the bracket down. It might seem like overkill, but it adds stability and helps reduce vibrations that can loosen screws.
Have you tried combining these techniques? It often results in a much sturdier setup that lasts longer and looks cleaner.
Credit: www.schmalz.com
Incorporating Velcro And Hook-and-loop
Attaching electronic components to wood can be tricky, especially when you want a solution that is both secure and flexible. Velcro and hook-and-loop fasteners offer a smart way to do this. They provide a reliable hold while allowing you to remove or adjust components without damaging the wood or the electronics.
Best Practices For Velcro
Start by choosing heavy-duty Velcro with a strong adhesive backing. Clean the wood surface thoroughly before sticking the Velcro to ensure maximum grip. Press firmly and allow the adhesive to set for at least 24 hours for a solid bond.
Attach the loop side to the wood and the hook side to your component. This setup reduces wear on the component’s surface. If your component is heavy, use multiple Velcro strips spaced evenly to distribute the weight and prevent it from falling off.
Have you considered how temperature and humidity might affect the adhesive? In damp areas, Velcro’s adhesive might weaken, so mechanical fasteners like small screws alongside Velcro can add extra security.
Adjustable Attachment Benefits
The biggest advantage of using Velcro is adjustability. You can easily reposition your components without drilling new holes or causing damage. This is perfect for projects that evolve or require frequent testing and adjustments.
Imagine needing to swap a sensor on a wooden prototype during testing—Velcro lets you do this quickly and keeps your workspace clean. Plus, it allows for quick troubleshooting and component replacement, saving you time and effort.
Have you ever struggled with permanent attachments that limit your project’s flexibility? Velcro offers a solution that adapts as your project grows or changes, letting you focus on innovation rather than repairs.
Ensuring Secure Connections
Ensuring your electronic components stay firmly attached to wood is key for long-lasting projects. Loose connections can cause malfunctions or even damage your electronics. Paying close attention to how you secure each part will save you time and frustration later.
Testing Stability
After attaching components, gently wiggle each one to check for any movement. If you notice even slight shifts, it means the connection isn’t tight enough. Push on the wires and connectors from different angles to simulate real use.
Try powering the circuit while lightly tapping the wood or components. Does the device flicker or lose power? If yes, you need to improve your attachment before proceeding. Think of this step as a quick reality check for your work.
Reinforcing Weak Points
Look for spots where parts feel loose or unsupported. You can reinforce these areas by adding small amounts of hot glue around the base of components. This glue dries fast and keeps parts from moving without interfering with electrical contacts.
Using tiny wood screws or brackets can also strengthen the hold, especially for heavier components. Just make sure you don’t damage wiring or circuit boards when drilling or screwing. Adding extra support might seem tedious, but it prevents headaches down the line.
Maintaining And Troubleshooting
Maintaining and troubleshooting electronic components attached to wood is essential for long-lasting performance. Wood can expand or contract with moisture, which may affect connections. Regular care helps prevent damage and keeps circuits working smoothly.
Regular Maintenance Tips
- Check all connections for looseness or corrosion.
- Clean dust and dirt from components and wood surface.
- Use a soft brush or compressed air to remove debris.
- Inspect solder joints for cracks or breaks.
- Apply a protective coating to wood to reduce moisture effects.
- Tighten screws or fasteners securing components to wood.
- Replace worn or damaged wires promptly.
Identifying Common Issues
Look for signs like flickering lights or intermittent connections. Loose wires often cause these problems.
Corrosion appears as green or white residue on metal parts. It disrupts electrical flow.
Wood swelling may push components apart, breaking connections.
Cracked solder joints can cause circuit failure. Test continuity with a multimeter.
Burn marks or smells suggest overheating or shorts. Turn off power immediately.
Frequently Asked Questions
How Do I Secure Electronic Components On Wood?
Use screws or small bolts to fasten components firmly. Pre-drill holes to avoid wood splitting. Alternatively, use hot glue or epoxy for lightweight parts. Ensure components are stable to prevent damage or disconnection.
What Tools Are Needed To Attach Electronics To Wood?
You need a drill, screwdriver, hot glue gun, and epoxy resin. Pre-drill holes for screws to avoid wood cracking. A multimeter helps check connections. Having clamps can hold pieces steady during assembly.
Can Adhesives Effectively Attach Electronics To Wood?
Yes, hot glue and epoxy are strong adhesives for wood. Hot glue is quick and suitable for lightweight parts. Epoxy offers a durable bond for heavier components. Ensure surfaces are clean before application for best results.
How To Prevent Wood Damage When Mounting Electronics?
Pre-drill holes smaller than screw size to avoid splitting. Use washers with screws to distribute pressure evenly. Avoid over-tightening screws. For adhesives, clean surfaces well to ensure proper bonding and reduce risk of wood damage.
Conclusion
Attaching electronic parts to wood is easier than it seems. Choose the right tools and materials first. Drill small holes to avoid splitting the wood. Use screws or clips to hold parts firmly. Test connections for safety and function. Take your time and work carefully.
Practice helps you improve every time. Now you can create simple wood and electronics projects. Enjoy building and learning new skills!
Leave a Reply