Are you fascinated by the world of electronics and eager to create your very own gadgets at home? Imagine the thrill of holding a device that you’ve built with your own hands, understanding every wire, circuit, and connection.
Making simple electronic gadgets at home isn’t just a rewarding hobby; it’s a way to unleash your creativity and problem-solving skills. In this guide, you’ll discover how to make simple electronic gadgets using easy-to-find materials and straightforward instructions. Whether you’re a complete beginner or have some experience, you’ll find tips and tricks that will empower you to bring your ideas to life.
So, are you ready to dive into the exciting world of DIY electronics and explore the endless possibilities? Keep reading to find out how you can get started on your very first project today!

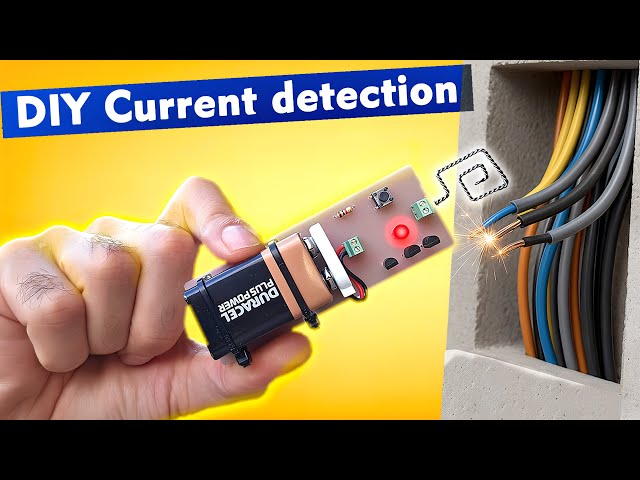
Credit: www.instructables.com
Basic Tools And Materials
Starting to make simple electronic gadgets at home requires some basic tools and materials. These items help you build and test your projects easily. Having the right tools ensures better results and fewer mistakes.
Essential Tools
- Soldering iron – for joining electronic parts.
- Wire cutters – to cut wires neatly.
- Multimeter – measures voltage, current, and resistance.
- Screwdrivers – for assembling and opening devices.
- Needle-nose pliers – useful for bending and holding wires.
- Breadboard – to test circuits without soldering.
- Desoldering pump – removes solder from joints.
Common Components
- Resistors – control electrical current flow.
- Capacitors – store and release electrical energy.
- LEDs – light up when powered.
- Transistors – act as switches or amplifiers.
- Diodes – allow current to flow one way only.
- Switches – control the flow of electricity.
- Batteries – provide power to circuits.
- Wires – connect all components together.
Safety Tips
- Work in a well-ventilated area to avoid fumes.
- Always unplug tools when not in use.
- Wear safety glasses to protect your eyes.
- Keep your workspace clean and organized.
- Handle soldering iron carefully to avoid burns.
- Check power sources before connecting circuits.
- Dispose of electronic waste properly.
Simple Circuit Concepts
Simple circuit concepts are the foundation of creating electronic gadgets at home. Understanding these basics helps you build projects confidently and troubleshoot problems effectively. Whether you want to light an LED or create a small sensor, grasping these ideas makes your experience smoother and more rewarding.
Understanding Circuits
A circuit is a path that allows electricity to flow and power your components. You need a power source, like a battery, connected through wires to parts such as resistors, LEDs, or sensors. Think about how a flashlight works: the battery sends electricity through a switch to the bulb, lighting it up.
Knowing the difference between series and parallel circuits is important. In a series circuit, components are connected one after another, so if one breaks, the whole circuit stops working. In parallel circuits, components are connected across the same voltage source, so they work independently.
Have you ever wondered why some gadgets keep working even when one part fails? That’s usually because they use parallel circuits. Understanding this can help you design more reliable devices at home.
Using Breadboards
Breadboards are your best friends for testing and building circuits without soldering. They have many tiny holes arranged in rows and columns, allowing you to insert components and wires easily. This setup helps you experiment with different circuit designs quickly.
One tip from my own projects: always double-check the rows and columns on your breadboard before inserting components. It’s easy to accidentally connect the wrong points, causing your circuit not to work. Breadboards make trial and error simple—so don’t hesitate to test freely.
Try labeling your wires and components to avoid confusion. Small habits like this save time and frustration when circuits don’t behave as expected.
Soldering Basics
Soldering joins electronic components permanently by melting a metal alloy (solder) around the connection point. It might seem tricky at first, but with practice, you’ll gain steady hands and confidence. Good soldering ensures strong electrical connections and durability.
Start with a basic soldering kit and practice on spare wires or old circuit boards. Remember to heat the component lead and pad evenly before applying solder; this creates a clean joint that lasts. Avoid using too much solder—it can cause shorts or messy results.
Safety matters: always work in a well-ventilated area and be careful with the hot soldering iron. Once you get the hang of it, soldering opens up many possibilities for building permanent, reliable gadgets at home.
Easy Diy Gadget Ideas
Creating simple electronic gadgets at home can be both fun and educational. These easy DIY projects help beginners understand basic electronics. They also build skills to work on more complex devices later. Start with simple ideas that use common parts. These projects require minimal tools and are perfect for learning.
Led Flashlight
Making an LED flashlight requires a few simple parts. Use an LED bulb, a small battery, and a switch. Connect the battery to the LED through the switch. This setup allows you to turn the light on and off. Enclose the parts in a small tube or box. This gadget teaches about circuits and power flow.
Basic Alarm System
A basic alarm system uses a buzzer or speaker and a sensor. Common sensors include switches or light sensors. Connect the sensor to the power source and the buzzer. When the sensor detects movement or light changes, it triggers the alarm. This project explains how sensors and alarms work together.
Simple Fm Radio
Building a simple FM radio involves a few key components. These include a tuning coil, capacitor, and a small speaker. The tuning coil selects the radio frequency. The capacitor helps in tuning the station. The speaker plays the sound. This project shows how radios receive and process signals.
Step-by-step Project Guide
Building simple electronic gadgets at home becomes much easier when you break down the process into clear, manageable steps. A solid plan, careful assembly, and thorough testing can turn your ideas into working devices. Let’s dive into how you can approach each phase effectively.
Planning Your Project
Start by deciding what gadget you want to create and what it should do. Write down a list of features and functions. This helps you stay focused and avoid unnecessary complexity.
Next, gather information about the components you’ll need. Check datasheets, watch tutorials, or read forums to understand each part’s role. Have you considered how much space you have for your gadget? That can affect your design choices.
Sketch a simple circuit diagram on paper or use free software tools. This visual guide makes assembling easier and reduces errors. Planning also includes setting a realistic timeline—don’t rush; give yourself time to troubleshoot.
Assembling Components
Lay out all your parts before starting. Organize resistors, capacitors, wires, and other components so you don’t lose track. Use a clean, well-lit workspace to avoid mistakes.
Follow your circuit diagram carefully as you connect components. Use a breadboard for testing circuits without soldering. It’s flexible and lets you make quick changes.
Make sure connections are secure but not forced. Loose wires cause intermittent issues, and tight ones might damage parts. Have you tried checking each connection with a multimeter? It can save hours of headaches.
Testing And Troubleshooting
Once assembled, power your gadget with a low voltage source first. Observe if it behaves as expected. If it doesn’t, don’t get discouraged—this is a normal part of the process.
Test each section of your circuit step-by-step. Isolate parts to find where the problem lies. Checking voltage and continuity often reveals hidden faults.
Document your findings and changes. This not only helps you fix issues faster but also improves your skills for future projects. What’s one unexpected problem you encountered while testing? Sharing it might help others avoid the same trap.
Customization And Upgrades
Customization and upgrades make simple electronic gadgets more useful and fun. They let you change a basic project into something unique. You can add new functions or improve how well the gadget works. This keeps your device fresh and suits your needs better. Learning how to customize and upgrade gadgets helps you grow your skills. It also saves money by fixing or improving gadgets yourself.
Adding Features
Adding features means putting new parts into your gadget. You can add lights, sounds, or sensors. These extras make your gadget do more things. For example, add a buzzer to alert you or a light to show status. Use simple components like switches, LEDs, or buttons. Test each new feature carefully to avoid errors. Small upgrades can change a simple gadget into a smart device.
Improving Performance
Improving performance makes your gadget faster or more reliable. Check the power supply to ensure it is stable. Use better batteries or add a voltage regulator. Replace low-quality parts with stronger ones. Clean all connections to reduce signal loss. Sometimes changing the circuit layout helps. A well-built gadget runs smoother and lasts longer.
Using Microcontrollers
Microcontrollers add brainpower to your gadget. They control many parts with one small chip. Popular choices are Arduino and Raspberry Pi Pico. These chips read sensors, control motors, and manage displays. You can program them to do custom tasks. Learning simple code helps you create smart gadgets. Microcontrollers turn basic electronics into interactive projects.

Credit: www.youtube.com
Resources For Beginners
Starting with simple electronic gadgets at home can be fun and educational. Beginners need the right resources to build confidence and skills. Useful tools help you learn faster and avoid common mistakes.
Many resources are available online and offline. Some are free, while others come as kits or paid courses. Choosing the right resource depends on your learning style and budget.
Online Tutorials
Online tutorials provide step-by-step guides for beginners. Videos and articles break down complex ideas into simple tasks. Many tutorials include pictures and diagrams for easy understanding.
- Basic soldering and circuit building lessons
- Easy projects like LED blinkers and simple alarms
- Interactive platforms with quizzes and practice exercises
These tutorials allow learning at your own pace. Pause, rewind, and repeat as needed.
Community Forums
Community forums connect beginners with experienced hobbyists. You can ask questions, share your progress, and get advice. Many forums have sections dedicated to beginner projects and troubleshooting.
- Advice on choosing parts and tools
- Solutions to common problems
- Project ideas and inspiration
Forums build a sense of support and motivation. Members often share their success stories and tips.
Recommended Kits
Starter kits include all parts needed for simple projects. Kits come with clear instructions and sometimes online support. They save time searching for components and ensure compatibility.
| Kit Name | Contents | Ideal For |
|---|---|---|
| Basic Electronics Kit | Resistors, LEDs, breadboard, wires | Complete beginners |
| Arduino Starter Kit | Arduino board, sensors, motors | Learning coding and hardware |
| DIY Robot Kit | Motors, chassis, controller | Simple robotics projects |
Kits help beginners practice hands-on skills safely. They make learning structured and enjoyable.
Credit: www.instructables.com
Frequently Asked Questions
What Basic Tools Do I Need For Simple Electronic Gadgets?
You need a soldering iron, wire cutters, multimeter, screwdriver, and a breadboard. These tools help you assemble and test circuits effectively.
Can Beginners Make Electronic Gadgets At Home Easily?
Yes, beginners can create simple gadgets by following tutorials and using basic components. Start with easy projects to build skills gradually.
Where Can I Find Components For Homemade Gadgets?
Electronic components are available online, at local electronics stores, or hobby shops. Common parts include resistors, LEDs, capacitors, and microcontrollers.
How Do I Ensure Safety While Making Electronic Gadgets?
Always work in a well-ventilated area, avoid short circuits, and handle tools carefully. Disconnect power sources when assembling or modifying circuits.
Conclusion
Making simple electronic gadgets at home can be fun and rewarding. You only need basic parts and some patience. Start with easy projects and learn step by step. Each small gadget teaches you new skills. Enjoy creating things that work with your own hands.
Keep experimenting and don’t be afraid to make mistakes. This hobby can grow with you over time. Try different ideas and see what you can build next. Simple tools, simple parts, great results. Why not begin today?
Leave a Reply