Are you ready to create amazing electronic music right from the comfort of your home? Setting up a home studio might seem overwhelming at first, but with the right steps, you can build a space that inspires creativity and sounds professional.
Imagine having everything you need at your fingertips, allowing your ideas to flow smoothly without any distractions. In this guide, you’ll discover simple, practical tips to set up your home studio quickly and affordably. By the end, you’ll be fully equipped to start producing tracks that truly reflect your style and passion.
Let’s dive in and turn your music dreams into reality!

Credit: www.reddit.com
Choosing The Right Space
Choosing the right space for your home studio is a crucial first step in creating an environment where your electronic music can truly come to life. The space you pick will influence your sound quality, comfort, and productivity. Before you dive into gear and software, think carefully about where you’ll set up your creative zone.
Room Size And Shape
Smaller rooms can make your setup feel cozy but may cause sound reflections that muddy your mixes. Larger rooms offer more breathing space but can introduce echo issues. Ideally, pick a room that’s not a perfect square to avoid standing waves that distort your sound.
I once tried mixing in a tiny, square-shaped room, and the bass frequencies became overwhelming. Moving to a rectangular room dramatically improved clarity. How does your room’s shape affect your listening experience right now?
Acoustic Considerations
Think about how sound behaves in your chosen space. Hard surfaces like bare walls and floors reflect sound, creating unwanted echoes. Adding soft materials such as rugs, curtains, and foam panels helps absorb these reflections and balance your sound.
Positioning your speakers and listening spot also matters. Place your monitors away from walls and corners to reduce bass build-up. Experiment with speaker height and angle until your mixes sound clear and balanced.
Noise Isolation Tips
Noise from outside or other rooms can distract you and interfere with recording. Use thick curtains, weather stripping on doors, or even heavy blankets to block out unwanted noise. If neighbors are loud, consider adding a layer of drywall or mass-loaded vinyl to walls for better isolation.
Have you noticed any distracting noises in your current space? Tackling these early will save you frustration later and help you focus on your music.
Credit: www.youtube.com
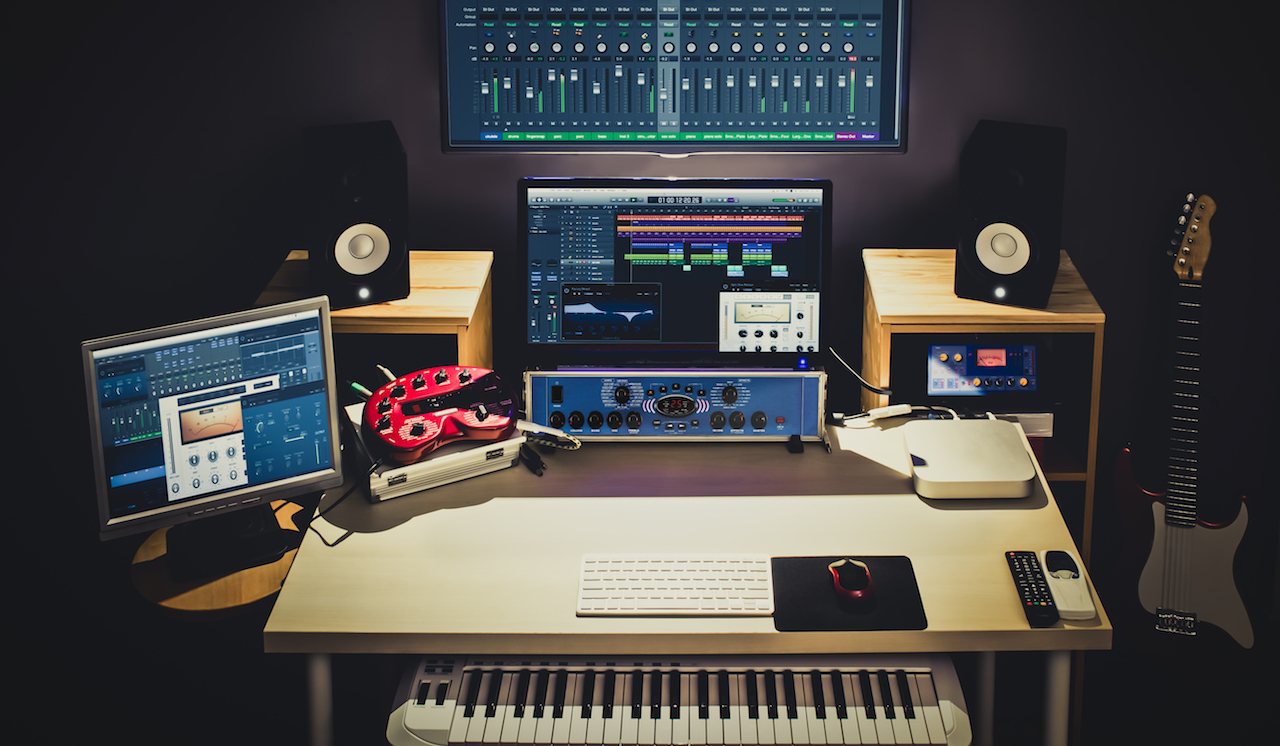
Essential Equipment
Setting up a home studio for electronic music needs the right tools. Essential equipment helps create clear sounds and smooth workflows. Choosing gear that fits your space and style is key.
Audio Interface Selection
An audio interface connects your instruments and computer. It improves sound quality and reduces delay. Look for these features:
- At least two inputs for microphones and instruments
- Good preamps for clean sound
- Low latency to avoid lag
- Compatibility with your computer
A reliable interface shapes your recordings and playback.
Studio Monitors And Headphones
Studio monitors show your music’s true sound. They help fix mixing errors you might miss on regular speakers. Choose monitors with flat frequency response.
Headphones provide detailed listening. Use closed-back headphones for tracking to avoid sound bleed. Open-back headphones suit mixing with natural sound.
- Monitors with clear, balanced output
- Comfortable headphones for long sessions
- Durable and good sound isolation
Midi Controllers And Synthesizers
MIDI controllers let you play and program music easily. They send signals to your software instruments. Synthesizers create unique electronic sounds and textures.
Pick a MIDI controller with enough keys and controls. Some have pads, knobs, and faders for more expression.
- Compact controllers fit small spaces
- Synthesizers with versatile sound options
- Controllers that integrate with your software
These tools boost creativity and workflow in your studio.
Software Setup
Setting up the right software is essential for a home studio focused on electronic music. The software controls your sounds, recordings, and edits. Choosing tools that suit your style helps you create music smoothly. This section covers the key software components to start producing electronic tracks.
Digital Audio Workstations
A Digital Audio Workstation (DAW) is the main software for music production. It records, edits, and arranges your tracks. Popular DAWs for electronic music include Ableton Live, FL Studio, and Logic Pro. Each DAW offers unique features and workflow styles. Choose one that feels easy to use and fits your budget.
Plugins And Virtual Instruments
Plugins add extra sounds and effects to your DAW. Virtual instruments mimic real instruments or synths. They expand your sonic options. Common plugins include synthesizers, drum machines, and effects like reverb or delay. Many plugins come in free or paid versions. Start with a few essentials and add more as you grow.
Sample Libraries
Sample libraries provide ready-made sounds and loops. They help add texture and rhythm to your tracks quickly. Look for libraries with electronic beats, synth loops, and sound effects. Organize samples by type and style for easy access. Sampling can boost creativity and speed up the production process.
Optimizing Acoustics
Optimizing acoustics in your home studio is essential for clear and accurate sound. Good acoustics help you hear every detail of your music. This improves mixing and mastering quality. Simple changes can reduce echoes and unwanted noise. Let’s explore key ways to enhance your studio’s sound environment.
Basic Acoustic Treatment
Start with acoustic panels on walls and ceilings. These panels absorb sound reflections that cause echo. Use foam or fabric-covered panels for best results. Cover the first reflection points around your listening area. Also, add a thick rug on the floor to reduce sound bounce. Curtains over windows help block outside noise and soften reflections.
Bass Traps And Diffusers
Bass traps control low-frequency sounds that build up in corners. Place them in corners where bass tends to gather. This balances the room’s bass response. Diffusers scatter sound waves to avoid harsh reflections. Use diffusers on the rear wall behind your speakers. They create a more natural and spacious sound.
Speaker Placement
Position speakers at ear level and form an equilateral triangle with your listening spot. Keep speakers away from walls to reduce reflections and bass buildup. Distance from the wall affects sound clarity and accuracy. Angle speakers slightly toward your ears for the best stereo image. Test different placements and listen carefully to find the best setup.
Cabling And Connectivity
Cabling and connectivity are the backbone of any home studio setup. Without proper management and the right connections, your gear won’t perform at its best, and troubleshooting becomes a nightmare. Keeping your cables organized and choosing the right types can save you time and frustration, letting you focus more on your music.
Organizing Cables
Messy cables can make your workspace look chaotic and increase the risk of damage or disconnections. Use cable ties, Velcro straps, or cable sleeves to bundle cables neatly together. Label both ends of each cable with a simple tag or color code—this trick saved me hours during a last-minute session.
Think about the cable paths before plugging everything in. Avoid crossing power cables with audio cables to reduce interference. Keeping cables off the floor prevents accidental trips or damage, so consider wall clips or under-desk trays.
Choosing The Right Cables
Select cables based on the equipment you use and the signal type. Balanced cables like XLR or TRS are ideal for microphones and studio monitors because they reduce noise. Unbalanced cables, such as TS or RCA, work fine for short runs or instruments but watch out for hum and interference.
Don’t buy the cheapest cables just to save money. Cheap cables can cause signal loss or introduce noise. Instead, invest in mid-range cables with good shielding and durable connectors. Have you ever noticed a crackling sound during recording? It’s often a cable issue.
Connecting Equipment Efficiently
Plan your connections to minimize cable length and avoid unnecessary adapters or splitters. Connect your audio interface directly to your computer using USB or Thunderbolt cables designed for high data transfer. Keep your MIDI controllers, synths, and monitors connected with cables that match their input/output types to ensure the best signal quality.
Test each connection as you go. Plug in and power on your equipment one by one to catch any faulty cables early. This step helped me avoid a full studio session wasted on a single bad connection.
Workflow And Productivity
Maximizing workflow and productivity in your home studio can transform how quickly and creatively you produce electronic music. A smooth workflow lets you focus on making music, not fiddling with your gear or hunting for files. Small changes in how you organize and set up your space can shave hours off your production time.
Setting Up Templates
Templates save you from starting from scratch every time you open your DAW (Digital Audio Workstation). Create different templates for genres or moods you often work in. Include your favorite synths, drum kits, and effect chains so you can jump right into making beats.
Think about which tracks or channels you use most. Setting them up with preset levels and routing can keep you in the creative zone. How much more could you produce if your tools were ready before you even press play?
Effective File Management
Organizing your samples, presets, and project files is crucial for efficient workflow. Use clear folder names and consistent file naming conventions like “TrackName_Date_Version” to find what you need fast. Avoid clutter by regularly cleaning up unused files.
Backing up your work in multiple places prevents losing hours of creativity due to crashes or accidents. Cloud storage combined with an external hard drive offers peace of mind. What’s your current system for keeping your files safe and easy to access?
Ergonomic Studio Layout
Your physical setup affects how long you can work without fatigue. Position your speakers at ear level and create a comfortable chair and desk height to avoid strain. Keep essential gear within arm’s reach to reduce unnecessary movement.
A clutter-free workspace helps your mind stay clear. Invest in cable management solutions to avoid tangles and distractions. Can you imagine how much more focused you’d be with a studio that feels as comfortable as your favorite chair?
Budgeting Tips
Setting up a home studio for electronic music can quickly become expensive if you’re not careful with your budget. Smart budgeting helps you get the most out of your money without sacrificing quality. Let’s look at ways to stretch your budget and build a functional, creative space step by step.
Prioritizing Gear Purchases
Focus first on the essentials that will have the biggest impact on your music creation. A reliable audio interface and good headphones or monitors should top your list. Without clear sound, mixing and producing can become frustrating and inefficient.
Think about what gear you’ll use daily and invest there before buying extra gadgets. For example, if you plan to produce mainly with software synths, you might delay buying hardware synths. What tools will directly improve your workflow and sound quality right now?
Affordable Alternatives
You don’t need the most expensive equipment to get started. Many budget-friendly options deliver solid performance for beginners and intermediate producers. Look for used gear or entry-level models from trusted brands.
Consider free or low-cost digital audio workstations (DAWs) like Cakewalk or Tracktion T7 instead of premium software at first. Also, plugins and virtual instruments often have free versions or affordable bundles that sound great.
- Use second-hand marketplaces or local classifieds
- Explore open-source or demo software versions
- Check out budget-friendly brands like Behringer or Focusrite
Upgrading Over Time
Building a studio is a marathon, not a sprint. Start with what you can afford and upgrade gear as your skills and needs grow. This approach keeps your setup manageable and helps you learn each piece of equipment thoroughly.
Keep track of what’s holding you back creatively or technically. Maybe your microphone needs an upgrade next or your MIDI controller lacks certain features. Upgrading with a clear purpose helps you avoid impulse buys and wasted money.

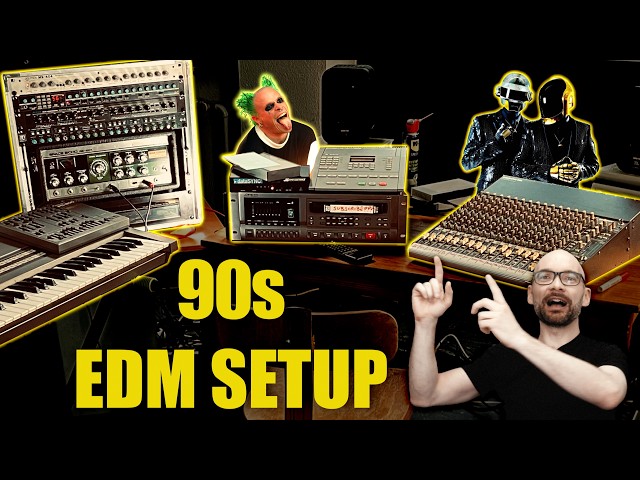
Credit: www.youtube.com
Frequently Asked Questions
What Equipment Is Essential For A Home Electronic Music Studio?
Essential equipment includes a computer, audio interface, MIDI controller, studio monitors, headphones, and DAW software. These tools enable recording, mixing, and producing electronic music effectively at home.
How Do I Choose The Right Daw For Electronic Music?
Select a DAW that supports electronic music production, offers good plugins, and suits your workflow. Popular options are Ableton Live, FL Studio, and Logic Pro.
What Is The Best Room Setup For A Home Studio?
Choose a quiet, soundproofed room with minimal echo. Arrange your desk and monitors at ear level for optimal sound accuracy and comfort.
How Can I Improve Sound Quality In My Home Studio?
Use acoustic treatment like foam panels and bass traps. Position monitors correctly and reduce background noise for clearer, professional sound.
Conclusion
Setting up a home studio for electronic music takes time and care. Start small and add gear as you learn. Choose the right space with good sound and comfort. Focus on essential equipment like a computer, software, and speakers. Keep your setup organized to stay creative.
Practice regularly to improve your skills. Enjoy the process and make music you love. This approach helps you build a studio that fits your needs. Keep experimenting and have fun with your music journey.
Leave a Reply