Are pesky mosquitoes making your summer nights unbearable? Imagine relaxing in your home without the constant buzzing or itchy bites.
You might think it’s impossible without expensive gadgets, but here’s the good news: you can craft your own electronic mosquito killer right at home. Yes, you heard that right! With just a few simple materials and a little bit of time, you can reclaim your space and enjoy peaceful evenings once more.
We’ll guide you through each step, ensuring that you can easily create a mosquito-free zone in your home. Ready to take control of your comfort? Let’s dive in and get started!
Materials Needed
Gathering the right materials is the first step to building your own electronic mosquito killer. Using quality components ensures your device works effectively and safely. Before you start, check you have everything ready to avoid interruptions and frustration.
Essential Components
- High Voltage Transformer:This is crucial for generating the electric charge that will zap mosquitoes on contact.
- Metal Grid or Wire Mesh:Acts as the electrified surface where mosquitoes get trapped. Stainless steel works best to resist rust.
- UV Light Bulb or LED:Mosquitoes are attracted to UV light, so this helps lure them in.
- Insulated Wires:Needed to connect the transformer, light source, and grid safely.
- Plastic or Wooden Frame:Use this to mount all parts securely without causing short circuits.
- Power Source:A battery pack or adapter compatible with your transformer’s voltage.
Having these parts at hand will make your project smoother. Think about sourcing components from local electronics stores or repurposing parts from old devices to save money.
Safety Gear
Working with electricity and sharp tools demands proper safety precautions. You don’t want a small oversight to turn into a dangerous accident.
- Insulated Gloves:Protect your hands from electric shocks and cuts while handling wires and metal parts.
- Safety Goggles:Shield your eyes from sparks or accidental wire snaps.
- Non-Conductive Work Surface:Use a wooden or plastic table to avoid grounding yourself.
- Multimeter:Helps you check voltage and continuity safely before powering up.
Have you ever underestimated safety gear and paid the price? It’s better to be cautious and avoid unnecessary risks, especially with electricity involved.

Credit: stargoldworld.com
Basic Working Principle
Understanding the basic working principle of an electronic mosquito killer is key to making one at home. It’s not just about zapping bugs; it’s about attracting and eliminating mosquitoes efficiently and safely. Knowing how these devices function will help you build a more effective and reliable mosquito trap.
How Electronic Mosquito Killers Work
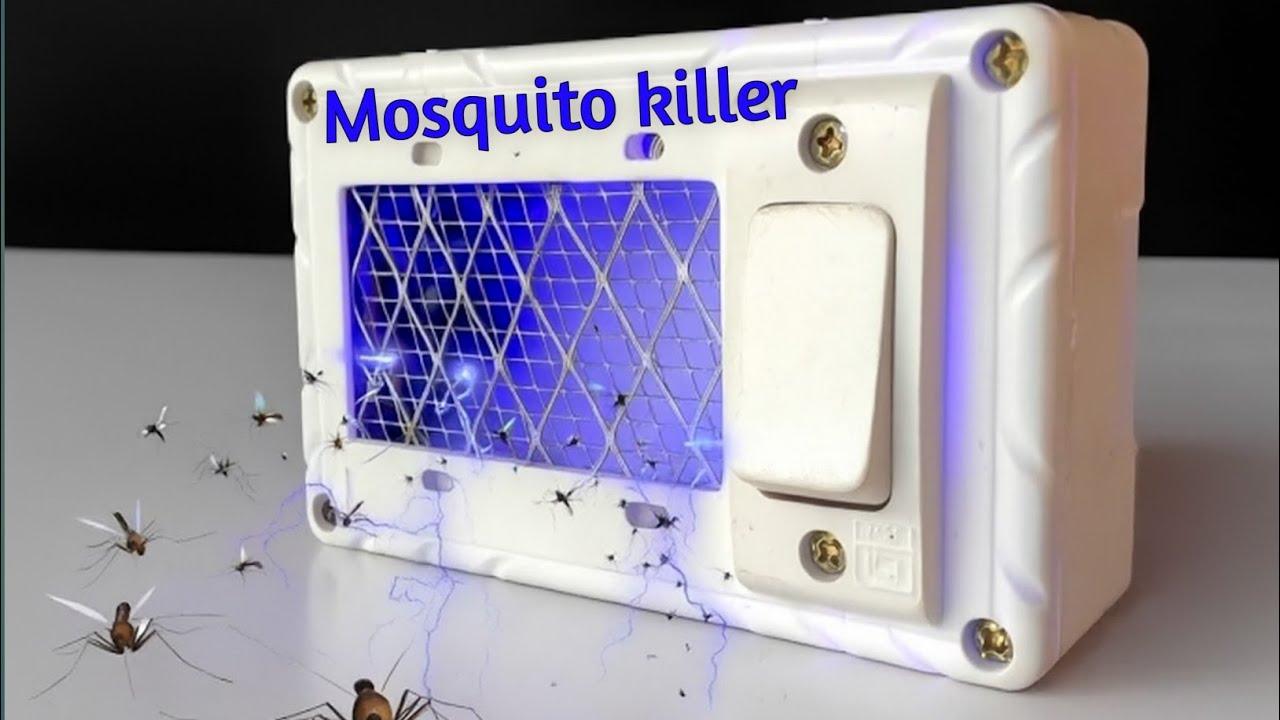
Electronic mosquito killers use a combination of light and electric shock to catch and kill mosquitoes. They emit ultraviolet (UV) light that attracts mosquitoes because these insects are naturally drawn to certain light wavelengths.
Once mosquitoes fly close, they encounter an electrified grid or mesh that delivers a quick electric shock, killing them instantly. Some models also use a fan to suck mosquitoes into a trap after they approach the light.
Have you noticed how mosquitoes tend to hover near your porch light? That’s exactly what these devices exploit. Instead of just swatting them away, you can lure mosquitoes into a controlled trap.
Key Features For Effectiveness
- UV Light Wavelength:The light should be in the range of 350-370 nm to attract mosquitoes effectively.
- Electric Grid Safety:The electrified mesh must be strong enough to kill but safe to touch, especially if you have pets or children.
- Power Source:Consistent power supply ensures the device works all night. Battery or USB-powered options add flexibility.
- Fan Suction:Including a small fan helps trap mosquitoes after attraction, preventing escape.
- Weather Resistance:If you plan to use it outdoors, the device needs to withstand rain and humidity.
Have you ever tried a bug zapper that didn’t seem to work? It’s often because one or more of these features were missing or poorly designed. Paying attention to these details can make your homemade device much more successful.
Step-by-step Assembly
Building an electronic mosquito killer at home is simple. Follow these clear steps to assemble the device correctly. Each part plays a key role in making the killer work effectively. Focus on accuracy and safety during assembly. Here is how to put the components together.
Preparing The Frame
Start with a sturdy frame to hold all parts. Use lightweight materials like wood or plastic. Cut the frame to fit the size of your circuit and grid. Make sure there is space for airflow. Smooth all edges to avoid injury. The frame must support the whole device firmly.
Wiring The Circuit
Gather the electronic components: transformer, resistors, and wires. Connect these parts following a simple electric circuit plan. Use insulated wires to prevent shocks. Check every connection twice for safety. Secure wires to avoid loose ends. Test the circuit with a multimeter before moving on.
Installing The Light Source
Choose a UV or LED light to attract mosquitoes. Fix the light inside the frame so it shines through the grid. Connect the light to the circuit’s power supply. Ensure the light is stable and will not move. Position the light for maximum mosquito attraction. Avoid direct contact with wiring.
Adding The Electric Grid
Use a metal mesh or wire grid as the electric grid. Fit the grid around the light source but keep it safe to touch. Connect the grid to the high voltage output of the circuit. Make sure the grid is tight and does not touch the frame. The grid should deliver a small shock to kill insects. Test the grid carefully for functionality and safety.
Testing The Device
Testing the electronic mosquito killer is a vital step. It ensures the device works correctly and safely. This phase involves checking all electrical connections and confirming safety measures. Proper testing prevents damage and protects users from electric shocks.
Checking Electrical Connections
Start by inspecting every wire and connection point. Loose or exposed wires can cause short circuits or failures. Use a multimeter to measure voltage and continuity. The device should receive the correct power level without interruptions.
Check the circuit board for any soldering issues. Cold joints or bridges between contacts can stop the device from working. Make sure all components are firmly in place and connected as per the design.
Ensuring Safety Measures
Safety is critical when handling electrical devices. Confirm the casing fully covers all live parts. This prevents accidental contact with high voltage areas. Test the device in a dry place, away from water or moisture.
Use insulated gloves while powering the device for the first time. Avoid touching the grid or wires during operation. Keep children and pets away from the testing area. Finally, verify that the device switches off quickly if unplugged.
Tips For Better Performance
Getting the best results from your homemade electronic mosquito killer means paying attention to a few key details. Small adjustments can make a big difference in how well your device works. Let’s look at some practical tips that can boost its effectiveness and keep those mosquitoes away.
Optimal Placement
Where you put your mosquito killer matters a lot. Position it in a dark, shaded spot away from strong lights that might compete with its lure.
Try placing it near mosquito breeding areas like stagnant water or dense plants, but keep it out of reach of pets and children.
Think about airflow too; mosquitoes tend to fly against the wind, so placing your device downwind can attract more mosquitoes.
Maintenance And Cleaning
Regular cleaning keeps your mosquito killer working at its best. Dead mosquitoes and debris can block the electric grid or light source, reducing its power.
Unplug the device and use a soft brush or cloth to remove any buildup at least once a week.
Check the wiring and connections occasionally to avoid any short circuits or power issues that could stop it from working.
Common Troubleshooting
Building your own electronic mosquito killer is rewarding, but sometimes it might not work as expected. Troubleshooting common issues can save you time and frustration. Let’s look at simple fixes that keep your device powered and attract mosquitoes effectively.
Fixing Power Issues
If your device isn’t turning on or stops suddenly, check the power source first. Make sure batteries are fresh or the adapter is firmly plugged in. Loose connections often cause intermittent power problems.
Inspect the wiring for any breaks or poor solder joints. Sometimes a tiny crack in the circuit can stop electricity flow. Using a multimeter can help you find where the power cuts off.
Have you ever noticed a faint smell or unusual heat near the power supply? That might indicate a short circuit. Unplug the device immediately and check for damaged components before trying again.
Improving Mosquito Attraction
Your killer might be powered perfectly but still fail to lure mosquitoes. Mosquitoes are attracted by carbon dioxide, heat, and certain colors. Adding a small fan to circulate the scent of dry ice or a sugar-yeast mixture can boost CO2 output.
Try using a light source with a wavelength close to 365 nm (UV light). This specific UV range is especially effective at drawing mosquitoes in. Avoid using bright white or yellow lights as they repel insects.
Consider the placement of your device. Mosquitoes tend to fly low and near stagnant air. Positioning your killer near shaded corners or close to water sources can increase its success rate. Have you thought about how your environment might affect mosquito behavior around your device?
Safety Precautions
Safety is the top priority when making an electronic mosquito killer at home. Working with electrical parts can be risky without proper care. Small mistakes may cause shocks or fire hazards. Follow these safety precautions to protect yourself and your home during the project.
Handling Electrical Components
Always turn off the power before touching any wires or parts. Use insulated tools to avoid electric shock. Check all components for damage before use. Never work with wet hands or in damp areas. Keep wires organized and secure to prevent short circuits. Use a multimeter to test connections safely. Avoid touching metal parts directly when the device is powered.
Preventing Accidents
- Work in a well-lit and clean space.
- Keep children and pets away from the workspace.
- Wear safety goggles to protect your eyes from sparks.
- Do not leave the device unattended while testing.
- Use a fuse or circuit breaker to prevent overload.
- Store tools and components safely after use.
- Dispose of damaged parts properly to avoid hazards.

Credit: www.amazon.in

Credit: www.youtube.com
Frequently Asked Questions
How Does An Electronic Mosquito Killer Work?
An electronic mosquito killer uses light to attract mosquitoes. When they touch the electrified grid, they die instantly. It’s safe, chemical-free, and effective for indoor and outdoor use.
What Materials Are Needed To Make One At Home?
You need a UV light source, a metal grid, a power supply, and a casing. Basic tools like wires and a switch are also required for assembly.
Is It Safe To Use Homemade Mosquito Killers Indoors?
Yes, homemade electronic mosquito killers are generally safe indoors. They don’t use harmful chemicals and only kill mosquitoes on contact with the grid.
How Effective Are Diy Electronic Mosquito Killers?
DIY electronic mosquito killers can be quite effective if built correctly. They attract and kill mosquitoes quickly, reducing mosquito presence in the area.
Conclusion
Making an electronic mosquito killer at home is simple and cost-effective. You only need a few basic materials. This device helps reduce mosquitoes safely without chemicals. It saves money and keeps your space comfortable. Try this easy project to enjoy mosquito-free days.
Stay safe and protect your family naturally. Give it a go and see the results yourself.
Leave a Reply