Have you ever stared at a tiny electronic part and wondered what it really does? Identifying electronic components can feel confusing, especially if you’re new to electronics or repairing gadgets.
But what if you could quickly recognize each part and understand its role with confidence? In this guide, you’ll learn simple, clear ways to spot and name electronic components like a pro. By the end, you’ll save time, avoid mistakes, and feel more in control of your projects.
Ready to unlock the secrets of those small but powerful parts? Let’s dive in!
Basic Electronic Components
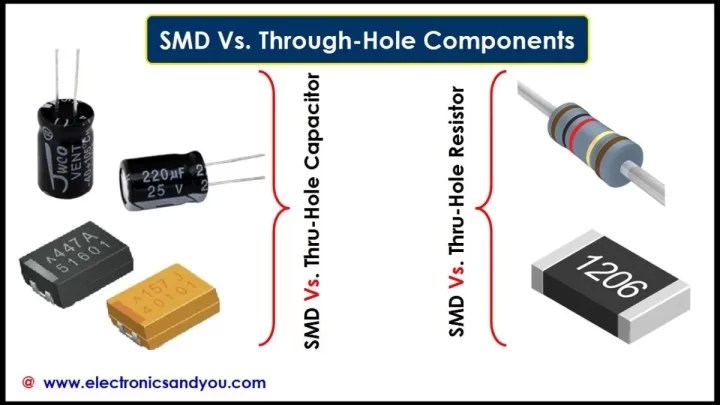
Basic electronic components form the foundation of all electronic circuits. These parts control the flow of electricity and enable devices to work. Knowing how to identify these components helps in repairing and building electronics. Each component has unique features and functions.
Resistors
Resistors limit the flow of electric current. They look like small cylinders with colored bands. The bands show the resistor’s value using a color code. Resistors come in different sizes and power ratings. They protect sensitive parts from receiving too much current.
Capacitors
Capacitors store and release electrical energy. They often appear as small cylinders or boxes. Capacitors have two leads and a value printed on them. The value shows the capacitance in microfarads or picofarads. They help smooth voltage and filter signals in circuits.
Inductors
Inductors store energy in a magnetic field. They usually look like coils of wire or small cylinders wrapped with wire. Inductors resist changes in current flow. Their value is measured in henries. These parts are common in filters and tuning circuits.
Diodes
Diodes allow current to flow in one direction only. They look like small cylinders or black packages with a line marking the cathode. The marking shows the direction current can flow. Diodes protect circuits from damage by blocking reverse currents.
Transistors
Transistors control current flow and amplify signals. They come in shapes like small black rectangles or cylinders. Transistors have three leads called collector, base, and emitter. They act like switches or amplifiers in electronic devices.

Credit: www.reddit.com
Reading Component Markings
Reading component markings is a key skill in electronics. Each component has marks that tell you what it does. These marks include colors, numbers, and symbols. Understanding these codes helps you identify the component’s type, value, and rating. It saves time and prevents mistakes during assembly or repair.
Color Codes
Many components use color bands to show their value. Resistors commonly have four or five colored bands. Each color stands for a number or multiplier. For example, red means 2, green means 5, and gold means a tolerance of ±5%. By reading these bands in order, you can find the resistance value.
Capacitors and inductors also use color codes sometimes. Learning the color chart is helpful. It is a quick way to identify parts without extra tools.
Numeric Codes
Some components have numbers printed on them. These numbers indicate the part’s value or model. For example, a capacitor might show “104,” which means 100,000 picofarads. Resistors use numeric codes too, often in ohms or kilohms.
Look for three or four digits, sometimes with letters. Letters can show tolerance or temperature rating. Check datasheets or online code lists to decode these numbers easily.
Manufacturer Symbols
Manufacturers add their logos or symbols on parts. These marks show who made the component. They can also indicate quality or certification. Some symbols represent safety standards or ratings.
Recognizing these symbols helps confirm authenticity. It ensures you use reliable parts for your projects. Manufacturer marks also help find datasheets for detailed specs.
Using Multimeters For Identification
Multimeters are essential tools for identifying electronic components. They measure different electrical properties that help distinguish parts. Using a multimeter can quickly tell if a component is functional or damaged. It shows key values like resistance, capacitance, and continuity. These values help identify resistors, capacitors, and wiring connections.
Measuring Resistance
Resistance measurement helps identify resistors and verify their values. Set the multimeter to the resistance or ohms mode. Place the probes on both ends of the component. The display shows the resistance value in ohms (Ω). Compare this number with the expected value marked on the resistor. If the reading is close, the component is likely a resistor. A very high or infinite reading means no continuity. This might indicate a broken resistor or a different component.
Testing Capacitance
Capacitance testing identifies capacitors and checks their condition. Switch the multimeter to capacitance mode. Connect the probes to the capacitor terminals. The meter shows the capacitance value in microfarads (µF). Match this value with the capacitor’s label to confirm its type. A very low or zero reading means a faulty capacitor. This test only works on discharged capacitors. Make sure to discharge them safely before testing.
Checking Continuity
Continuity testing confirms if a circuit or component is complete. Set the multimeter to continuity mode, often marked with a soundwave symbol. Touch the probes to the two points you want to test. The meter beeps if there is a continuous path. No beep means the circuit is open or broken. This test is useful for checking wires, fuses, and switches. It helps find broken connections or shorts in circuits.
Credit: www.electronicsandyou.com
Interpreting Circuit Diagrams
Interpreting circuit diagrams is essential for identifying electronic components. These diagrams provide a visual map of how components connect and function. Learning to read them helps you understand the role of each part in a circuit. It also simplifies troubleshooting and building electronic devices.
Common Symbols
Circuit diagrams use symbols to represent electronic components. Recognizing these symbols is the first step to identifying parts.
- Resistor:A zigzag line showing resistance.
- Capacitor:Two parallel lines with a gap or one curved line.
- Diode:A triangle pointing to a line.
- Transistor:Three lines with arrows indicating current flow.
- Ground:Lines that narrow down like a triangle.
- Battery:Long and short parallel lines.
Each symbol represents a specific function. Understanding these helps to identify components quickly.
Schematic Basics
A schematic shows connections between components using lines. These lines represent wires carrying electric current.
Components are arranged logically, not physically. This means parts may not look like real objects but show how they connect.
- Nodes are points where wires connect.
- Power supply lines show voltage sources.
- Arrows indicate current or signal flow direction.
- Labels or values show component ratings.
Reading schematics carefully helps you trace circuits and identify parts by their symbols and connections.
Online Resources And Tools
Finding the exact details of an electronic component can feel like searching for a needle in a haystack. Thankfully, online resources and tools make this task much easier. They provide quick access to datasheets, specifications, and cross-references that help you identify components accurately.
Component Databases
Component databases are treasure troves of information for anyone working with electronics. Websites like Digi-Key, Mouser, and Octopart offer searchable libraries containing detailed specifications, images, and datasheets. You can enter part numbers, markings, or even physical characteristics to narrow down your search.
These databases often include user reviews and application notes that give practical insights. For example, I once identified a tiny SMD resistor by its marking code using Octopart and quickly found the exact replacement. Wouldn’t it be great if you could avoid guesswork and wasted time by using these tools?
Mobile Apps
Mobile apps bring component identification to your fingertips, especially when you’re working away from your desk. Apps like ElectroDroid and PartsBox allow you to scan component markings or search by type on the go. This convenience means you can identify parts right at the workbench or during field repairs.
Some apps even feature built-in calculators and pinout diagrams, making them multifunctional for troubleshooting and design. I’ve found that having these tools on my phone saves me from carrying bulky manuals or laptop searches. How much easier would your projects be if you could instantly verify components anytime, anywhere?
Tips For Beginners
Starting with electronic components can feel confusing. Small parts, different shapes, and many labels make it hard to know what is what. Beginners need simple ways to keep parts clear and easy to find. A neat workspace helps you work faster and avoid mistakes.
Good habits from the beginning save time and reduce stress. Two key steps are organizing components and labeling them clearly. These tips help keep parts in order and make identifying them easier.
Organizing Components
Sort components by type or function. Use small containers or boxes to separate resistors, capacitors, transistors, and others. Clear storage helps find parts quickly. Keep similar sizes together to avoid confusion.
- Use compartment boxes with lids
- Group by component type
- Store in a cool, dry place
- Keep frequently used parts within reach
Labeling Techniques
Label every container or bag clearly. Use printed labels or write with a fine-tip permanent marker. Include the component name and value if possible. This avoids guessing and reduces errors in your projects.
- Write component name and value
- Use color-coded labels for quick ID
- Label both sides of small bags
- Update labels if you change contents

Credit: electronics.stackexchange.com
Frequently Asked Questions
What Are The Main Types Of Electronic Components?
Electronic components include resistors, capacitors, diodes, transistors, and integrated circuits. Each serves a unique function in circuits. Identifying them by shape, color codes, and markings helps in proper usage and repair.
How Can I Read Resistor Color Codes Effectively?
Resistor color codes indicate resistance value using colored bands. Each color corresponds to a number. By learning the color chart, you can quickly determine the resistor’s value and tolerance.
What Tools Help In Identifying Electronic Components?
Multimeters, component testers, and magnifying glasses are essential tools. They measure resistance, capacitance, and check component functionality. These tools provide accurate identification and prevent incorrect component use.
Why Is Component Labeling Important For Identification?
Labels contain vital information like part numbers, ratings, and manufacturer details. They simplify identification and ensure correct replacements. Proper labeling avoids circuit errors and ensures device reliability.
Conclusion
Identifying electronic components is easier with practice and patience. Start by checking shapes, sizes, and markings carefully. Use a multimeter to test basic functions. Learning common symbols helps read circuit diagrams better. Take your time and repeat the steps often.
Soon, you will feel more confident handling parts. This skill saves time and avoids mistakes. Keep exploring and stay curious about electronics. Small steps lead to big improvements in understanding.
Leave a Reply