Are you struggling to find clear guidance on fixing electronic components? Imagine having a simple, step-by-step PDF that helps you quickly identify and solve common issues.
Whether you’re a beginner or have some experience, this guide will give you the confidence to troubleshoot your devices with ease. Keep reading, and you’ll discover practical tips and tricks that make diagnosing problems straightforward and stress-free. Your next repair could be just a few clicks away.

Credit: www.amazon.ca
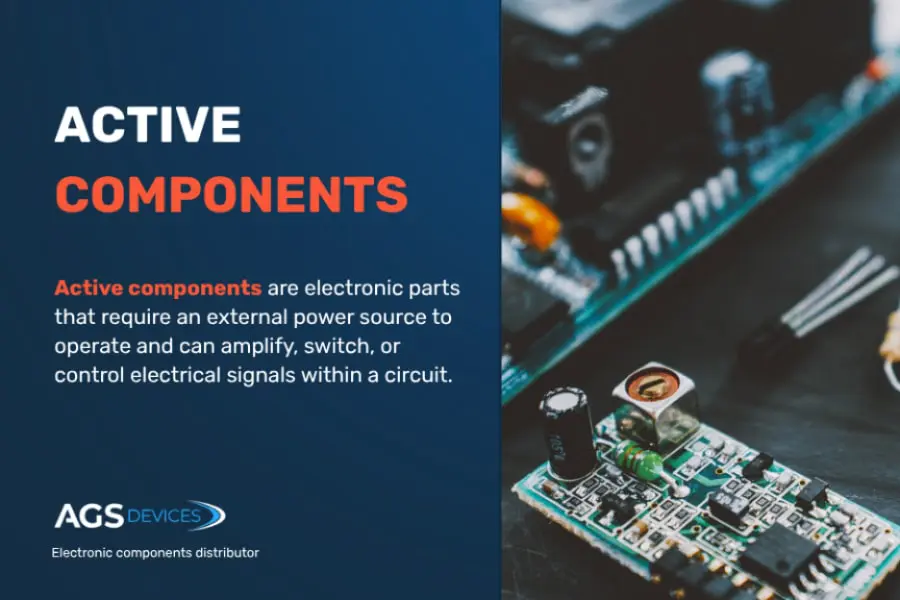
Common Electronic Components
Understanding common electronic components is key to troubleshooting devices. Each component plays a unique role in circuits. Familiarity with them aids in identifying issues effectively. Let’s explore some essential components.
Resistors And Capacitors
Resistors limit current flow in circuits. They’re vital for controlling voltage. Different colors on resistors indicate their resistance value. Capacitors store electrical energy temporarily. They release energy when needed. They help smooth voltage fluctuations. Both are fundamental in circuit stability.
Diodes And Transistors
Diodes allow current to flow in one direction. They prevent reverse current flow, protecting circuits. Transistors amplify or switch electronic signals. They are crucial in building amplifiers and switches. Understanding their functions helps in repairing faulty circuits.
Integrated Circuits
Integrated Circuits (ICs) are compact. They contain multiple electronic components. ICs perform complex functions efficiently. They are used in computers, phones, and more. Identifying a faulty IC can solve many circuit problems.
Sensors And Actuators
Sensors detect changes in the environment. They convert physical parameters into signals. Actuators convert electrical signals into physical movement. Both are important in automation and control systems. Troubleshooting them ensures devices work correctly.
Tools For Troubleshooting
Troubleshooting electronic components requires the right tools. These tools help detect problems quickly and accurately. Using proper equipment saves time and prevents further damage. Each tool serves a specific purpose in testing and fixing electronics.
Multimeters
Multimeters measure voltage, current, and resistance. They help check if a component works correctly. Digital multimeters show clear readings on a screen. Analog multimeters have a needle dial for measurement. Multimeters are essential for basic electronic troubleshooting.
Oscilloscopes
Oscilloscopes display electrical signals in waveforms. They reveal signal patterns and timing issues. This tool helps analyze complex circuits and data flow. Oscilloscopes provide detailed insights beyond simple measurements. They are useful for advanced troubleshooting tasks.
Soldering Equipment
Soldering tools fix broken connections and attach components. A soldering iron heats solder to join parts together. Soldering stations offer temperature control for precise work. Good soldering ensures strong electrical connections. Proper use prevents damage to sensitive components.
Component Testers
Component testers check individual electronic parts like resistors and capacitors. They identify faulty or damaged components quickly. Some testers work automatically and give easy-to-read results. Using component testers speeds up the repair process. They are handy for verifying parts before installation.
Basic Troubleshooting Techniques
Basic troubleshooting techniques are the foundation for diagnosing issues with electronic components. These straightforward methods help you identify faults quickly without needing complex tools or advanced knowledge. Mastering these can save you time, reduce frustration, and improve your repair skills.
Visual Inspection
Start by closely examining the component and its surroundings. Look for obvious signs like burnt marks, broken wires, or loose connections. Even a tiny crack or discoloration can reveal the root of the problem.
Have you ever overlooked a simple broken solder joint that caused hours of confusion? Visual checks catch many issues before you dive deeper.
Continuity Testing
Use a multimeter to check if electrical paths are complete. This test confirms whether current can flow through the circuit or component as expected.
If continuity is broken, you’ll know exactly where the fault lies—saving guesswork. Remember, a beep from your tester means the path is good, no sound means it’s broken.
Voltage And Current Measurement
Measuring voltage and current helps you understand if components receive the right power levels. Too much or too little voltage can damage parts or cause malfunction.
Checking these values at different points in the circuit reveals where power drops or spikes happen. This insight guides you to the faulty component or wiring.
Signal Tracing
Follow the signal flow through the circuit using an oscilloscope or signal tracer. This technique helps pinpoint where the signal stops or distorts.
Signal tracing is like following breadcrumbs—each step narrows down the problem area. It’s especially useful in complex circuits where visual checks and measurements don’t give clear answers.

Credit: www.electronicsandyou.com
Advanced Diagnostic Methods
Advanced diagnostic methods take your troubleshooting skills beyond basic checks. They help you pinpoint issues that are not visible through simple inspection or multimeter readings. Using these techniques, you can save time and avoid replacing components unnecessarily.
Using Oscilloscope Patterns
An oscilloscope shows you the actual waveform signals in a circuit. By observing these patterns, you can detect irregularities like noise, distortion, or missing pulses. Have you ever noticed a signal that looked normal on a multimeter but revealed glitches on an oscilloscope? That’s the power of this tool.
Focus on these key points when using an oscilloscope:
- Compare the waveform against the expected signal shape.
- Look for sudden spikes or drops that may indicate faulty components.
- Check timing between signals for synchronization issues.
Thermal Imaging
Thermal cameras let you see heat patterns on electronic boards. Overheating parts often point to shorts or failing components. I once found a tiny resistor generating excessive heat, which wasn’t visible to the naked eye but caused the whole device to fail.
When using thermal imaging, consider these tips:
- Scan the circuit during operation to spot hot spots.
- Compare temperatures with normal operating ranges.
- Use thermal images to confirm suspicions from other tests.
Testing Ics With Testers
Integrated circuits (ICs) can be tricky to diagnose because of their complexity. Specialized IC testers help you check whether an IC is functioning correctly without removing it from the board. Have you ever spent hours replacing parts only to discover a single IC was the culprit?
Effective IC testing involves:
- Using the right tester compatible with your IC type.
- Running diagnostic tests as per the tester’s instructions.
- Verifying the IC’s response under different conditions.
Firmware And Software Checks
Sometimes the issue isn’t hardware but the firmware or software controlling the electronics. Updating or reloading firmware can fix bugs causing erratic behavior. Have you checked if the device’s software is up to date before swapping components?
Focus your firmware and software checks on:
- Verifying the current firmware version.
- Looking for known bugs or patches released by the manufacturer.
- Performing a clean reinstall if corruption is suspected.
Interpreting Datasheets And Schematics
Interpreting datasheets and schematics is a crucial skill for troubleshooting electronic components effectively. These documents contain all the technical details you need to understand how a component behaves and how it fits into a circuit. Mastering this skill saves you time and helps avoid costly mistakes during repairs or builds.
Reading Component Specifications
Datasheets list various specifications like voltage, current, power ratings, and pin layouts. Pay close attention to the absolute maximum ratings to avoid damaging components. You might find unfamiliar terms like “forward voltage” or “gain bandwidth,” so keep a glossary handy or note them down for quick reference.
Think about a time when you replaced a resistor and it overheated—did you check its power rating first? Ignoring specs can cause failures, so always verify these details before testing or swapping parts.
Following Circuit Diagrams
Circuit diagrams show how components connect and interact. Symbols represent different parts like resistors, capacitors, and transistors, so it’s vital to recognize them quickly. Look for labels and reference designators (e.g., R1, C2) that link the diagram to the physical components.
Ask yourself: does the circuit flow make sense? Tracing the path of current can reveal where problems occur. Use a highlighter or draw on a printed schematic to map your troubleshooting steps clearly.
Identifying Pin Configurations
Each component has specific pins that serve different functions such as input, output, or ground. Incorrect wiring often causes failures, so double-check pin layouts in the datasheet. Manufacturers sometimes use different numbering conventions, so don’t assume pins are arranged in the same order for all devices.
Have you ever plugged a chip backward? That’s a common mistake easily avoided by confirming pin positions. Use diagrams and photos to match your component before powering the circuit.
Understanding Tolerances And Ratings
Tolerances indicate how much a component’s actual value can vary from its nominal value. For example, a 100Ω resistor with a ±5% tolerance may be anywhere between 95Ω and 105Ω. This variation affects circuit performance, especially in precision applications.
Ratings such as maximum voltage and temperature tell you the safe operating limits. Exceeding these can cause permanent damage or erratic behavior. Always consider these factors when selecting replacement parts or testing components under stress.
Common Faults And Their Solutions
Common faults in electronic components often cause devices to stop working correctly. Identifying these faults quickly helps save time and money. Understanding typical problems and their fixes makes troubleshooting easier and more effective.
Open Circuits And Short Circuits
Open circuits occur when a connection breaks, stopping current flow. Common causes include broken wires or loose solder joints. Use a multimeter to check for continuity across the circuit. Repair broken connections by resoldering or replacing wires.
Short circuits happen when two points connect unintentionally, causing excess current. This can damage components or blow fuses. Inspect the board for solder bridges or damaged insulation. Remove shorts by cleaning the board or fixing faulty parts.
Component Overheating
Overheating damages electronic parts and reduces lifespan. Check for signs like discoloration or a burnt smell. Causes include excess current, poor ventilation, or faulty components. Use a heat sink or fan to cool parts. Replace damaged components to prevent further issues.
Signal Distortion
Signal distortion affects data and audio quality. Common reasons include bad connections, interference, or faulty components. Use an oscilloscope to observe signal shape and strength. Fix loose connections and shield cables to reduce noise. Replace defective parts causing distortion.
Power Supply Issues
Power supply problems cause devices to fail or reset. Check voltage output with a multimeter to ensure correct levels. Inspect power cables and connectors for damage or loose contacts. Replace faulty power supplies or repair damaged wiring to restore function.
Safety Precautions
Safety is the foundation of any successful troubleshooting process with electronic components. Ignoring proper precautions can lead to damaged devices, inaccurate diagnoses, or even personal injury. Before you start testing or repairing, consider the risks and how you can protect yourself and your equipment effectively.
Handling Static Sensitive Devices
Static electricity can silently destroy delicate electronic parts without any visible signs. Always ground yourself using an anti-static wrist strap or mat before touching components like microchips or circuit boards.
Keep your workspace free from materials that generate static, such as plastic or synthetic fabrics. Have you ever lost a costly chip due to a tiny static shock? Taking these steps prevents that silent damage.
Working With High Voltage
High voltage circuits carry significant risk of electric shock, which can be fatal. Never work on powered devices unless absolutely necessary and always disconnect power before opening cases or touching internal parts.
Use insulated tools and test voltage levels with a multimeter before handling. If you feel unsure, ask yourself: Is the component really worth risking your safety?
Proper Use Of Tools
Using the right tool for the job saves time and prevents damage. For example, a precision screwdriver is essential for small screws, while a soldering iron with temperature control avoids overheating sensitive parts.
Keep your tools clean and in good condition to maintain accuracy and safety. Remember, using a worn-out or inappropriate tool can cause slips or damage that complicate troubleshooting.
Personal Protective Equipment
Protect your eyes, hands, and skin during electronic repairs. Safety glasses shield you from solder splashes or flying debris, and gloves protect against sharp edges or chemical exposure.
Wearing appropriate PPE might seem unnecessary for small tasks, but a moment of carelessness can lead to injuries that set you back. What protective gear do you keep handy when working on electronics?
Creating A Troubleshooting Workflow
Creating a troubleshooting workflow is essential for efficiently diagnosing issues in electronic components. It helps you stay organized and focused, reducing the time spent on guesswork. A clear workflow transforms a complex problem into manageable steps, guiding you toward a solution systematically.
Step-by-step Problem Isolation
Start by breaking down the problem into smaller parts. Identify which component or section of the circuit is malfunctioning by testing each part individually.
Use tools like multimeters and oscilloscopes to measure signals and voltages at critical points. Ask yourself: which part behaves differently than expected? This focused approach prevents random probing and saves time.
Documenting Findings
Write down every test result and observation you make during troubleshooting. A simple notebook or digital document can serve as your reference.
Clear documentation helps you track what you’ve tried and what didn’t work. It also makes it easier to spot patterns or repeated issues that might otherwise be missed.
Using Checklists
Create checklists for common faults and test procedures. This ensures you don’t overlook basic but crucial steps.
- Verify power supply levels
- Check for loose connections
- Inspect for visible damage
- Confirm component ratings
Checklists keep your troubleshooting consistent and thorough, especially when handling multiple devices or complex circuits.
Collaborating With Teams
Share your findings and ask for input from colleagues or online communities. Fresh eyes often spot issues you might miss.
Collaboration encourages knowledge exchange and speeds up problem-solving. Have you ever solved a tricky issue faster after discussing it with someone else?
Resources For Further Learning
Finding the right resources helps deepen your understanding of troubleshooting electronic components. These resources offer clear explanations and practical tips. They cover basics and advanced topics. Use them to improve your skills step by step.
Many learners benefit from books and PDFs. These materials provide detailed information you can read at your own pace. Online tutorials and videos show how to apply concepts in real situations. Forums and communities connect you with experts and peers. Software tools help simulate and test electronic circuits easily.
Recommended Books And Pdfs
- “The Art of Electronics” by Paul Horowitz and Winfield Hill – a classic guide.
- “Troubleshooting Electronic Circuits” by R. W. Erickson – clear and practical.
- “Electronic Components: A Complete Reference for Project Builders” by Delton T. Horn – great for beginners.
- Free PDFs from educational websites like Electronics Tutorials and All About Circuits.
Online Tutorials And Videos
- Electronics Hub and SparkFun offer step-by-step tutorials.
- YouTube channels like EEVblog and GreatScott! explain troubleshooting concepts clearly.
- Khan Academy provides basic electronics lessons for beginners.
- Interactive platforms like CircuitVerse help practice with virtual circuits.
Forums And Communities
- Electronics Stack Exchange – ask questions and get expert answers.
- Reddit’s r/electronics – share projects and troubleshooting tips.
- All About Circuits forum – discuss problems and solutions with others.
- EEVblog Forum – active community focused on electronics engineering.
Software Tools
- LTspice – free circuit simulation software to test designs.
- Fritzing – useful for creating circuit diagrams and breadboard layouts.
- KiCad – open-source software for electronic design automation.
- Multisim – professional tool for simulating and troubleshooting circuits.
Credit: www.agsdevices.com
Frequently Asked Questions
What Is The Best Way To Troubleshoot Electronic Components?
Start by checking the power supply and connections. Use a multimeter to test voltage and continuity. Inspect components visually for damage or burns. Refer to the troubleshooting PDF guide for step-by-step procedures and safety tips.
How Can I Use A Pdf To Fix Electronic Parts?
A troubleshooting PDF offers detailed steps, diagrams, and common faults. Follow the instructions carefully to identify issues. It saves time by providing structured diagnostics and repair methods. Always keep the PDF handy during repairs.
What Tools Are Essential For Electronic Troubleshooting?
Key tools include a multimeter, soldering iron, oscilloscope, and screwdrivers. These help measure electrical values and fix components. Using the right tools improves accuracy and safety, as outlined in troubleshooting PDFs.
How Do I Identify Faulty Electronic Components Quickly?
Look for physical damage like burns or cracks. Use a multimeter to test resistance and voltage. Compare readings with standard values in your troubleshooting PDF. This method helps pinpoint failures efficiently.
Conclusion
Troubleshooting electronic components takes patience and clear steps. Use the PDF guide to check each part carefully. Always test with the right tools and follow safety rules. Small issues can cause big problems, so don’t rush. Keep notes of what you find for better results.
Practice helps build your skills over time. Stay calm and take your time. This way, fixing electronics becomes easier and less frustrating.
Leave a Reply