
Are you struggling to fix a faulty electronic device? Knowing how to troubleshoot electronic components can save you time, money, and frustration.
Imagine being able to quickly find the problem and get your gadgets working again without needing an expert. This guide will show you simple, clear steps to identify and solve common electronic issues. Keep reading, and you’ll gain the confidence to tackle your electronics like a pro.
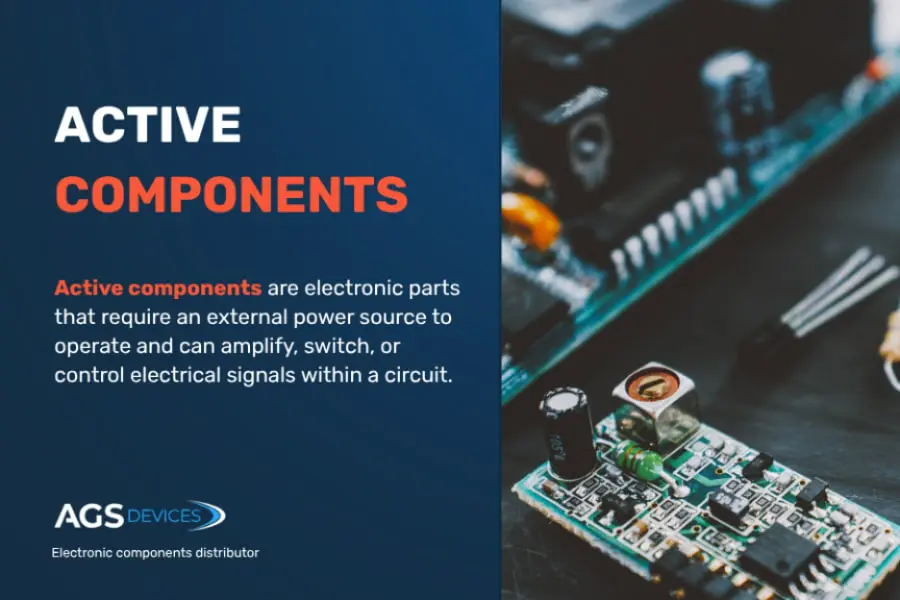
Common Electronic Components
Testing each component with a multimeter helps find faults quickly. Visual checks for damage or loose connections reveal many common problems. Simple steps like these save time and effort in fixing electronics.
Understanding common electronic components is crucial for troubleshooting. Whether you’re a hobbyist or a professional, knowing how to identify and fix these parts can save you time and frustration. Each component has unique characteristics and plays a specific role in electronic circuits.Resistors And Capacitors
Resistors are used to limit current in a circuit. When troubleshooting, measure the resistance with a multimeter to ensure it matches the expected value. If it’s off, consider replacing it to avoid circuit failure. Capacitors store and release electrical energy. Check for any bulging or leakage, which are signs of failure. A faulty capacitor can lead to erratic circuit behavior.Diodes And Transistors
Diodes allow current to flow in only one direction. Test them by measuring the forward and reverse bias using a multimeter. If the readings are inconsistent, the diode might be damaged. Transistors act as switches or amplifiers. Ensure they are not overheating and test the connections for continuity. A malfunctioning transistor can disrupt the flow of current, affecting the entire circuit.Integrated Circuits
Integrated Circuits (ICs) are the brains of many electronic devices. Start by checking the power supply to the IC. Inspect for any visible damage on the pins or the IC body. A faulty IC can halt the operation of the entire device.Connectors And Switches
Connectors link different parts of a circuit. Ensure they are firmly connected and free from corrosion. A loose connection can result in intermittent faults. Switches control the flow of electricity. Test them by toggling and ensuring the circuit responds appropriately. A defective switch can break the circuit, leading to device failure. Do you find yourself constantly replacing the same component? It might be time to consider what underlying issues might be causing repeated failures. By understanding these components better, you can enhance your troubleshooting skills and keep your devices running smoothly.
Credit: www.youtube.com
Essential Tools For Troubleshooting
Troubleshooting electronic components demands the right set of tools. Without them, identifying issues becomes guesswork, leading to wasted time and frustration. Having essential tools at hand simplifies diagnosis and repair, making your work more efficient and accurate.
Multimeters And Oscilloscopes
A multimeter is your basic yet powerful tool. It measures voltage, current, and resistance, giving you immediate insight into circuit conditions. Think of it as your first checkpoint when a device isn’t working properly.
Oscilloscopes show you how signals change over time, which is crucial for spotting irregular patterns or noise. I once found a tiny glitch in a circuit only visible through an oscilloscope trace. Do you know what your signals look like under the hood?
Soldering Equipment
Reliable soldering tools are key to fixing or replacing faulty components. A good soldering iron with adjustable temperature lets you work safely on sensitive electronics without causing damage. Don’t overlook quality solder and a proper stand; they make your work cleaner and faster.
Have you ever struggled with cold joints or messy connections? The right soldering setup can save you from those common headaches.
Component Testers
Component testers quickly verify if individual parts like capacitors, resistors, or transistors are functioning correctly. They save you from the hassle of guessing which component is faulty. I found a tiny resistor causing a board failure simply by testing components one by one.
Investing in a good tester helps you avoid replacing entire boards when just one part is bad. What if your next repair could be that straightforward?
Diagnostic Software
Modern electronics often require software tools for troubleshooting, especially with microcontrollers and complex circuits. Diagnostic software can read error codes, monitor real-time data, and even simulate circuit behavior. This kind of insight is invaluable when hardware tests alone don’t tell the whole story.
Have you explored software diagnostics to complement your hardware tools? They might reveal problems invisible to the naked eye.
Safety Precautions
Safety is the top priority when troubleshooting electronic components. Without proper care, accidents can happen quickly. Taking precautions protects you and the devices you work on. It also helps avoid damage from electrical shock or static electricity. Always prepare before starting any repair or testing.
Handling Electrical Devices
Always turn off power before touching any electronic device. Unplug the device from the outlet to avoid electric shocks. Use insulated tools to prevent accidental shorts. Avoid working near water or damp areas. Keep your workspace clean and organized. Check for damaged wires or parts before you begin.
Protective Gear
Wear safety glasses to protect your eyes from sparks or debris. Use gloves made for electrical work to avoid shocks and cuts. Avoid loose clothing or jewelry that can catch on components. Wear closed-toe shoes to protect your feet from falling tools. Consider using a face shield if you expect flying particles.
Static Electricity Prevention
Static electricity can damage sensitive electronic parts. Use an anti-static wrist strap to ground yourself. Work on an anti-static mat to protect components. Keep humidity levels moderate to reduce static build-up. Avoid touching pins or circuit boards directly with your fingers. Store components in anti-static bags when not in use.
Credit: www.agsdevices.com
Step-by-step Troubleshooting Process
Troubleshooting electronic components requires a clear and organized approach. Following a step-by-step process helps find faults quickly. It reduces mistakes and saves time. Each step focuses on a specific check to understand the problem better.
Start with simple checks before using tools. This way, you avoid unnecessary work. Gradually move to detailed testing for accurate results. This process applies to many types of electronic devices and circuits.
Visual Inspection
Look closely at the component and its surroundings. Check for burnt marks, cracks, or loose connections. Inspect solder joints for cold or broken spots. Notice any discoloration or signs of overheating. A simple visual check often reveals obvious problems.
Testing Continuity
Use a multimeter to test continuity between points. This helps find broken wires or open circuits. Place the probes on the ends of the path. A beep or low resistance means the path is good. No sound or high resistance shows a break.
Measuring Voltages
Measure voltage at different points in the circuit. Compare values with expected readings from the datasheet. Check power supply and signal points carefully. Voltage too high or low can indicate a faulty component. Always follow safety rules when measuring voltages.
Checking Signal Integrity
Use an oscilloscope to observe signal waveforms. Check for distortion, noise, or missing signals. Ensure signals have correct amplitude and timing. Poor signal quality often causes circuit failure. This step is important for digital and analog circuits.
Replacing Faulty Parts
Identify parts that fail tests or look damaged. Replace them with identical or compatible components. Use proper tools for removal and installation. After replacement, test the circuit again to confirm the fix. Proper replacement restores device function and reliability.
Troubleshooting Specific Components
Troubleshooting specific electronic components requires a clear understanding of how each part works and what common issues might arise. Identifying the problem quickly can save you time and prevent further damage to the circuit. Let’s break down common faults and practical ways to check resistors, capacitors, diodes, transistors, and integrated circuits.
Resistors And Capacitors Issues
Resistors often fail by changing value or becoming open circuits. You can test resistors using a multimeter by measuring their resistance and comparing it to the labeled value. If the reading is off by a significant margin, the resistor might be faulty.
Capacitors can show problems like leakage, short circuits, or loss of capacitance. Look for bulging or leaking on electrolytic capacitors as a physical sign of failure. Use a capacitance meter or a multimeter with a capacitance setting to check if they hold the correct charge.
Have you ever replaced a capacitor only to find the circuit still doesn’t work? Sometimes, multiple components can fail simultaneously, so it’s important to test surrounding parts as well.
Diode And Transistor Failures
Diodes usually fail by shorting or becoming open circuits. Testing a diode involves checking the forward and reverse bias with a multimeter’s diode test function. A good diode will show a low reading in forward bias and a high reading in reverse bias.
Transistors can fail in various ways, including shorted junctions or loss of gain. Use a multimeter to test the base-emitter and base-collector junctions like diodes. If either junction shows a short or open where it shouldn’t, the transistor likely needs replacement.
Sometimes a transistor might seem fine with a basic test but still underperform in a circuit due to subtle internal damage. How do you decide when to trust your tests or swap the component anyway?
Integrated Circuit Problems
Integrated circuits (ICs) are trickier since they contain many components inside. Visual inspection for burn marks or damaged pins is a good start. If the IC is socketed, try replacing it with a known good one to see if the problem resolves.
Testing ICs often requires checking power supply pins, input, and output signals with an oscilloscope or logic analyzer. If outputs don’t respond as expected, the IC might be faulty. Sometimes, the problem is not the IC itself but a surrounding component affecting its operation.
Have you ever spent hours chasing a fault only to find a tiny resistor near the IC was causing the issue? Troubleshooting ICs means thinking beyond the chip and examining the entire circuit path.
Tips For Efficient Troubleshooting
Troubleshooting electronic components requires focus and clear methods. Efficient troubleshooting saves time and reduces errors. Knowing what to do helps solve problems faster. Below are key tips to improve your troubleshooting skills.
Documenting Findings
Write down every test result and observation. Notes help track what you checked and what worked. Use clear and simple words. Keep a record of measurements and component conditions. This makes it easier to spot patterns or repeated issues. Also, documenting helps if you need to ask for help later.
Using Schematics
Schematics show the layout and connections of components. Study the diagram before testing parts. It guides you on where to measure voltage or check signals. Schematics help understand how the circuit should work. Keep a printed or digital copy nearby during troubleshooting. Mark areas you tested to avoid repeating work.
Systematic Approach
Follow a step-by-step process to find faults. Start with simple checks like power supply and connections. Test components one by one, moving logically through the circuit. Avoid random tests that waste time. Use tools like multimeters or oscilloscopes properly. A clear plan reduces confusion and leads to faster fixes.
Common Mistakes To Avoid
Troubleshooting electronic components can be tricky. Avoiding common mistakes saves time and prevents frustration. Knowing what to watch out for helps you work safely and effectively.
Ignoring Safety Rules
Safety must always be the top priority. Ignoring safety rules can cause serious injury or damage. Always disconnect power before testing parts. Use protective gear like gloves and goggles. Never work on live circuits without proper training.
Skipping Basic Checks
Many problems come from simple issues. Skipping basic checks wastes time and effort. Start by checking power supply and connections. Inspect components for visible damage or burns. Use a multimeter to test voltages and continuity first.
Overlooking Intermittent Faults
Intermittent faults are hard to find. They happen irregularly and can be missed easily. Pay attention to loose wires or bad solder joints. Test components multiple times under different conditions. Take notes to track when and where faults appear.
Advanced Troubleshooting Techniques
Advanced troubleshooting techniques help identify complex faults in electronic components. They go beyond basic checks and use specialized tools to find hidden issues. These methods provide precise data about the circuit’s behavior and condition.
Using these techniques speeds up repairs and reduces guesswork. They also improve accuracy and save time during diagnostics.
Signal Tracing
Signal tracing follows the flow of electrical signals through a circuit. It locates where signals stop or change unexpectedly. This technique uses an oscilloscope or signal tracer tool to check each stage.
By observing signal shape and strength, you can find faulty components or broken connections. Signal tracing works well for audio, radio, and digital circuits.
Thermal Imaging
Thermal imaging detects heat patterns on electronic boards. Overheated parts often indicate a fault or short circuit. A thermal camera shows hot spots without touching the device.
This method quickly spots failing resistors, transistors, or chips. It helps prevent damage by identifying issues early through temperature differences.
Using Logic Analyzers
Logic analyzers capture and display multiple digital signals at once. They help test timing and data flow in digital circuits. This tool shows how signals change over time and reveals errors.
Logic analyzers are essential for debugging microcontrollers and digital communication lines. They provide clear insight into complex electronic behaviors.

Credit: www.youtube.com
Frequently Asked Questions
What Are The First Steps To Troubleshoot Electronic Components?
Start by visually inspecting for damage or loose connections. Use a multimeter to check voltage and continuity. Identify faulty parts by comparing readings to specifications. Always ensure power is off before testing. This approach helps isolate the problem quickly and safely.
How Do You Test Resistors And Capacitors Effectively?
Use a digital multimeter set to the correct mode. Measure resistance for resistors and capacitance for capacitors. Compare the readings with the component’s rated values. Replace components that show significant deviations. Testing ensures components function within their specified ranges.
Why Is Grounding Important In Electronic Troubleshooting?
Proper grounding prevents electrical noise and interference. It ensures accurate measurements and device stability. Poor grounding can cause false readings or component damage. Always check ground connections when troubleshooting circuits for reliable results.
Can Software Tools Aid In Troubleshooting Electronics?
Yes, simulation and diagnostic software can help identify circuit issues. They model circuits and predict faults before physical testing. Using software saves time and reduces errors during troubleshooting. Integrating software tools complements hands-on testing methods effectively.
Conclusion
Troubleshooting electronic components takes patience and careful steps. Start by checking power and connections. Use simple tools like a multimeter to test parts. Watch for signs of damage or wear. Keep track of your findings as you go. Small problems often cause big issues.
Staying calm helps you solve problems faster. Practice makes this process easier over time. Remember, anyone can learn to fix electronics with some effort. Keep trying, and you will improve your skills.
Leave a Reply