Are you ready to turn your passion for electronic music into reality right from the comfort of your own home? Building a home studio might seem like a daunting task, but it’s more achievable than you think.
Imagine having a space where creativity flows freely and your music comes to life, all without the need to rent expensive studio time. This guide will walk you through the essentials of setting up your own electronic music studio, ensuring you have everything you need to produce tracks that reflect your unique sound.
Whether you’re a beginner or looking to upgrade your current setup, you’ll find tips and insights to help you create a studio that inspires your best work. Stick around, because by the end of this article, you’ll be well on your way to creating the ultimate home studio for your electronic music journey.

Credit: www.reddit.com
Choosing The Right Space
Choosing the right space for your home studio is the foundation of creating great electronic music. The room you pick affects sound quality, comfort, and productivity. Let’s dive into what makes a space ideal and how you can optimize it to suit your creative needs.
Room Size And Shape
The size of your room influences how sound behaves inside it. A larger room offers more space for gear and movement, but it can cause sound to bounce around unpredictably. Smaller rooms often make mixing tricky due to tight acoustics, but they’re easier to treat.
Square rooms tend to create standing waves that mess with bass frequencies. Rectangular spaces usually give better sound distribution. If you have a choice, pick a room that isn’t a perfect square to avoid these issues.
Acoustic Considerations
Sound reflections can ruin your mix if untreated. Hard surfaces like bare walls, windows, and floors bounce sound, creating echoes and muddiness. Adding soft materials such as rugs, curtains, and foam panels helps absorb these reflections.
Think about where you place your speakers. Setting them away from walls reduces unwanted bass buildup. Use a simple mirror trick: sit at your mixing spot and have someone move a mirror along the walls; mark spots where you see speaker reflections and treat those areas with acoustic panels.
Noise Isolation Tips
Noise from neighbors or street traffic can distract you and affect recording quality. To minimize this, seal gaps around doors and windows with weather stripping or acoustic sealant. Heavy curtains or double-pane windows also help block outside noise.
Consider adding mass to your walls by hanging thick blankets or installing mass-loaded vinyl. If your budget allows, decoupling your walls with resilient channels can make a big difference. How quiet does your space need to be for your workflow?
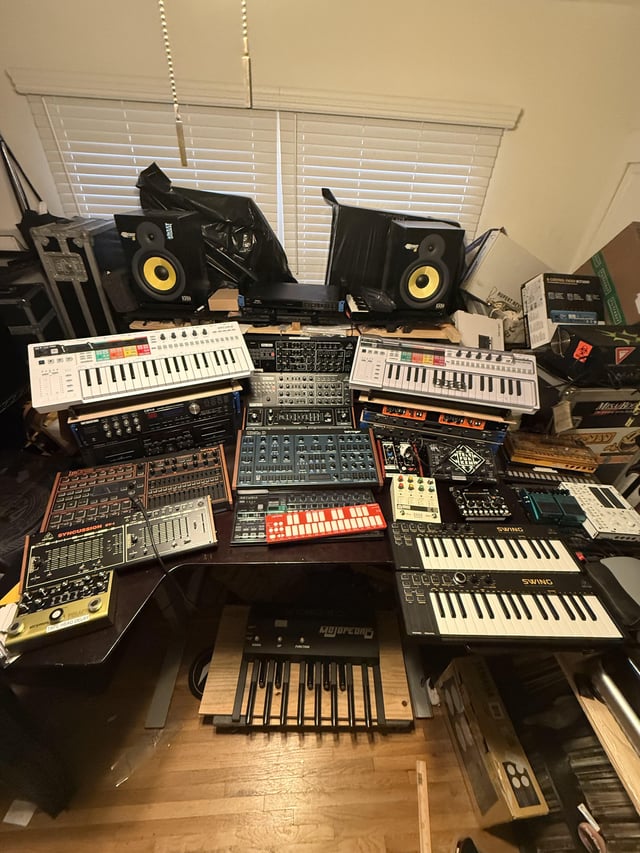
Essential Equipment List
Building a home studio for electronic music needs the right tools. A clear list of essential equipment helps create quality sound. This list covers key gear to start producing music at home. Each piece plays a vital role in the studio setup.
Audio Interface Options
An audio interface connects instruments and microphones to your computer. It converts sound into digital signals for recording and playback. Look for interfaces with low latency and multiple inputs.
- Focusrite Scarlett series – reliable and affordable
- PreSonus AudioBox – good for beginners
- Universal Audio Apollo – high-end quality and effects
Choose an interface that fits your budget and recording needs.
Monitors And Headphones
Good monitors and headphones let you hear every detail. Monitors give clear sound in the room. Headphones help with quiet or detailed listening.
- KRK Rokit – popular studio monitors
- Yamaha HS series – precise and flat response
- Audio-Technica ATH-M50x – great headphones for mixing
Select gear that balances comfort and sound accuracy.
Midi Controllers And Synths
MIDI controllers send signals to your software instruments. Synthesizers create sounds you can play live or record. Both add creativity to electronic music production.
- Akai MPK Mini – compact and versatile controller
- Novation Launchkey – integrates well with software
- Korg Minilogue – affordable analog synthesizer
Pick controllers and synths that inspire your music style.
Computer And Software
Your computer runs all music production software. A fast processor and enough RAM are important for smooth work. Digital Audio Workstations (DAWs) are the main software tools.
- Apple MacBook Pro – popular choice for producers
- Dell XPS – powerful Windows option
- Ableton Live – widely used DAW for electronic music
- FL Studio – beginner-friendly with many features
Choose a computer and software that match your workflow.
Setting Up Your Gear
Setting up your gear is a crucial step in building a home studio for electronic music. Proper setup ensures smooth workflow and clear sound quality. It involves connecting hardware, managing cables, and configuring software. Each task improves your studio’s efficiency and helps you focus on creating music.
Connecting Hardware Components
Start by arranging your main devices: audio interface, MIDI controller, synthesizers, and monitors. Use the right cables for each connection, such as USB, MIDI, or audio cables. Connect your audio interface to your computer first. Then link your MIDI controller to the interface or computer. Connect studio monitors to the audio interface outputs. Power on all devices after connections. Check that each device is recognized by your computer.
Optimizing Cable Management
Good cable management keeps your workspace tidy and prevents signal issues. Use cable ties or Velcro straps to bundle cables. Label each cable near the plug for easy identification. Keep power cables separate from audio cables to reduce interference. Route cables along the edges of your desk or under it. Avoid tight bends or stretching cables. A clean setup helps you find and fix problems fast.
Configuring Software Settings
Open your digital audio workstation (DAW) and select your audio interface as the input/output device. Set the sample rate and buffer size for low latency and good sound quality. Enable MIDI devices in your DAW settings. Assign MIDI channels for each controller or synthesizer. Calibrate your monitors for balanced sound if your DAW supports it. Save your settings as a template for future sessions.
Acoustic Treatment Strategies
Acoustic treatment is a crucial part of building your home studio for electronic music. It shapes the sound in your room, making your mixes clearer and more accurate. Without it, you risk mixing tracks that don’t translate well outside your space.
Bass Traps And Diffusers
Bass traps reduce low-frequency build-up, which is common in corners and can muddy your sound. Placing bass traps in room corners helps control these problematic frequencies effectively.
Diffusers scatter sound waves to avoid harsh reflections and dead spots. You don’t need fancy diffusers; even angled wooden panels or bookshelves can work well to break up sound waves.
Have you noticed how your room sounds when you add or remove furniture? That’s diffusion in action. Experiment with different placements to find what smooths out your sound the best.
Absorption Panels Placement
Absorption panels cut down on echoes and reverb, making your room sound tighter. Position them at first reflection points—areas where sound bounces directly to your ears.
To find these points, sit at your mixing position and have someone move a mirror along the walls. Wherever you see your speakers in the mirror, place a panel there.
Don’t cover every wall with panels. Overdoing absorption can make your room sound lifeless. Balance absorption with diffusion for a natural sound.
Diy Vs Professional Solutions
DIY acoustic treatment can save money and let you customize your studio’s look. Simple materials like rock wool, foam panels, and wooden slats can be effective when installed properly.
Professional treatments often offer higher performance and durability but come with a higher price tag. If you mix regularly and want consistent results, investing in quality panels might be worth it.
Think about your budget and how serious you are about your music. Can you test DIY options first? Sometimes, starting small and upgrading over time leads to the best balance between cost and sound quality.
Workflow And Organization
Organizing your home studio boosts creativity and saves time. A clear workflow helps keep ideas flowing without distractions. Simple organization makes every session smooth and focused. Proper setup and file handling avoid frustration and delays.
Creating A Productive Layout
Place your desk and equipment to reduce movement. Keep your main instruments and controls within easy reach. Arrange monitors at ear level for accurate sound. Use a comfortable chair to support long sessions. Ensure good lighting to prevent eye strain. Clear cables and clutter to maintain a neat space.
File Management Tips
Use clear folder names for projects and sounds. Separate samples, presets, and recordings into different folders. Save project versions regularly to track progress. Use consistent naming rules like date and project name. Delete unused files to free up space. Organize files by genre or style for quick access.
Backup And Storage Solutions
Keep backups on external drives or cloud services. Use two backup methods to protect your work. Schedule regular backups after each session. Label storage devices to avoid confusion. Store backups in a safe, different location from your studio. Use reliable hard drives with enough space for your projects.

Credit: www.reddit.com
Recording Techniques
Recording techniques are vital for capturing the true essence of electronic music in your home studio. The way you record synths, drum machines, and virtual instruments directly affects the clarity and depth of your tracks. Understanding these methods helps you create professional-sounding music without needing expensive gear or a big space.
Capturing Synths And Drum Machines
Direct input (DI) recording is the best way to capture synths and drum machines. It gives you a clean, noise-free signal. Always use good quality cables to avoid unwanted hum or interference.
Try recording multiple takes with different settings on your synth or drum machine. This approach helps you find the perfect tone. If your gear has built-in effects, experiment with them but also record a dry signal for more flexibility during mixing.
Have you ever noticed how room acoustics affect your recordings? Even with electronic instruments, positioning and environment matter. Try placing your gear in a quiet, reflective-free space to avoid capturing unwanted noise.
Using Virtual Instruments
Virtual instruments (VSTs) are a huge part of electronic music production. Instead of recording audio, you record MIDI data. This lets you edit notes, timing, and velocity easily after recording.
To get the best sound, pair your virtual instruments with good MIDI controllers. This gives you more expressive control over your performance. Don’t rely only on presets—try tweaking parameters to create unique sounds.
Consider layering multiple virtual instruments to add richness. Mixing different synth patches or drum samples can make your track more dynamic. How often do you experiment with blending sounds before settling on one?
Layering Sounds Effectively
Layering is key to building complex and full electronic tracks. Start by choosing sounds that occupy different frequency ranges to avoid muddiness. For example, pair a deep bass with a bright lead synth.
Use panning and volume control to create space in your mix. Pan one layer slightly left and another right to add width. Adjust levels carefully so no layer overwhelms the others.
Don’t forget about effects like reverb and delay on certain layers. These can add depth and movement but use them sparingly. What’s your approach to balancing clarity and texture when layering sounds?
Mixing And Mastering Basics
Mixing and mastering are key parts of making electronic music sound clear and powerful. Mixing balances all the sounds in a track. Mastering makes the final version loud and smooth across all devices. Knowing the basics helps you create professional-sounding music in your home studio.
Eq And Compression Tips
EQ shapes the tone of each sound in your track. Cut unnecessary low frequencies to reduce muddiness. Boost mids or highs to make instruments stand out. Use a gentle touch to keep the sound natural.
Compression controls the volume range of sounds. It makes quiet parts louder and loud parts softer. Set a slow attack to keep the punch of drums. Use a fast release to keep the track lively.
Using Effects Creatively
Effects add interest and space to your music. Delay creates echoes that fill empty space. Reverb adds a sense of room or hall size. Use modulation effects like chorus or flanger for movement.
Experiment with effects on different sounds. Try subtle changes to avoid clutter. Layer effects to build unique textures. Keep the mix balanced by checking effects levels often.
Preparing Tracks For Release
Before release, check your track on different speakers and headphones. Fix any imbalances in volume and tone. Use limiting to raise loudness without distortion.
Export your track in high-quality formats like WAV or FLAC. Add metadata such as song title and artist name. This helps your music get recognized on streaming platforms.
Budget-friendly Tips
Building a home studio for electronic music does not have to drain your wallet. Smart choices make a big difference. You can create quality sound without spending a fortune. Focus on what you already have and seek affordable options. This saves money and keeps the creative flow alive.
Affordable Gear Alternatives
Look for budget-friendly versions of key equipment. Many brands offer reliable gear at lower prices. Consider second-hand items in good condition. Small MIDI controllers can replace expensive keyboards. USB microphones often provide clear sound without high cost. Portable audio interfaces can handle multiple inputs affordably. Prioritize gear that suits your style and space.
Maximizing Existing Equipment
Use what you already own to its fullest. Repurpose old gear for new functions. Turn your smartphone into a recording device. Use headphones instead of studio monitors at first. Rearrange your room to improve sound quality. Learn to mix and edit well with basic tools. This approach stretches your budget and builds skills.
Free And Low-cost Software
Many free digital audio workstations (DAWs) offer powerful features. Explore options like Cakewalk, Tracktion T7, or GarageBand for Mac users. Find free plugins for effects and virtual instruments. Low-cost software bundles often include everything you need. Use tutorials online to learn software quickly. These tools help produce professional tracks without high costs.

Credit: www.reddit.com
Frequently Asked Questions
What Essential Equipment Do I Need For A Home Electronic Music Studio?
You need a computer, DAW software, audio interface, MIDI controller, studio monitors, and headphones. These tools ensure quality sound production and efficient workflow.
How Do I Choose The Right Daw For Electronic Music?
Select a DAW based on ease of use, built-in synths, effects, and compatibility. Popular choices include Ableton Live, FL Studio, and Logic Pro.
What Is The Best Room Setup For Sound Quality?
Use a small, quiet room with minimal echo. Add acoustic panels and bass traps to improve sound clarity and reduce unwanted reflections.
How Can I Optimize My Budget When Building A Studio?
Start with essential gear and upgrade gradually. Look for quality used equipment and free or affordable software plugins to save money.
Conclusion
Building a home studio for electronic music takes time and care. Start small and add gear as you learn. Choose a quiet room with good space. Focus on sound quality and comfort. Practice often to improve your skills. Keep your setup organized and simple.
Enjoy creating your own unique sounds. Your studio will grow with your music. Stay patient and keep experimenting. Music is about having fun and expressing yourself.
Leave a Reply