Have you ever wondered how to make a simple electronic robot at home? Imagine bringing your own creation to life, right in your living room.
It’s not just a fun project; it’s a way to dive into the world of robotics and electronics without needing a lab or fancy equipment. In this guide, you will discover how easy and rewarding it can be to build your own robot using everyday materials.
Whether you’re a curious beginner or a seasoned hobbyist, this step-by-step process will ignite your passion for innovation. Ready to transform your curiosity into a hands-on experience? Let’s get started on crafting your very own electronic robot!
Credit: www.voltpaperscissors.com
Materials Needed
Gathering the right materials is the first step to building a simple electronic robot at home. Choosing basic components ensures the project stays easy and fun. Having the correct tools helps with smooth assembly. Optional accessories can enhance your robot’s features but are not required.
Basic Electronic Components
- Microcontroller (such as Arduino or Raspberry Pi)
- Motors (servo or DC motors)
- Wheels or tracks for movement
- Battery pack for power supply
- Breadboard for circuit connections
- Resistors and capacitors
- Wires and jumper cables
- Ultrasonic sensor or infrared sensor for obstacle detection
- Switch to turn the robot on and off
Tools Required
- Soldering iron and solder (for permanent connections)
- Wire stripper and cutter
- Screwdrivers (small size)
- Multimeter to check electrical circuits
- Hot glue gun for fixing parts
- Small pliers for bending wires
Optional Accessories
- LED lights for visual effects
- Buzzer for sound signals
- Bluetooth or Wi-Fi module for remote control
- Camera module for vision capabilities
- Plastic or metal chassis for a sturdy frame
Choosing A Robot Design
Choosing the right design is the first step in building a simple electronic robot at home. The design decides what your robot can do and how complex it will be. Picking a design that matches your skills and goals makes the project fun and successful.
Some designs need few parts and simple circuits. Others need sensors and programming. Consider what materials you have and what you want to learn.
Simple Wheeled Robot
This design uses wheels for movement. It is easy to build and requires basic parts like motors and a battery. The robot moves forward, backward, and turns. No sensors are needed, so it suits beginners well.
Line Following Robot
This robot follows a path marked on the ground. It uses sensors to detect the line. The design needs a small circuit to control the motors based on sensor input. It helps learn about sensors and basic programming.
Obstacle Avoidance Robot
This design detects objects in front and avoids them. It uses distance sensors like ultrasonic or infrared. The robot changes direction to avoid collisions. Building this robot improves knowledge of sensors and control systems.
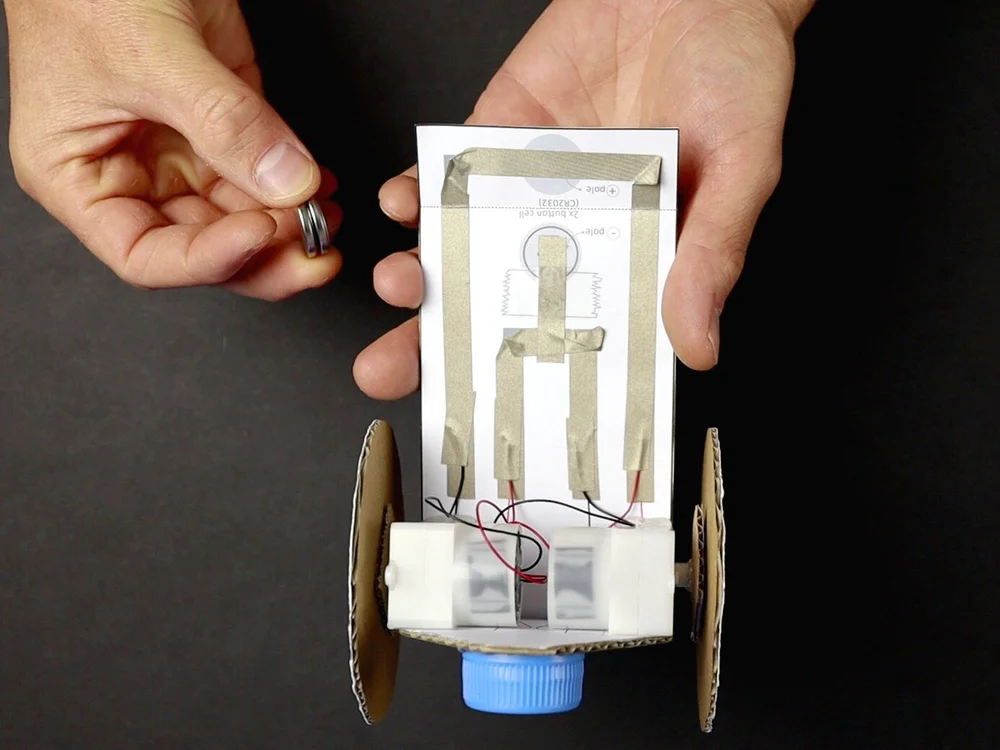
Assembling The Circuit
Assembling the circuit is a crucial part of building your simple electronic robot at home. This stage brings all the individual components together, creating the brain and nervous system of your robot. Paying attention to detail here ensures your robot will work smoothly and respond correctly to commands.
Wiring The Components
Start by organizing your components on a breadboard or circuit board. Arrange them so wires won’t overlap or tangle, which can cause confusion or errors later. Use color-coded wires to differentiate connections easily—red for power, black for ground, and other colors for signals.
Connect the power supply to your microcontroller or main board first. Then link sensors, motors, and other parts according to your circuit diagram. If you’re unsure about a connection, double-check the pin numbers and the direction of components like LEDs or capacitors.
Soldering Tips
Soldering can feel intimidating at first, but it’s easier than most think. Heat the soldering iron properly and hold it to the joint for just a second before adding solder. This creates a strong, clean connection without overheating components.
Keep your solder joints shiny and smooth—dull or cracked joints can cause bad connections. If you make a mistake, don’t panic; use a solder sucker or wick to remove excess solder and try again. Remember, practice improves your soldering skills significantly.
Testing Connections
Once your circuit is wired and soldered, it’s time to test each connection. Use a multimeter to check continuity and ensure there are no shorts between wires. This step can save hours of troubleshooting later.
Power up your circuit carefully and observe the behavior of each component. Are the motors turning smoothly? Do the LEDs light up as expected? If something doesn’t work, recheck your wiring and solder joints before assuming a faulty component.
Have you ever skipped testing connections and spent hours fixing what turned out to be a loose wire? Taking time now can save frustration later and make your robot-building experience much more enjoyable.
Programming The Robot
Programming the robot brings your creation to life. It’s where your ideas turn into actions, making the robot move, respond, or perform tasks. Understanding the programming process will help you control your robot effectively and customize its behavior.
Selecting A Microcontroller
The microcontroller acts as the brain of your robot. Choosing the right one depends on what you want your robot to do. Popular beginner options include Arduino and Raspberry Pi because they’re affordable and have plenty of community support.
Think about the number of input/output pins you need, memory size, and ease of programming. If your robot needs simple movements, an Arduino Uno is a solid choice. For more complex tasks like image processing, Raspberry Pi might be better.
Writing Basic Code
Start with simple commands to test your robot’s motors and sensors. Use easy-to-understand programming languages like C++ for Arduino or Python for Raspberry Pi. Writing code in small chunks helps you find errors faster.
Try writing code that turns the robot’s wheels or blinks an LED first. This builds your confidence and ensures your connections work correctly. Don’t hesitate to experiment; tweaking your code teaches you how the robot responds.
Uploading The Program
Uploading your code to the microcontroller connects your ideas to the physical robot. You will need a USB cable and software like the Arduino IDE or Thonny for Raspberry Pi. Make sure your microcontroller is properly connected before uploading.
Watch for error messages during upload—they often point to simple mistakes like wrong board selection or port settings. Once uploaded, your robot should start executing the instructions immediately. Have you checked if your robot reacts exactly as you programmed?
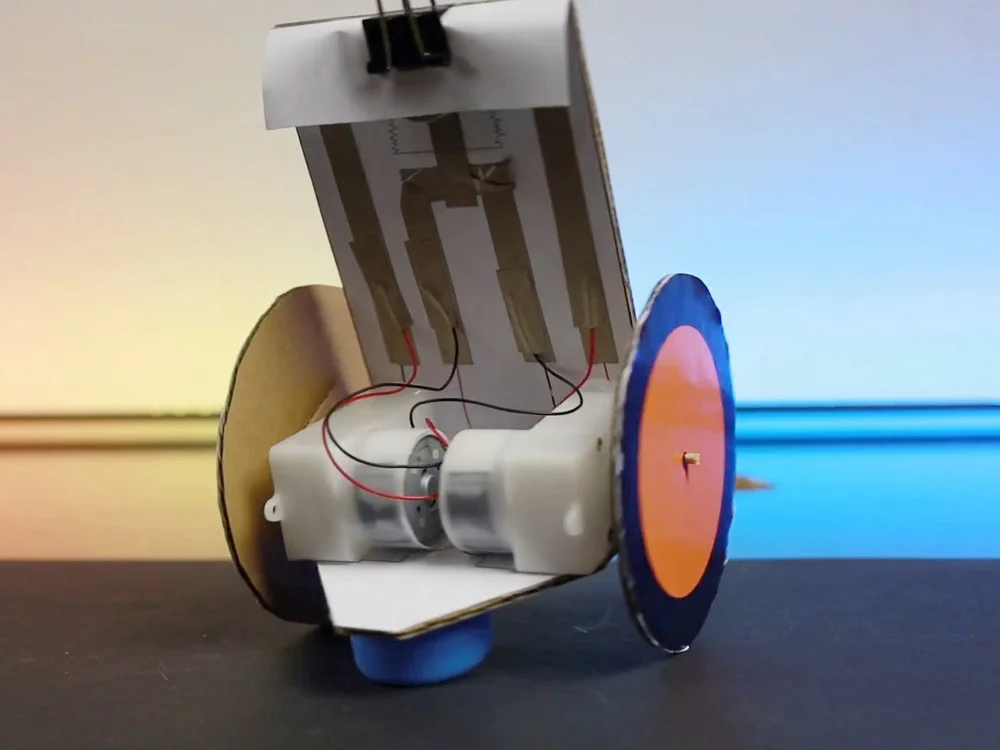
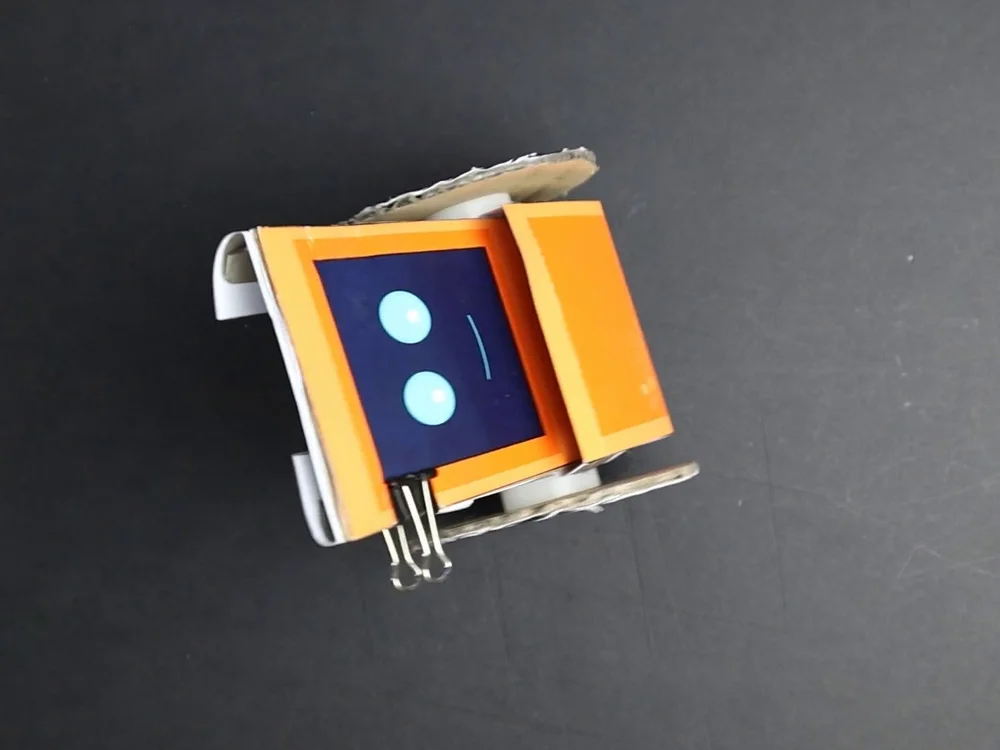
Building The Robot Body
Building the robot body is an exciting part of creating your own electronic robot. The body holds all parts together and gives the robot its shape. It needs to be strong yet light for easy movement. You can make the body from simple materials found at home. This section explains how to build the robot body step by step.
Using Recycled Materials
Recycled materials work well for making a robot body. Boxes, plastic containers, and old toys are good choices. They are easy to cut and shape. Choose materials that are light but sturdy. Cardboard is simple to use and easy to glue. Plastic bottles give a smooth finish and can hold parts inside.
Cut the materials to the size you want. Use scissors or a craft knife carefully. Join pieces with tape, glue, or small screws. Make sure the body parts fit well and do not wobble. This saves time and prevents damage to the electronics later.
Attaching Motors And Sensors
Motors and sensors bring your robot to life. Attach motors to the robot body where they can move wheels or arms. Use screws or strong glue to keep motors firm. Make sure motors are placed to balance the robot’s weight.
Sensors detect obstacles or light. Place sensors at the front or sides of the robot. Secure sensors so they face the right direction. Use small brackets or tape to hold sensors steady. Check wires to avoid tangling or pulling.
Securing The Electronics
Electronics include the battery, circuit board, and wires. Keep these parts safe inside the robot body. Use small boxes or compartments to hold electronics. Fix the circuit board with screws or double-sided tape.
Organize wires neatly to avoid damage. Use zip ties or twist ties to bundle wires. Leave enough slack for movement but avoid loose ends. Protect the battery in a separate space to prevent short circuits. Proper securing keeps your robot working well and lasting longer.

Credit: www.voltpaperscissors.com
Testing And Troubleshooting
Testing and troubleshooting your homemade electronic robot is where your creation truly comes to life. This phase helps you identify issues early and ensures your robot functions smoothly. Patience and a keen eye during testing can save you hours of frustration later.
Initial Power-on Checks
Before powering your robot, double-check all connections. Loose wires or reversed polarity can cause immediate problems. Confirm that the battery or power source matches your robot’s requirements to avoid damaging components.
Once you turn it on, watch closely for any unusual signs like sparks or smoke. If nothing happens, don’t panic—sometimes a simple overlooked connection is the culprit. Have a basic multimeter handy to check voltage and continuity at critical points.
Common Issues And Fixes
If your robot doesn’t move or respond, start by verifying the motor connections. Motors often fail to run due to weak power supply or incorrect wiring. Swap the motor wires or test the motors individually to isolate the problem.
Another frequent issue is sensor malfunction. Dust, misalignment, or incorrect placement can cause sensors to give false readings. Clean the sensors gently and adjust their positions to improve accuracy.
- Problem:Robot stops randomly
Fix:Check battery charge and solder joints. - Problem:Motors run but robot doesn’t move
Fix:Inspect wheels and mechanical parts for obstructions. - Problem:Sensors unresponsive
Fix:Test sensor output with a simple LED or buzzer circuit.
Improving Performance
Once your robot works, think about ways to enhance its abilities. Tighten loose parts and secure wires to prevent accidental disconnections during movement. Adding small rubber pads under wheels can improve traction on smooth surfaces.
Consider tweaking the code if your robot uses a microcontroller. Adjusting motor speeds or sensor sensitivity often leads to smoother operation. Have you tried changing the robot’s weight distribution? Sometimes a small shift can make a big difference in balance and speed.
Testing and troubleshooting isn’t just about fixing errors; it’s your chance to make your robot better than you first imagined.
Enhancing Your Robot
Enhancing your simple electronic robot can take your project from basic to impressive. Small upgrades can make your robot more interactive and fun to control. Are you ready to see how a few additions can transform your creation?
Adding More Sensors
Adding sensors lets your robot sense its environment better. You can start with simple sensors like ultrasonic for distance or light sensors to detect brightness. These sensors allow your robot to avoid obstacles or follow a light source, making it smarter and more responsive.
Try connecting a temperature sensor to monitor room temperature or a sound sensor to respond to claps. Each sensor adds new possibilities for your robot’s behavior. Think about what you want your robot to do and choose sensors that help achieve that.
Upgrading Mobility
Improving your robot’s movement makes it more agile and versatile. You might replace basic wheels with larger ones or add tracks for better grip on rough surfaces. More powerful motors can increase speed and carrying capacity.
Consider adding a servo motor to control a robotic arm or a pan-and-tilt mechanism for a camera. These upgrades expand what your robot can physically do. What new tasks could your robot perform if it moved more smoothly or could manipulate objects?
Incorporating Remote Control
Remote control lets you operate your robot from a distance, adding a whole new level of fun. You can use simple options like infrared remotes or upgrade to Bluetooth or Wi-Fi modules for smartphone control. This allows precise commands and even programming complex routines.
Setting up a remote control system might seem tricky, but many kits and tutorials make it straightforward. Imagine guiding your robot through a maze without touching it—how would that change your experience?
Credit: www.voltpaperscissors.com
Frequently Asked Questions
What Materials Are Needed To Build A Simple Electronic Robot?
To build a simple electronic robot, you need a microcontroller, motors, batteries, sensors, wires, and a chassis. These components are affordable and easy to find. Basic tools like a soldering iron and screwdriver are also helpful for assembly.
How Much Time Does It Take To Make A Robot At Home?
Making a simple electronic robot at home usually takes 2 to 4 hours. This depends on your experience and the complexity of the design. Beginners should allow extra time for learning and troubleshooting.
Can Beginners Build An Electronic Robot Easily?
Yes, beginners can build an electronic robot easily with step-by-step guides. Simple designs use basic components and clear instructions. This helps develop skills in electronics and programming without overwhelming complexity.
What Skills Are Needed To Make A Home Robot?
Basic skills in electronics, soldering, and programming are useful to make a robot at home. Understanding circuits and coding microcontrollers helps in assembling and controlling the robot effectively.
Conclusion
Building a simple electronic robot at home is fun and rewarding. You can learn basic electronics while creating something useful. Using easy parts makes the project simple and clear. This hands-on experience helps you understand how robots work. Keep experimenting to improve your skills and ideas.
Start small, then try new designs and functions. Enjoy the process and stay curious. Making robots is a great way to explore science and technology. Give it a try—you might be surprised by what you can do.
Leave a Reply