Have you ever imagined creating your own electronic devices right at home? It might sound like a daunting task, but the truth is, with a little guidance, you can build amazing gadgets yourself.
Imagine the thrill of holding a device you made, watching it light up or move, powered by your own hands and creativity. This guide will show you how to make electronics at home, step by step, even if you’re a complete beginner.
You’ll discover that with the right tools and a little patience, you can bring your ideas to life and impress your friends with your new DIY skills. Ready to dive into the world of homemade electronics and unlock the inventor within you? Let’s get started!
Basic Tools And Materials
Starting electronics projects at home needs the right tools and parts. These basics help you build circuits and learn how electronics work. Using proper tools and materials makes your work easier and safer.
Knowing the essential items lets you prepare well for any project. It saves time and avoids mistakes. Beginners benefit from simple and clear lists of what to use and how to stay safe.
Essential Electronics Tools
- Soldering iron – for joining wires and parts
- Wire cutters – to trim wires cleanly
- Multimeter – to check voltage, current, and resistance
- Needle-nose pliers – for bending and holding small parts
- Wire stripper – to remove insulation from wires
- Breadboard – for easy circuit testing without soldering
- Screwdrivers – small sizes for tightening screws
- Helping hands tool – holds components while you work
Common Components For Beginners
- Resistors – control electrical current
- Capacitors – store and release energy
- LEDs – small lights to indicate power or signals
- Transistors – amplify or switch electronic signals
- Diodes – allow current to flow in one direction
- Push buttons and switches – for user input
- Battery holders – to power your projects
- Jumper wires – connect components on breadboards
Safety Tips For Diy Projects
- Work in a clean, dry, and well-lit area
- Unplug devices before making changes
- Wear safety glasses to protect your eyes
- Use tools carefully, especially the soldering iron
- Keep flammable materials away from heat sources
- Check connections twice to avoid shorts
- Do not touch live wires with bare hands
- Follow instructions and do not rush your work
Simple Circuits To Start
Simple circuits are the best way to start making electronics at home. They teach the basics of electricity and components. These projects need few parts and are easy to build. You learn how current flows and how to control it.
Starting with simple circuits builds confidence. It helps you understand more complex designs later. Below are some easy circuits to try. Each uses common parts and clear steps.
Building A Basic Led Circuit
Light Emitting Diodes (LEDs) are small lights that show electricity flow. A basic LED circuit needs a battery, LED, resistor, and wires. Connect the resistor to the positive battery terminal. Attach the LED’s long leg to the resistor. Connect the LED’s short leg to the negative terminal. The resistor protects the LED from too much current. The LED lights up if connected right.
Creating A Simple Switch Circuit
A switch controls the flow of electricity. Adding a switch lets you turn the LED on or off easily. Use a push-button or toggle switch. Connect the switch in series with the LED and resistor. When pressed, the switch completes the circuit. The LED lights up. When released, the circuit breaks and the LED turns off.
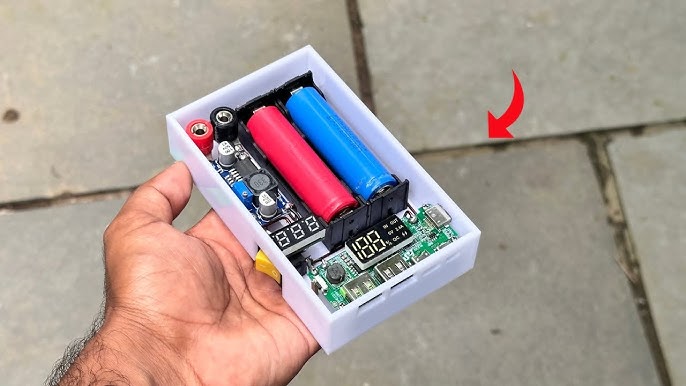
Assembling A Battery Holder
A battery holder keeps batteries secure and connected. It makes changing batteries easier and safer. Battery holders come in many sizes for different batteries. Use a holder with wires attached. Connect its wires to your circuit’s power points. This setup prevents loose connections and shorts. It also improves your circuit’s stability.
Using A Breadboard
Using a breadboard is a simple way to build electronic circuits at home. It allows easy connections without soldering. You can test ideas quickly and change parts with no damage. Breadboards are ideal for beginners and hobbyists who want to learn electronics. Understanding how to use a breadboard helps you create projects safely and efficiently.
Breadboard Basics
A breadboard has many tiny holes in rows and columns. Each hole connects to metal strips under the board. These strips connect the holes in groups. The middle area has two sets of rows separated by a gap. Each row connects horizontally. The side columns are power rails. They supply power to your circuit.
- Insert component leads into holes to make connections.
- Use jumper wires to link different parts.
- Power rails run vertically for positive and negative supply.
- Gap in the middle isolates two halves of the board.
Prototyping Your First Circuit
Start by placing components on the board. Insert resistors, LEDs, or sensors into the holes. Connect the parts using jumper wires. Follow a simple circuit diagram. Connect the power supply to the rails. Double-check each connection before powering up. Keep wires short and neat to avoid confusion.
Tips For Effective Testing
Test your circuit step-by-step. Check each connection with a multimeter. Look for loose wires or wrong placements. Power the circuit only after verifying connections. Use a small power supply to avoid damage. Replace or adjust components if the circuit does not work. Keep notes of changes for future improvements.
Diy Electronic Projects
DIY electronic projects offer a fun way to learn and create useful devices. They allow you to explore basic electronics and improve your skills. These projects use simple parts and clear instructions. You can build gadgets that respond to light, amplify sound, or even move on their own.
Starting with small projects helps you understand circuits and components. Each project teaches something new. Let’s explore some easy and rewarding electronic builds you can make at home.
Making A Light-activated Alarm
A light-activated alarm turns on when it detects light changes. It uses a photoresistor to sense light levels. The circuit can alert you if a door or window opens. You need a battery, buzzer, photoresistor, and a transistor.
When light hits the photoresistor, its resistance changes. This change triggers the transistor to power the buzzer. You can adjust the sensitivity by choosing different photoresistors. This project helps you learn about sensors and switches.
Building A Basic Audio Amplifier
A basic audio amplifier makes small sounds louder. It uses a transistor or an integrated circuit like an LM386. You need a few resistors, capacitors, a speaker, and a power source.
This project shows how signals can be increased in strength. It is useful for boosting audio from phones or radios. You will learn about sound waves, voltage, and current control.
Constructing A Simple Robot
Building a simple robot introduces motors, sensors, and microcontrollers. It can move around and avoid obstacles. You need small motors, wheels, a battery, and a control board like Arduino.
The robot uses sensors to detect objects and changes direction. This project teaches basic programming and electronics working together. It is a great start for anyone interested in robotics and automation.
Soldering Techniques
Soldering is a fundamental skill for anyone making electronics at home. Mastering soldering techniques ensures your circuits are reliable and your components stay safe. It’s not just about melting metal; it’s about creating solid, lasting connections that power your projects.
Choosing The Right Soldering Iron
Your choice of soldering iron can make a huge difference. A temperature-controlled iron gives you precision and prevents overheating sensitive parts. Look for one with a comfortable grip and interchangeable tips to handle different soldering jobs.
Consider the wattage too—20 to 40 watts usually works well for most electronics. If you’re working with tiny surface-mount components, a fine tip is essential. What kind of projects are you planning? That will guide your choice of iron and accessories.
Step-by-step Soldering Guide
- Prepare the components:Make sure wires or pins are clean and dry before starting.
- Heat the joint:Place the soldering iron tip on both the component lead and the pad for about 2 seconds.
- Apply solder:Touch the solder wire to the joint, not the iron, and let it melt and flow smoothly.
- Remove solder, then iron:Once enough solder has flowed, pull away the solder wire, then the iron.
- Inspect the joint:A good solder joint looks shiny and cone-shaped, not dull or blob-like.
Did you know that rushing this process often causes cold joints? Taking your time pays off with stronger connections that won’t fail under stress.
Preventing Common Soldering Mistakes
Many beginners struggle with solder bridges, cold joints, or overheating components. Avoid these by never touching the soldering iron to the solder directly. Always heat the joint first.
Keep your soldering tip clean by wiping it on a damp sponge regularly. Dirty tips reduce heat transfer and make your joints weak. Also, don’t use too much solder; it can cause shorts or messy connections.
Have you ever thought about the importance of your workspace? A clutter-free area with good lighting makes spotting mistakes easier and keeps your components safe.
Credit: www.youtube.com
Troubleshooting Tips
Troubleshooting is a key skill for making electronics at home. It saves time and prevents damage. Learning to spot problems early helps you fix circuits faster. Basic tools and clear steps make troubleshooting easier. Understanding common issues guides your repair process.
Identifying Common Circuit Problems
Start by checking if the circuit powers on. Look for burnt components or broken wires. Watch for unusual smells or sounds from the device. Test if LEDs light up or motors spin. These signs point to where the problem lies.
- Check for short circuits causing overheating.
- Look for open circuits stopping current flow.
- Find damaged components like resistors or capacitors.
- Inspect solder joints for cracks or cold soldering.
Using A Multimeter Effectively
A multimeter measures voltage, current, and resistance. It helps find faults in circuits quickly. Set the multimeter to the right mode before testing. Touch the probes to test points carefully. Read the values and compare with expected results.
- Measure voltage to check power supply.
- Test resistance to find broken connections.
- Use continuity mode to detect shorts or open circuits.
- Check diode and transistor function with special settings.
Fixing Loose Connections
Loose connections cause many circuit problems. They stop current flow or cause intermittent faults. Inspect connectors, wires, and solder joints closely. Tighten screws and re-solder weak joints. Replace damaged wires with new ones for safety.
- Remove old solder and clean the area before re-soldering.
- Use heat shrink tubing to protect repaired wires.
- Secure connectors firmly to avoid future looseness.
- Test the circuit again after fixing connections.
Expanding Your Skills
Expanding your skills in electronics opens new doors to creativity and problem-solving. It helps you build complex projects with confidence. Learning more also deepens your understanding of how devices work. This section guides you through key areas to grow your knowledge and abilities.
Learning To Read Circuit Diagrams
Circuit diagrams are maps for electronic projects. They show how components connect and work together. Reading these diagrams helps you understand and build circuits accurately. Start by learning common symbols like resistors, capacitors, and transistors. Practice by drawing simple circuits on paper. Use online resources with step-by-step examples. This skill reduces errors and saves time during assembly.
Exploring Microcontrollers
Microcontrollers are small computers that control electronic devices. They let you add intelligence and automation to your projects. Start with beginner-friendly boards like Arduino or Raspberry Pi Pico. Learn basic programming to control LEDs, sensors, and motors. Experiment by creating simple tasks such as blinking lights or reading temperature. This knowledge lets you build smart gadgets and expand project possibilities.
Joining Online Electronics Communities
Online communities connect you with other electronics enthusiasts worldwide. You can ask questions, share ideas, and get feedback. Popular forums and social media groups offer tutorials and project inspiration. Engaging with others helps solve problems faster and learn new techniques. It builds motivation and keeps you updated on trends. Join communities to grow your skills and enjoy electronics more.

Credit: www.youtube.com

Credit: www.instructables.com
Frequently Asked Questions
What Basic Tools Are Needed To Make Electronics At Home?
You need a soldering iron, multimeter, wire cutters, and a breadboard. These tools help in assembling and testing circuits effectively.
How Can Beginners Start Making Electronics Projects?
Start with simple kits like LED blinkers or basic circuits. Follow tutorials and understand component functions step-by-step.
Which Components Are Essential For Home Electronics Projects?
Resistors, capacitors, transistors, LEDs, and microcontrollers are essential. These parts form the foundation of most electronic circuits.
Is It Safe To Build Electronics At Home?
Yes, with proper precautions like working in a ventilated area and using safety gear. Always follow instructions carefully.
Conclusion
Building electronics at home can be fun and rewarding. Start with simple projects to learn the basics well. Use the right tools and follow safety steps carefully. Practice often to improve your skills and confidence. Soon, you will create useful gadgets by yourself.
Keep exploring new ideas and enjoy the process. Making electronics at home brings creativity and learning together. Give it a try and see how much you can do!
Leave a Reply