Imagine being able to create your own electronic devices right from the comfort of your home. It might sound like a daunting task, but with a little guidance, you can turn this idea into reality.
Whether you’re a tech enthusiast or a curious beginner, learning how to make electronic devices at home is both exciting and rewarding. Think of the satisfaction you’ll feel when your own creation comes to life, lighting up or buzzing just the way you wanted.
This guide will walk you through the steps, simplify the jargon, and empower you to unleash your creativity. Ready to dive in and discover how you can start crafting your very own gadgets? Let’s get started.

Credit: www.instructables.com
Basic Tools And Materials
Starting to make electronic devices at home requires a clear understanding of the basic tools and materials you’ll need. Without the right equipment, even simple projects can become frustrating or unsafe. Gathering these essentials first sets you up for success and keeps your work efficient and enjoyable.
Essential Tools For Electronics
You’ll need some key tools to handle components and circuits effectively. A reliable soldering iron is a must for connecting parts securely. Choose one with adjustable temperature to prevent damage to delicate components.
Other important tools include wire cutters, a multimeter for measuring voltage and resistance, and a screwdriver set with various heads. Tweezers help manage tiny parts, and a breadboard is great for testing circuits without soldering.
Have you ever struggled to hold small wires while soldering? Using a helping hand tool with adjustable clamps can make a huge difference in precision and safety.
Common Components To Gather
Stocking up on basic electronic components will keep your projects moving smoothly. Essential parts include resistors, capacitors, LEDs, and transistors. Each plays a unique role in controlling electrical flow and signals.
Don’t forget jumper wires, which connect components on a breadboard, and batteries or power supplies to energize your circuits. Having a variety of sensors and switches can expand the functionality of your devices.
Think about what project you want to build first. Which components might you need to add or substitute? Planning ahead saves time and avoids mid-project hunts for parts.
Safety Tips For Diy Electronics
Handling electronics at home demands attention to safety. Always unplug your device while assembling or soldering to avoid shocks. Use safety glasses to protect your eyes from solder splashes or wire clippings.
Work in a well-ventilated area, especially when soldering, to avoid inhaling fumes. Keep your workspace organized to prevent accidental short circuits or damage to components.
Have you ever accidentally touched a hot soldering iron tip? Setting up a stand and using heat-resistant mats prevents burns and keeps your area tidy.

Credit: www.instructables.com
Simple Circuit Projects
Simple circuit projects are a great way to start making electronic devices at home. These projects use basic parts like wires, batteries, and small components. They help build understanding of how electronics work. You can create useful and fun gadgets with just a few tools and parts.
These projects are perfect for beginners. They teach you how to connect parts and test your circuits safely. Working on simple circuits builds confidence and skills for more complex electronics later.
Creating A Basic Led Circuit
Making a basic LED circuit is an easy start. You need an LED, a resistor, a battery, and some wires. Connect the resistor to the positive leg of the LED. Attach the free end of the resistor to the battery’s positive terminal. Connect the LED’s negative leg to the battery’s negative terminal. The LED will light up, showing electricity flows through the circuit.
Building A Simple Alarm System
A simple alarm system uses a buzzer, a battery, a switch, and wires. Connect the buzzer and battery in series. Add a switch between the battery and buzzer. When the switch is closed, the buzzer sounds an alarm. This project teaches how switches control circuits and make devices work.
Diy Flashlight Assembly
Building a DIY flashlight needs a small bulb or LED, a battery holder, batteries, a switch, and wires. Connect the bulb to the battery holder with wires. Add the switch to control the light. When the switch is on, the bulb lights up. This project shows how to power a light source and control it easily.
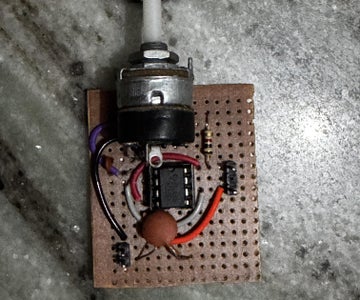
Intermediate Electronics Builds
Intermediate electronics projects help build practical skills beyond basics. They offer challenges that improve understanding of circuits and components. These projects combine theory with hands-on work, making learning fun and rewarding.
Each project requires some tools like a soldering iron, multimeter, and breadboard. Patience and careful reading of circuit diagrams are essential. These builds introduce useful devices you can use daily or modify for new functions.
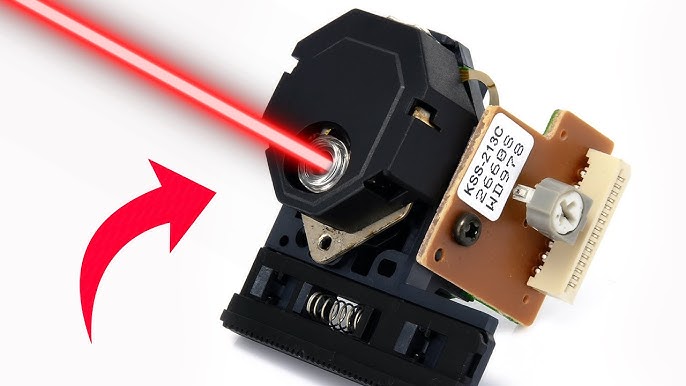
Constructing A Fm Radio Receiver
Building an FM radio receiver involves assembling a tuner, amplifier, and speaker. The tuner captures radio waves and converts them into audio signals. Use a variable capacitor to adjust the frequency and find stations easily.
- Start with a coil and capacitor to form the tuner circuit.
- Connect a transistor amplifier to boost the weak signals.
- Add a small speaker or headphones for sound output.
This project improves skills in tuning circuits and handling radio frequency signals.
Making A Digital Thermometer
A digital thermometer shows temperature readings on a display using sensors. Use a thermistor or a digital sensor like DS18B20 for accurate results. The sensor connects to a microcontroller to process temperature data.
- Attach the sensor to the microcontroller input pin.
- Program the microcontroller to read and convert temperature values.
- Show the temperature on an LCD or LED display.
This build teaches programming and sensor interfacing with microcontrollers.
Designing A Light-activated Switch
A light-activated switch controls devices based on light levels. It uses a photoresistor to detect light intensity. When light reaches a certain level, the circuit turns on or off an appliance.
- Connect a photoresistor in a voltage divider circuit.
- Use a transistor or relay as the switching element.
- Adjust the threshold with a potentiometer for sensitivity.
This circuit is useful for automatic lighting or security systems.
Microcontroller Projects
Microcontroller projects offer a hands-on way to bring your electronic ideas to life. These tiny computers can control sensors, motors, lights, and more, making them perfect for beginners and hobbyists alike. You don’t need to be an expert to start creating useful and fun devices at home.
Getting Started With Arduino
Arduino is one of the most popular microcontroller platforms for beginners. It uses simple coding and a large community support network, which makes troubleshooting easier. You can start by buying an Arduino starter kit that includes the board, sensors, and step-by-step guides.
Try connecting an LED to your Arduino and write a basic program to blink it. This small success will boost your confidence and show you how input and output work. Have you thought about what small project you’d like to try first?
Building An Automated Plant Watering System
Keeping plants watered can be a challenge, especially if you forget or travel often. Using a soil moisture sensor connected to a microcontroller, you can build a system that waters your plants automatically. This project involves:
- A soil moisture sensor to measure dryness
- A water pump or valve to deliver water
- Simple code to turn on watering when the soil is dry
Setting this up teaches you how to read sensor data and control devices based on conditions. Imagine never worrying about your plants again—doesn’t that sound like a smart addition to your home?
Creating A Temperature Logger
Recording temperature changes can be useful for various reasons, from monitoring your room to tracking weather trends. You can create a temperature logger by connecting a temperature sensor to your microcontroller and storing data on an SD card or sending it to your computer.
This project helps you learn about data collection, storage, and even basic data analysis. What patterns could you discover by tracking your environment over time? Try adding a display to show live temperature readings for extra functionality.
Tips For Successful Diy Electronics
Successfully making electronic devices at home requires more than just gathering parts and following instructions. It demands attention to detail, patience, and a willingness to test and tweak your circuits. These tips will help you navigate common pitfalls and improve your DIY electronics projects.
Reading And Following Schematics
Schematics are like blueprints for your electronics project. Take time to study every symbol and connection before you start building. Missing a tiny detail can cause your circuit to fail.
Try to trace the flow of electricity through the schematic. Ask yourself: where does the power enter, and how does it reach each component? This practice clarifies how the circuit works and highlights potential problem areas.
If you find a symbol or component unfamiliar, look it up rather than guessing. Understanding each part’s role saves you from costly mistakes later.
Testing And Troubleshooting Circuits
Testing is where you confirm if your device works as expected. Use a multimeter to check voltage, current, and resistance at different points in the circuit. This helps you spot problems early.
If your circuit doesn’t work, don’t get discouraged. Break it down into smaller sections and test each one separately. Sometimes the issue is a loose connection or a reversed component.
Have you ever spent hours debugging only to find a simple wiring error? Keeping a logical testing approach reduces frustration and speeds up repairs.
Upgrading And Customizing Projects
Once your basic project works, think about how you can make it better. Maybe add a feature that suits your needs or improve the design for durability. Customizing makes the project truly yours.
Start by changing one component at a time. This way, you can understand how each upgrade affects performance. Document your changes so you can replicate or undo them later.
Could adding a sensor or a microcontroller expand your project’s capabilities? Experimenting with upgrades keeps your skills sharp and your devices unique.
Credit: www.instructables.com
Frequently Asked Questions
What Basic Tools Do I Need To Make Electronic Devices At Home?
You need a soldering iron, multimeter, wire cutters, and screwdrivers. These tools help assemble and test circuits safely and efficiently.
How Can I Learn To Design Electronic Circuits Easily?
Start with online tutorials and beginner kits. Practice simple projects to understand components and circuit functions step-by-step.
Which Components Are Essential For Homemade Electronic Devices?
Common components include resistors, capacitors, transistors, LEDs, and microcontrollers. These parts form the foundation of most electronic circuits.
Is It Safe To Build Electronic Devices At Home?
Yes, if you follow safety guidelines. Work in a well-ventilated area, avoid electric shocks, and use protective gear when soldering.
Conclusion
Making electronic devices at home is fun and rewarding. You learn how parts work and connect. Start small and practice often to build skills. Use simple tools and follow safety steps. Mistakes help you improve and understand better. Keep trying, and soon you can create more complex devices.
Enjoy the process and share your projects with friends. This hobby can grow with you over time.
Leave a Reply