Ever wondered how you can create your own electronic gadgets right from the comfort of your home? You’re not alone.
Many people feel the excitement of building something with their own hands, especially if it lights up, beeps, or even moves! Making gadgets at home can be surprisingly easy and incredibly rewarding. Imagine the thrill of showing off a cool device you built yourself.
It’s not just about saving money; it’s about the joy of learning and creating something unique. This guide will walk you through simple steps and tips to get started. Ready to dive into the world of DIY electronics and unleash your creativity? Keep reading, and let’s transform your home into a mini innovation lab!
Basic Tools And Materials
Before you dive into making your own electronic gadgets at home, gathering the right basic tools and materials is crucial. Having these essentials at hand will save you time and frustration. It also helps you avoid unnecessary trips to the store when you hit a snag during your project.
Essential Electronics Components
Every DIY electronics project starts with a few basic components. You’ll want to have:
- Resistors:Control the flow of electric current.
- Capacitors:Store and release electrical energy.
- LEDs:Simple light indicators that show circuit status.
- Transistors:Act as switches or amplifiers in circuits.
- Diodes:Allow current to flow in one direction.
- Microcontrollers:The brain of many gadgets, like Arduino or Raspberry Pi.
- Wires and Breadboards:For building circuits without soldering.
Would you believe that just a handful of these parts can bring your ideas to life? Start small, and you’ll quickly see how they work together.
Tools For Beginners
You don’t need a fancy workshop to get started. A simple toolkit can handle most beginner projects. Here’s what I found handy:
- Soldering Iron:For connecting components permanently.
- Wire Strippers:Remove insulation without damaging wires.
- Multimeter:Measures voltage, current, and resistance to troubleshoot circuits.
- Screwdrivers and Pliers:Basic hand tools to assemble parts.
- Helping Hands Tool:Holds components steady while you work.
Think about what tools you already have at home. Could you repurpose them? Sometimes, the simplest tools lead to the best results.
Safety Tips
Working with electronics can be exciting but comes with risks you must respect. Always unplug devices before working on them to avoid electric shocks. Wear safety glasses to protect your eyes from solder splashes or small flying parts.
Keep your workspace clean and organized to prevent accidents. Never touch live wires with bare hands. Have a fire extinguisher nearby, just in case a short circuit causes overheating.
How do you keep yourself safe while learning something new? Developing good safety habits early will make your projects more enjoyable and secure.
Simple Circuit Projects
Simple circuit projects offer an easy way to start making electronic gadgets at home. These projects use basic components that are affordable and easy to find. They help build a strong foundation in electronics. Anyone can try them, even without prior experience.
These projects focus on understanding how electricity flows and how parts work together. You will learn to connect wires, resistors, and power sources safely. The hands-on approach makes learning fun and effective.
Making A Basic Led Circuit
A basic LED circuit is the simplest electronic project to start with. It uses a battery, a resistor, an LED, and connecting wires. The resistor protects the LED from too much current. Connect the positive side of the battery to the resistor, then to the LED’s long leg. The LED’s short leg connects back to the battery’s negative side. This circuit lights the LED and shows how electricity flows.
Building A Simple Alarm
A simple alarm uses a buzzer, a battery, a switch, and wires. The switch controls the flow of electricity to the buzzer. When the switch is closed, the buzzer sounds an alarm. This project teaches how to control circuits with switches. It is useful for learning basic security devices or alerts.
Creating A Diy Flashlight
A DIY flashlight needs a battery, LED, resistor, switch, and a small box to hold parts. Connect the battery to the LED through the resistor and switch. The switch turns the flashlight on and off. Place all parts inside the box to protect them. This project helps understand portable light sources and power management.
Using Microcontrollers
Microcontrollers are the tiny brains behind many electronic gadgets you use every day. They make it possible to create smart devices at home without needing complex equipment. By learning how to use microcontrollers, you open the door to building your own custom gadgets that respond to the environment or perform tasks automatically.
Introduction To Arduino
Arduino is one of the most popular microcontroller platforms for beginners. It’s affordable, easy to use, and supported by a large community. The Arduino board connects to your computer, allowing you to upload simple code that controls electronic components like LEDs, sensors, and motors.
Starting with Arduino doesn’t require deep electronics knowledge. You can quickly set up a basic circuit and see how the board controls it. Have you ever wondered how a simple gadget like a motion sensor works? Arduino can help you understand and create such devices yourself.
Programming Basics
Programming an Arduino involves writing instructions in a language similar to C++. These instructions tell the microcontroller what to do step by step. The Arduino software makes writing and uploading code straightforward, even for beginners.
Common commands include turning components on or off, reading sensor values, and making decisions based on those values. For example, you can program your device to turn on a fan only if the temperature goes above a certain point. Wouldn’t it be useful to automate simple tasks like this at home?
Sample Projects For Starters
Starting with small projects boosts your confidence and skills. Here are some easy ideas you can try:
- LED Blink:Make an LED blink at different speeds to learn basic coding and wiring.
- Temperature Monitor:Use a temperature sensor to display room temperature on a screen.
- Automatic Night Light:Build a light that turns on automatically when it gets dark.
Each project teaches you something new about how microcontrollers interact with the physical world. What gadget would make your daily life easier if you could build it yourself?

Credit: www.youtube.com
Soldering Tips For Diy
Soldering is a key skill for making electronic gadgets at home. It connects components with metal joints that conduct electricity. Good soldering ensures strong, reliable circuits. Poor soldering can cause device failure or damage parts.
Understanding basic soldering tips helps beginners create neat, solid connections. Focus on the right tools and techniques. Avoid common mistakes that waste time and materials. This section offers practical advice to improve your DIY soldering.
Choosing The Right Soldering Iron
Select a soldering iron with adjustable temperature control. This allows you to work with different components safely. A 25 to 40-watt iron suits most electronics projects. A fine tip helps reach small parts easily. Avoid cheap irons that overheat or break quickly. Invest in a stand to hold the iron safely when not in use.
Soldering Techniques
- Heat the component lead and pad together before applying solder.
- Use just enough solder to cover the joint without blobs.
- Keep the iron tip clean by wiping it on a damp sponge.
- Allow the joint to cool naturally without moving the parts.
- Practice on scrap boards to build steady hands and confidence.
Common Mistakes To Avoid
- Applying solder directly to the iron tip instead of the joint.
- Using too much solder, causing short circuits.
- Moving components before the solder cools, resulting in cold joints.
- Not cleaning the tip, which reduces heat transfer.
- Forgetting to use safety gear like goggles or proper ventilation.
Repurposing Old Gadgets
Repurposing old gadgets is a smart way to save money and reduce waste. Instead of throwing away broken or outdated devices, you can give them new life. This approach helps you learn about electronics and create useful tools at home. Many parts inside old gadgets still work perfectly. With some care and patience, you can extract and reuse them for new projects.
Extracting Useful Parts
Start by carefully opening old devices. Look for parts like batteries, screens, motors, and circuit boards. Use basic tools like screwdrivers and pliers. Handle components gently to avoid damage. Label each part for easy identification later. Keep small screws and connectors in a container. This step builds your collection of useful electronics pieces.
Recycling Components
Sort components by type and condition. Test parts like LEDs, resistors, and capacitors with simple tools. Discard broken or unsafe items responsibly. Store reusable parts in organized boxes or drawers. Group similar items together for quick access. This system helps you find components fast. It also keeps your workspace neat and safe.
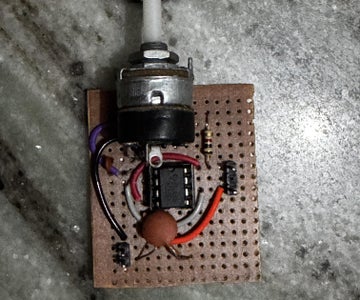
Creating New Devices
Combine parts from different gadgets to make new tools. For example, use an old motor and battery to build a small fan. Connect LEDs and switches to create custom lights. Use circuit boards to control your projects. Start with simple designs and improve them step by step. Experimenting helps you understand how electronics work.

Credit: www.instructables.com
Troubleshooting Common Issues
Troubleshooting common issues is a key skill in making electronic gadgets at home. Problems can arise from simple mistakes or faulty parts. Knowing how to find and fix these issues saves time and frustration.
Start by carefully checking every connection and component. Small errors often cause the biggest problems. Testing parts helps identify what works and what does not. Many issues have easy fixes once you know where to look.
Identifying Faulty Connections
Loose or wrong connections cause many gadget failures. Look closely at wires and solder joints. Check if any wires are disconnected or touching where they should not. Use a magnifying glass for a better view.
Look for:
- Broken wires
- Cold solder joints (dull or cracked)
- Incorrect wiring paths
Reattach or resolder any suspicious connections. Make sure each wire is secure and goes to the right place. Good connections improve power flow and signal strength.
Testing Components
Test each part to see if it works right. Use a multimeter to check resistors, capacitors, and diodes. Measure voltage at different points to find where power stops.
Simple tests include:
- Resistance check for broken wires or resistors
- Continuity test for connected paths
- Voltage check to confirm power supply
Replace any component that shows wrong readings. This helps ensure the gadget functions as designed.
Fixing Simple Problems
Many fixes are quick and easy. Clean dirty contacts with rubbing alcohol and a soft brush. Tighten loose screws or clips. Reposition wires to avoid shorts.
Common simple fixes:
- Resolder joints that look dull or cracked
- Swap out blown fuses
- Adjust switches or buttons stuck in one position
Small fixes can make a big difference. Test the gadget after each repair to see if it works better.
Credit: www.instructables.com
Frequently Asked Questions
What Basic Tools Are Needed To Make Gadgets At Home?
To start making gadgets, you need a soldering iron, multimeter, wire cutters, and a breadboard. These tools help assemble and test circuits easily. Having a small screwdriver set is also useful for device casing and adjustments.
How Can Beginners Learn To Build Electronic Gadgets?
Beginners should start with simple kits and online tutorials. Practice basic circuits and follow step-by-step guides. Joining maker communities and watching videos improves skills and confidence in building gadgets at home.
What Common Components Are Used In Homemade Electronics?
Common components include resistors, capacitors, LEDs, transistors, and microcontrollers. These parts form the foundation of most electronic projects. Buying a starter kit with these essentials saves time and simplifies learning.
How To Ensure Safety While Making Gadgets At Home?
Always work in a well-ventilated area and use safety goggles. Avoid touching live circuits and unplug devices when assembling. Follow instructions carefully to prevent electrical shocks and component damage.
Conclusion
Making electronic gadgets at home can be simple and fun. Start with basic tools and clear instructions. Take small steps and learn as you go. Practice helps build confidence and skill. Remember, patience and curiosity lead to success. Creating gadgets yourself saves money and boosts creativity.
Enjoy the process and keep experimenting. Soon, you’ll make cool devices on your own. Keep trying, and don’t give up. Making things at home brings great satisfaction.
Leave a Reply