Are you fascinated by the inner workings of gadgets and eager to create your own electronic devices from the comfort of your home? Imagine the thrill of building something unique with your own hands, knowing it’s something you’ve crafted from scratch.
You don’t need to be a tech wizard to dive into the world of homemade electronics. Whether you want to build a simple circuit or a more complex device, this guide will walk you through the essentials, turning your curiosity into reality.
Discover the secrets to making electronics at home, and unlock a new hobby that’s as rewarding as it is exciting. Are you ready to unleash your creativity and innovation? Let’s get started!

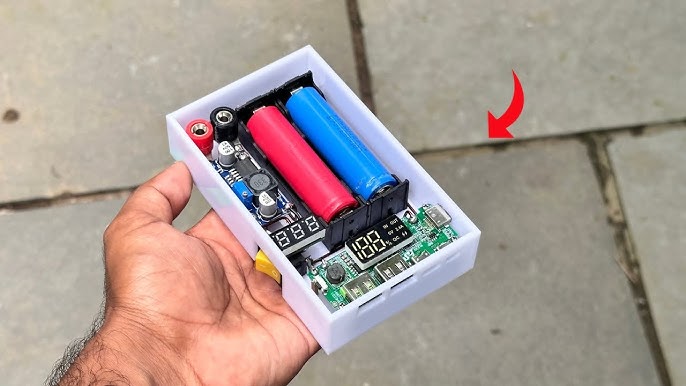
Credit: www.youtube.com
Basic Tools And Materials
Starting your journey in making electronics at home begins with gathering the right tools and materials. Having the essentials on hand not only makes the process smoother but also helps you understand the basics deeply. You might be surprised how a few simple tools can open up a world of creative projects right at your desk.
Essential Tools For Diy Electronics
Your toolkit shapes your experience in building electronics. A basic set should include:
- Soldering iron:Vital for joining components with wires and circuit boards.
- Multimeter:Helps measure voltage, current, and resistance to troubleshoot circuits.
- Wire cutters and strippers:Essential for preparing wires and leads.
- Small screwdrivers:Useful for assembling and disassembling components.
- Breadboard:Allows you to prototype circuits without soldering.
- Tweezers:Handy for placing small components.
Think about how much time you’ve lost hunting for the right screwdriver or accidentally damaging a board without a proper soldering iron. Investing in these basics saves frustration and keeps you focused on your creation.
Common Components To Start With
Once your tools are ready, stock up on fundamental parts. These components form the building blocks of nearly every project:
- Resistors:Control the flow of electric current in a circuit.
- Capacitors:Store and release electrical energy.
- LEDs:Light up your projects and indicate status.
- Transistors:Act as switches or amplifiers.
- Diodes:Ensure current flows in one direction.
- Microcontrollers (e.g., Arduino):Serve as the brain for programmable projects.
Would a simple LED blinking circuit excite you? Starting small helps you understand how each component interacts without overwhelming you.
Safety Tips For Home Electronics
Handling electronics safely is crucial to prevent injury and damage. Always unplug devices before working on them and avoid touching live circuits.
Use safety glasses to protect your eyes from solder splashes or tiny flying parts. Work in a well-ventilated area to avoid inhaling fumes from soldering.
Have you ever experienced a shocking surprise while tinkering? Taking simple precautions protects you and your equipment, making your projects more enjoyable and stress-free.
Simple Circuit Projects
Simple circuit projects are a great way to start making electronics at home. They help you understand how electricity flows and how different components work together. These projects don’t require expensive tools or complicated parts, making them perfect for beginners.
Building A Basic Led Circuit
Creating a basic LED circuit is one of the easiest ways to see electronics in action. You only need a battery, an LED, a resistor, and some wires. Connect the resistor in series with the LED and the battery to prevent the LED from burning out.
Once connected, the LED will light up, showing that current is flowing. This simple setup teaches you about current control and polarity—LEDs only light up when connected the right way. Have you ever wondered why some devices have tiny lights that blink? This is the basic principle behind them.
Creating A Simple Switch
A switch lets you control the flow of electricity in a circuit, turning it on or off. You can make a simple switch using a paperclip or a small piece of metal. Attach it so it can touch two points in the circuit to close the loop and allow current to pass.
This project helps you grasp the concept of open and closed circuits. You’ll see how a small action can control an entire electronic system. What everyday devices do you use that rely on switches?
Making A Battery-powered Alarm
Building a battery-powered alarm combines your knowledge of circuits and switches. Use a buzzer, a battery, a switch, and wires. When you close the switch, the buzzer sounds, alerting you to an event.
This project shows how electronics can be used for safety and security. You can customize it with different sensors or triggers to make it more useful. Imagine creating your own door alarm—how would you design it to suit your home?
Using Microcontrollers
Microcontrollers are small computers on a single chip. They control many electronic devices and projects. Using microcontrollers at home opens many possibilities. You can create smart gadgets, robots, and automated systems. They are affordable and easy to program. This makes them perfect for beginners and hobbyists. Learning to use microcontrollers builds a strong base in electronics and coding.
Introduction To Arduino
Arduino is one of the most popular microcontroller platforms. It is open-source and simple to use. The Arduino board connects to a computer via USB. It controls sensors, lights, motors, and more. The Arduino software allows easy programming with simple commands. Many models exist, like Arduino Uno, Nano, and Mega. Each model suits different project sizes and needs.
Basic Arduino Projects
Start with simple projects to learn Arduino basics. Common beginner projects include:
- Blinking an LED light
- Controlling a buzzer sound
- Reading data from a temperature sensor
- Making a simple traffic light system
- Building a basic robot car
These projects teach wiring, coding, and using components. They prepare you for more complex builds.
Programming Tips For Beginners
Write clear and simple code for easy debugging. Break your code into small parts. Test each part before combining. Use comments to explain what each code section does. This helps track your progress and fix errors. Learn to use loops and conditional statements well. They control how your program runs. Use online resources and forums to find help and examples.
Soldering Techniques
Soldering is a fundamental skill for anyone interested in making electronics at home. It connects components to circuit boards, ensuring your device works reliably. Mastering soldering techniques not only improves your projects but also saves time and frustration.
Choosing The Right Soldering Iron
Your choice of soldering iron impacts the quality of your work significantly. Look for an iron with adjustable temperature control to match different components and solder types. A tip size of around 1-2 mm works well for most electronics projects, giving you precision without overheating.
Consider an iron with quick heat-up time and a comfortable grip for longer sessions. I once tried a cheap iron without temperature control, and it damaged several components before I switched. Investing in a quality soldering iron pays off quickly in better results and less waste.
Step-by-step Soldering Guide
- Prepare your workspace with good lighting and ventilation to avoid fumes.
- Clean the soldering iron tip with a damp sponge before use for better heat transfer.
- Heat the joint by touching the tip to both the component lead and the pad simultaneously.
- Feed solder into the heated joint, not directly onto the iron tip, allowing it to flow smoothly.
- Remove the solder, then the iron, and let the joint cool without moving the components.
- Check the solder joint; it should look shiny and cone-shaped, not dull or blob-like.
Have you noticed how a clean tip and steady hand make a huge difference? Taking your time with these steps builds strong, reliable connections.
Common Soldering Mistakes To Avoid
One frequent mistake is using too much solder, which can cause shorts between pins. Another is not heating the joint long enough, resulting in a weak connection that may fail later. Avoid moving components while the solder cools; this can create cracks or cold joints.
Also, don’t neglect tip maintenance—oxidized tips reduce heat transfer and make soldering harder. How often do you clean your soldering iron tip during a session? Regular cleaning keeps your work neat and efficient.
Troubleshooting And Testing
Troubleshooting and testing are vital parts of making electronics at home. Without these steps, even a well-planned circuit can fail to work. Learning how to identify and fix issues early saves you time and frustration, and improves your skills as you go.
Using A Multimeter Effectively
A multimeter is your best friend when testing circuits. It measures voltage, current, and resistance—essential for spotting where things might be going wrong.
Start by checking the power supply. Ensure the voltage matches what your circuit needs. Then, test continuity to confirm connections are solid and there are no breaks in the circuit.
Don’t rush through measurements. Take your time to understand what each reading means. This will help you catch subtle problems that could cause bigger failures later on.
Identifying Common Circuit Problems
Look for obvious signs like burnt components, loose wires, or cold solder joints. These are often the root causes of circuit failures.
Another common issue is incorrect component placement. Double-check your circuit against the schematic to verify each part is in the right spot.
Ask yourself: does the circuit behave differently than expected? For example, if an LED doesn’t light up, is it the LED, the resistor, or the power supply? Narrowing down the cause is key.
Fixing Simple Errors
Many problems come down to small mistakes you can fix quickly. Resoldering a joint or repositioning a wire often solves connectivity issues.
If a component is damaged, replace it with an identical one. Avoid mixing parts with different ratings, as this can lead to further trouble.
Test your fixes step-by-step. After each change, power the circuit to see if the problem is solved. This keeps you from making multiple changes at once and losing track of what works.
Credit: www.youtube.com
Project Ideas To Try
Trying out simple electronics projects at home is a great way to learn and have fun. Each project can teach you something new about circuits and components. You’ll find that building these devices yourself makes the concepts stick better than just reading about them.
Diy Flashlight
Making a flashlight from scratch is a rewarding project that requires only a few parts. You’ll need a battery, an LED, a resistor, and a switch. Connecting these parts correctly will power the LED and light up your homemade flashlight.
Working on this project helps you understand how current flows and how to control it safely. You can experiment by trying different LED colors or adding a casing to protect your circuit. What would happen if you change the resistor value?
Homemade Sound Sensor
A sound sensor detects noise and can trigger other devices. To build one, use a microphone, an amplifier circuit, and a transistor. This setup lets you convert sound waves into an electrical signal.
Once you have a working sensor, you can connect it to an alarm or a light that turns on with sound. Testing your sensor in different environments will show how sensitive it really is. Have you ever thought about how microphones in your phone work?
Simple Electronic Game
Creating a basic electronic game is both challenging and entertaining. Use LEDs, buttons, and a simple microcontroller or timer circuit to build it. For example, you can make a “reaction time” game where players press a button when an LED lights up.
This project teaches you about timing circuits and user input. You can customize it by adding more LEDs or sounds to increase difficulty. How fast can you improve your reaction time with practice?
Expanding Your Skills
Expanding your skills in making electronics at home transforms simple projects into exciting challenges. It pushes you beyond basic circuits and encourages creative problem-solving. As you grow, you’ll find new ways to innovate and build more complex devices that truly work.
Learning From Online Resources
You can access a vast amount of tutorials, videos, and forums online to boost your electronics knowledge. Websites like YouTube, Instructables, and specialized electronics blogs offer step-by-step guides for all skill levels.
Try following along with a video project while pausing to experiment on your own. This hands-on approach helps you understand concepts better and makes learning more interactive.
Joining Maker Communities
Connecting with others who share your passion can accelerate your learning. Maker communities, both online and local, provide support, advice, and inspiration.
Participate in forums or attend meetups to share your projects and get feedback. Have you ever noticed how a quick tip from a fellow maker can save hours of troubleshooting?
Planning Advanced Projects
Challenge yourself by designing projects that combine multiple skills, such as programming microcontrollers with hardware assembly. Start by outlining what you want to build and break it down into smaller tasks.
Use tools like flowcharts or project management apps to organize your steps. Tackling advanced projects teaches you project planning, patience, and technical skills all at once.

Credit: www.youtube.com
Frequently Asked Questions
What Basic Tools Are Needed To Make Electronics At Home?
To make electronics at home, essential tools include a soldering iron, multimeter, wire cutters, and screwdrivers. These tools help in assembling and testing circuits safely and effectively.
How Can Beginners Start Making Simple Electronic Projects?
Beginners should start with basic kits like LED circuits or simple sensors. These projects build foundational skills and confidence in handling components and circuits.
Where To Find Electronic Components For Home Projects?
Electronic components can be found online on sites like Amazon, eBay, or specialized electronics stores. Local hobby shops also offer a variety of parts for DIY projects.
What Safety Precautions Are Essential When Making Electronics?
Always work in a well-ventilated area, wear safety glasses, and avoid touching live circuits. Use insulated tools and follow proper handling of soldering equipment to prevent accidents.
Conclusion
Making electronics at home is fun and rewarding. Start with simple projects to build your skills. Use basic tools and follow clear instructions carefully. Practice helps you learn and avoid mistakes. Stay patient and keep trying different ideas. Soon, you will create useful and exciting devices.
Enjoy the process and share your work with friends. Home electronics can be a great hobby and learning experience. Keep exploring and building new things step by step.
Leave a Reply