Are you struggling to keep your maintenance planning smooth and up-to-date? Pushing system data to the Maintenance Planner can be a game-changer for your workflow.
When you get this right, you save time, avoid costly errors, and make smarter decisions. You will learn exactly how to push your system data efficiently and effortlessly. Keep reading, and by the end, you’ll have the clear steps you need to take control of your maintenance planning like a pro.
Credit: www.ibsolution.com
Preparation Steps
Prepare your system by checking all relevant data is accurate and up to date. Ensure proper connectivity and permissions are set before pushing data to Maintenance Planner. Verify system settings to avoid errors during the transfer process.
Preparing to push system data to the Maintenance Planner is crucial. It ensures a smooth and error-free process. Proper preparation minimizes risks and safeguards your data.Check System Requirements
Ensure your system meets all necessary requirements. This step prevents compatibility issues. Verify software versions align with Maintenance Planner needs. Check hardware specifications too. Sufficient resources are vital for smooth data transfer.Backup System Data
Backup your system data before starting. This step protects against data loss. Use reliable backup methods. Ensure backup files are easily accessible. Test your backup to confirm its integrity. This step provides peace of mind.Gather Necessary Credentials
Collect all needed credentials beforehand. This includes system admin access. Ensure you have login details for related platforms. Securely store these credentials. Verify their validity. Having credentials ready saves time and avoids delays.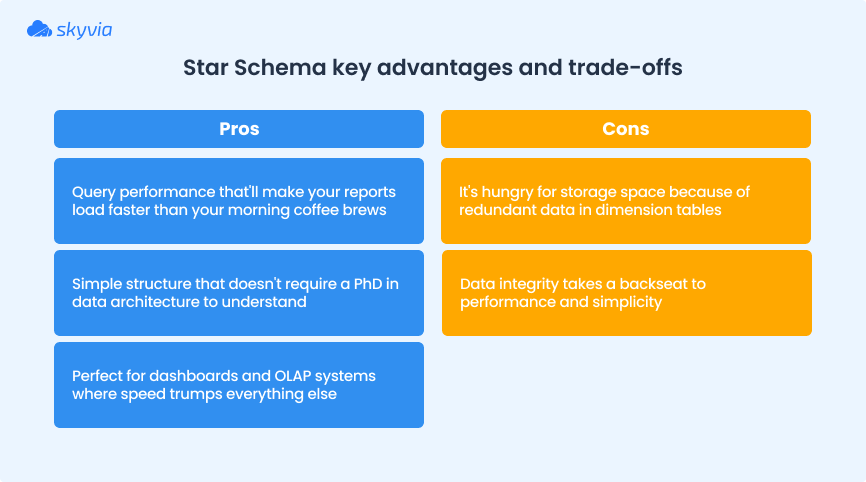
Credit: blog.skyvia.com
Data Export Process
The Data Export Process is a crucial step when pushing system data to Maintenance Planner. It ensures that the right information is gathered and formatted correctly, making the maintenance planning efficient and error-free. Understanding how to navigate this process saves time and avoids common pitfalls that can disrupt your workflow.
Accessing The Export Tool
Start by logging into your system with the appropriate permissions. The export tool is usually located under the system administration or data management section. If you can’t find it, check your user role—sometimes access is limited based on your profile.
Once you open the export tool, you’ll see a dashboard or menu guiding you through the export options. Take a moment to familiarize yourself with the interface. A clean, simple design often hides powerful features that can make your job easier.
Selecting Relevant Data
Choosing the right data to export is key. You don’t want to overload Maintenance Planner with unnecessary information, nor miss critical details. Focus on data related to equipment, configurations, and system logs that affect maintenance schedules.
Ask yourself what information Maintenance Planner needs to create accurate maintenance plans. Filter data by date, system type, or status to narrow down your selection. This step not only speeds up the export but also keeps your data clean and manageable.
Configuring Export Settings
Before you start the export, adjust the settings to match your needs. Decide on the file format—CSV, XML, or others—depending on what Maintenance Planner supports. Also, check if you need to include metadata or additional attributes.
Pay attention to options like data compression or encryption if you’re handling sensitive information. A small tweak here can improve security and reduce file size. Have you explored all the settings available? Sometimes hidden options can enhance your export process significantly.
Uploading Data To Maintenance Planner
Uploading your system data to Maintenance Planner is a crucial step to ensure accurate maintenance scheduling and system updates. This process helps you keep your system information current, enabling better planning and resource allocation. Understanding how to upload data efficiently can save you time and prevent errors down the line.
Logging Into Maintenance Planner
Start by accessing the Maintenance Planner through your SAP portal. Use your credentials to log in securely. If you experience login issues, double-check your username and password or contact your system administrator.
Once logged in, you’ll see the main dashboard. This is where you can manage all your system maintenance tasks. Remember, keeping your login details private protects your system’s data integrity.
Navigating To Data Upload Section
After logging in, look for the menu option labeled “Data Upload” or “System Data.” The exact wording might differ slightly depending on your version, but it’s usually easy to spot. Clicking this will take you to the upload interface.
This section is designed to be user-friendly. You’ll find clear prompts guiding you through the upload process. Take a moment to familiarize yourself with the available options before proceeding.
Uploading And Validating Files
Prepare your data files in the required format—typically XML or CSV. Before uploading, verify that your files contain accurate and complete information. Poor data quality can cause validation errors or incorrect maintenance plans.
Use the upload button to select your files and start the process. Maintenance Planner will automatically check your data for errors. If issues arise, detailed messages will help you identify and fix them quickly.
Once your files pass validation, confirm the upload to update your system data. Have you ever encountered an unexpected validation error? Taking the time to review your files before uploading can prevent frustrating delays.
Troubleshooting Common Issues
Encountering issues while pushing system data to the Maintenance Planner can disrupt your workflow. Common problems often arise during data export, upload, or verification stages. Identifying and fixing these issues quickly keeps your maintenance planning on track.
Handling Export Errors
Export errors may happen due to incorrect system settings or missing data. Check system configurations and ensure all required fields are filled. Look for error messages during export and note their details.
- Restart the export process after correcting settings.
- Clear temporary files that might block export.
- Verify user permissions for data export.
Resolving Upload Failures
Upload failures often occur because of network problems or file format issues. Confirm your internet connection is stable before uploading files. Ensure files comply with the Maintenance Planner format requirements.
- Rename files to avoid special characters.
- Reduce file size if it exceeds limits.
- Use supported browsers and update them regularly.
Verifying Data Integrity
Data integrity checks prevent errors during planning. Verify data completeness and consistency before pushing it to the planner. Use built-in validation tools to scan for anomalies.
| Check | Action |
|---|---|
| Missing fields | Fill in all required information |
| Data format | Match format guidelines |
| Duplicate entries | Remove or merge duplicates |
Best Practices
Getting your system data pushed accurately to the Maintenance Planner is crucial for seamless maintenance operations. Best practices ensure this process runs smoothly and avoids common pitfalls. Let’s look at some key habits that can make your data push reliable and efficient.
Scheduling Regular Data Pushes
Consistency is key. Setting up a fixed schedule for data pushes helps you avoid last-minute rushes and errors. Depending on your system’s update frequency, daily or weekly pushes can keep your Maintenance Planner current without overwhelming your resources.
Automate notifications or reminders to check if data transfers complete successfully. This way, you catch issues early before they affect maintenance planning. Have you ever faced delays because the latest data wasn’t available? Regular schedules prevent that problem.
Maintaining System Compatibility
System updates can break data push processes if you’re not careful. Always check compatibility between your source system and the Maintenance Planner before pushing data. Keep your software versions aligned and test the connection after any upgrade.
Use a staging environment to run trial pushes before sending data live. This helps you spot format or version mismatches without risking your production data. Think about how much downtime you could save by catching these issues early.
Documenting The Process
Clear documentation is your safety net. Write down each step of the data push process, including system settings, schedules, and troubleshooting tips. This keeps your team aligned and speeds up onboarding new members.
Include screenshots or logs to make the instructions easy to follow. When unexpected problems arise, well-maintained documentation lets you resolve them faster. Ask yourself: if you were out sick tomorrow, could someone else run the data push without your help?

Credit: medium.com
Frequently Asked Questions
How Do I Push System Data To Maintenance Planner?
To push system data, use the SAP Solution Manager. Navigate to the Maintenance Planner tool and upload the system export file. This process ensures accurate system information is available for planning maintenance activities.
What File Format Is Required For System Data Upload?
Maintenance Planner requires system data in XML format. Export this file from your SAP system using the Software Update Manager (SUM) or System Data Collector. The XML format ensures compatibility and smooth data integration.
Can I Automate Pushing Data To Maintenance Planner?
Yes, automation is possible using SAP Solution Manager’s scheduled jobs. Configure regular exports of system data and automatic uploads to Maintenance Planner. This saves time and keeps system data up-to-date without manual intervention.
Why Is Pushing System Data To Maintenance Planner Important?
Pushing accurate system data helps plan software updates and patches effectively. It reduces errors and downtime by providing precise system details. This ensures smooth maintenance and compliance with SAP recommendations.
Conclusion
Pushing system data to Maintenance Planner helps keep your systems updated. It makes planning maintenance easier and more efficient. Follow the right steps to avoid errors and save time. Regular updates improve system performance and reduce downtime. Use this process to keep your maintenance tasks on track.
Simple, clear actions lead to better results. Keep your data clean and organized for smooth operation. This practice supports better decision-making and planning. Stay consistent to maintain system health and reliability.
Leave a Reply