Are you struggling to figure out if your electronic components are working properly? Testing them with a multimeter is easier than you might think, and it can save you time and money.
Whether you’re fixing a gadget or building your own project, knowing how to use a multimeter will give you confidence and control. In this guide, you’ll learn simple steps to test different components quickly and accurately. Keep reading, and you’ll discover tips that make testing straightforward—even if you’re a beginner.
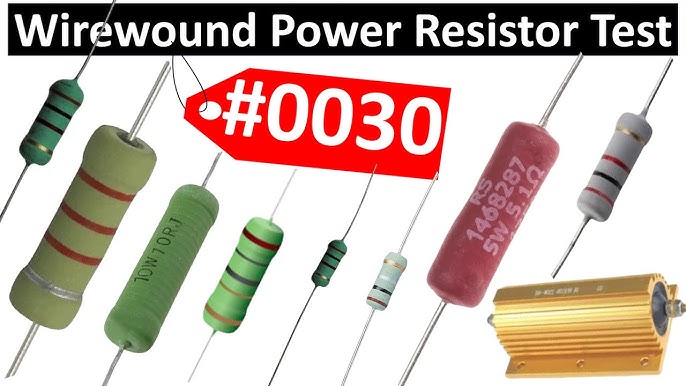
Your next successful repair or build starts here.

Credit: www.viasion.com
Choosing The Right Multimeter
Choosing the right multimeter helps you test electronic parts accurately and safely. Look for features like easy reading, multiple functions, and durability. A good multimeter makes checking resistors, capacitors, and other components simple and fast.
Choosing the Right Multimeter Selecting the right multimeter is essential for testing electronic components. A suitable multimeter ensures accurate readings and simplifies troubleshooting. Below are key aspects to consider when selecting a multimeter.Types Of Multimeters
Multimeters come in two main types: analog and digital. Analog multimeters display readings using a needle on a scale. They are ideal for monitoring slow changes in readings. Digital multimeters show readings on a digital display, offering more precision. Digital models are popular due to their accuracy and ease of use.Key Features To Look For
Consider features that match your testing needs. Essential features include:- Auto-ranging capability for automatic selection of measurement range.
- A clear display with a backlight for easy reading in low light.
- Continuity test function to check circuit connections.
- Resistance, voltage, and current measurement options.
- Durability and robust build quality for long-term use.
Budget Vs. Professional Models
Budget multimeters are great for beginners and basic tasks. They offer essential features at a lower cost. Professional models provide advanced features and higher accuracy. They are suitable for complex tasks and frequent use. Consider your skill level and application needs when choosing. Investing in a quality multimeter can enhance your testing experience.Multimeter Basics
Understanding the basics of a multimeter is the first step to confidently testing electronic components. This handy tool combines several measurement functions in one device, making it essential for troubleshooting circuits and verifying parts. Before diving into testing, knowing your multimeter’s parts, how to set it up correctly, and how to stay safe is crucial.
Multimeter Parts And Functions
Your multimeter has several key parts, each designed for specific tasks. The display shows measurement readings clearly, usually in digital form for ease of use.
- Dial/Selector switch:Lets you choose the measurement type—voltage, current, resistance, and more.
- Probes:The red probe is typically positive, and the black is negative or ground.
- Ports:Where you plug in the probes; common ones include COM (common ground) and VΩmA for voltage, resistance, and small current measurements.
Each function on the dial corresponds to a different type of measurement. For example, the “V” with a straight line measures DC voltage, while “V” with a squiggly line measures AC voltage. Getting familiar with these symbols saves time and prevents errors.
Setting Up Your Multimeter
Before measuring, ensure your multimeter is set up properly. Insert the black probe into the COM port and the red probe into the correct port depending on what you’re measuring.
Turn the dial to the right function and range. If unsure, start with the highest range to avoid damaging the meter. For example, if measuring a small resistor, start with the highest resistance setting and then adjust downward for accuracy.
Testing a battery? Set the dial to DC voltage. Testing a resistor? Choose the resistance mode. These small adjustments make a big difference in getting accurate readings.
Safety Precautions
Using a multimeter incorrectly can be risky. Always check the condition of your probes and wires before use—damaged insulation or exposed wires can cause shocks or short circuits.
Never touch the metal tips of the probes while testing. Keep your fingers behind the probe guards to avoid accidental contact. If you are testing high voltages, wear insulated gloves and work on a non-conductive surface.
Have you ever been surprised by a reading because the multimeter was set incorrectly? Double-check your settings every time to avoid mistakes that could harm you or damage the component.
Testing Resistors
Testing resistors with a multimeter is a fundamental skill that helps you understand if the component functions properly or needs replacement. Resistors control the flow of electrical current, so accurate testing ensures your circuits work as intended. With a few simple steps and your multimeter, you can quickly check the resistance and spot any issues.
Measuring Resistance
Start by turning off power to the circuit and removing the resistor if possible. Set your multimeter to the resistance mode, often marked with the Greek letter omega (Ω).
Place the probes on each end of the resistor. It doesn’t matter which probe goes where because resistance is not directional. The multimeter will display the resistance value in ohms.
Hold the probes steady and wait for the reading to stabilize. If your resistor is part of a circuit, ensure other components don’t interfere by isolating it first.
Interpreting Results
Compare the reading to the resistor’s color code or specified value. Resistors have tolerance ranges, typically ±5% or ±10%, so small differences are normal.
If the reading is significantly higher or shows as open (infinite resistance), the resistor is likely damaged or burnt out. A reading near zero means it might be shorted, which is also a problem.
Ask yourself: Does the value fit within the acceptable tolerance? This simple check can save you hours of troubleshooting faulty electronics.
Common Issues
One common mistake is testing resistors while still soldered on a board. Other components can affect the reading and give false results.
Another issue is dirty or oxidized resistor leads, which can cause inconsistent readings. Cleaning the leads with a bit of sandpaper or a contact cleaner helps.
Also, make sure your multimeter’s batteries are fresh. Low battery power can lead to inaccurate measurements and unnecessary frustration.
Checking Capacitors
Checking capacitors is a key step in testing electronic components. Capacitors store electrical energy and help regulate voltage. Faulty capacitors cause circuits to fail or work poorly. Testing capacitors ensures they work properly before use or repair.
Using Capacitance Mode
A multimeter with capacitance mode measures capacitor value directly. Set the multimeter to the capacitance symbol (usually “CAP” or “F”). Connect the probes to capacitor terminals. The multimeter shows the capacitance value in microfarads (µF).
Compare the reading to the capacitor’s rated value printed on its body. Small differences are normal. Large deviations or zero reading indicate a problem.
Detecting Faulty Capacitors
- Look for bulging, leaking, or discoloration on the capacitor body.
- Test with capacitance mode for incorrect or no reading.
- Use resistance mode to check for short or open circuits. A shorted capacitor shows very low resistance.
- Check ESR (Equivalent Series Resistance) with a special meter for detailed faults.
Tips For Accurate Testing
- Discharge the capacitor fully before testing to avoid damage.
- Remove the capacitor from the circuit for accurate results.
- Use fresh batteries in the multimeter for stable readings.
- Test in a dry environment to avoid false readings from moisture.
Measuring Diodes
Measuring diodes with a multimeter is a simple way to check if they work properly. Diodes control the flow of electricity in one direction. Testing them helps find faults in circuits quickly. This section explains how to test diodes using a multimeter.
Diode Test Mode Explained
The diode test mode on a multimeter measures voltage drop across the diode. It sends a small current through the diode and reads the voltage. A healthy diode shows a voltage drop between 0.5 and 0.8 volts.
If the reading is very high or shows “OL,” the diode may be open or damaged. A reading near zero means the diode is shorted. This mode is more accurate than resistance mode for testing diodes.
Identifying Forward And Reverse Bias
Diodes allow current to flow in one direction only. Forward bias means the positive lead of the multimeter is on the diode’s anode. Reverse bias means the positive lead is on the cathode.
- In forward bias, the multimeter shows a voltage drop.
- In reverse bias, the multimeter shows “OL” or no conduction.
This difference confirms the diode’s correct operation. Swap the probes to check both directions easily.
Troubleshooting Diode Failures
Common diode failures include short circuits and open circuits. A shorted diode shows near zero voltage in both directions. An open diode shows “OL” in both directions.
Check the diode in circuit or remove it for accurate tests. Replace faulty diodes to restore circuit function. Regular testing prevents bigger electrical problems later.

Credit: www.viasion.com
Testing Transistors
Testing transistors with a multimeter helps verify their condition quickly. Transistors control current flow in circuits. A faulty transistor can cause circuit failure. Using a multimeter ensures the transistor works properly before installation.
Using Diode Mode For Transistors
Set the multimeter to diode mode to test transistor junctions. Transistors have two junctions like two diodes. The multimeter measures voltage drop across these junctions.
- Connect the positive probe to the transistor’s base.
- Touch the negative probe to the emitter; note the reading.
- Move the negative probe to the collector; note the reading.
- Reverse probes and repeat measurements.
Good transistors show a voltage drop around 0.6 to 0.7 volts in one direction. No reading or very high reading means a bad junction.
Differentiating Npn And Pnp Types
NPN and PNP transistors differ in current direction and polarity. Identifying the type helps in correct testing and circuit placement.
- NPN transistors show a forward voltage drop when the positive probe is on the base.
- PNP transistors show a forward voltage drop when the negative probe is on the base.
Testing both types with diode mode reveals their polarity clearly. This step confirms transistor type before further testing.
Common Testing Methods
Besides diode mode, other common methods check transistor health.
- Resistance Test:Measure resistance between collector and emitter. It should be high in both directions.
- Gain Test:Some multimeters test transistor gain (hFE). Insert leads into correct sockets. Compare gain with datasheet values.
- Short Circuit Check:Check for shorts between all terminals. Any short means the transistor is faulty.
These tests combine to give a clear transistor condition. They help avoid damaged parts in circuits.
Checking Fuses And Switches
Checking fuses and switches is a key part of testing electronic components with a multimeter. These parts control the flow of electricity and protect circuits. A faulty fuse or switch can stop a device from working properly. Using a multimeter helps find problems quickly and safely.
Continuity Testing
Continuity testing checks if electricity flows through a fuse or switch. Set your multimeter to the continuity mode. Touch the probes to both ends of the fuse or switch. A beep or zero reading means the component is good. No sound or an infinite reading means it is broken.
Signs Of Faulty Components
- Burn marks or discoloration on the fuse or switch
- Physical damage like cracks or breaks
- Device does not turn on or suddenly stops working
- Multimeter shows no continuity during the test
Quick Troubleshooting Tips
- Always turn off power before testing fuses or switches
- Remove the fuse or switch from the circuit for accurate results
- Double-check multimeter settings before testing
- Replace any faulty fuse or switch with the exact type and rating
- Keep spare fuses and switches handy for quick fixes

Credit: www.youtube.com
Advanced Testing Techniques
Advanced testing techniques with a multimeter take your electronic troubleshooting skills to the next level. These methods help you understand complex components and circuits with more accuracy. You’ll learn not just if a part works, but how well it performs under real conditions.
Testing Inductors
Inductors can be tricky because they store energy in a magnetic field. Use the multimeter’s resistance mode to check if the coil inside is intact. A very low or zero resistance usually means a short, while infinite resistance means a broken coil.
For a deeper test, measure inductance if your multimeter supports it. Compare the reading to the component’s rated value. A big difference suggests damage or degradation.
Have you ever checked an inductor only to find it looked fine but failed in the circuit? Testing inductance directly can save you hours of guesswork.
Measuring Voltage And Current
Accurate voltage and current measurements are essential for diagnosing circuit problems. Set your multimeter to the appropriate range to avoid damaging the device or getting incorrect readings.
- Measure voltage by placing the probes across the component or section of the circuit.
- For current, connect the multimeter in series with the circuit so the current flows through the meter.
Always start with the highest range to protect your meter. Gradually move to lower ranges for precise readings. Have you noticed strange voltage drops or unexpected current draws in your projects? This approach can pinpoint those issues quickly.
Using Multimeter With Oscilloscope
Combining a multimeter with an oscilloscope gives you a powerful toolkit. While the multimeter provides steady DC measurements, the oscilloscope shows you waveforms and signal behavior over time.
Use the multimeter to verify basic values like voltage and resistance before diving into waveform analysis. This helps confirm if the issue is with the component or the signal quality.
Seeing a waveform change live on the oscilloscope while monitoring voltage on your multimeter can reveal subtle faults. Have you tried this combo to catch intermittent problems that a multimeter alone misses?
Troubleshooting Common Problems
Troubleshooting common problems when testing electronic components with a multimeter can be challenging. Unexpected readings, noisy signals, and deciding when to replace a component all require careful attention. Understanding these issues will save you time and frustration during your repair or testing process.
Interpreting Unexpected Readings
Have you ever measured a resistor and got a reading that made no sense? Unexpected readings often happen because of incorrect multimeter settings or poor probe contact. Double-check your meter’s mode—resistance, voltage, or continuity—and ensure the probes touch the right points firmly.
Sometimes, the component may be connected to other parts in the circuit, affecting your measurement. Try isolating the component by removing it or testing it out of the circuit. This simple step can clarify if the reading is truly off or just influenced by surrounding elements.
Dealing With Noisy Signals
Noisy signals can confuse your multimeter readings, especially when testing sensitive parts like capacitors or transistors. This noise often comes from electromagnetic interference or unstable connections. To minimize this, keep your test leads away from power cables and use shorter leads if possible.
Another trick is to hold the probes steadily and avoid touching metal parts with your fingers, which can introduce interference. If noise persists, switching to a multimeter with a higher resolution or built-in filtering might be necessary for more accurate results.
When To Replace Components
Knowing when to replace a component isn’t always straightforward. If a resistor’s value is significantly different from its rated specification, it’s a clear sign it needs replacement. But what about capacitors or diodes?
Look for open circuits or shorts during testing. For example, a capacitor showing infinite resistance in both directions might be open, while a diode that reads low resistance both ways is likely shorted. If you encounter these signs consistently, replacing the component is the safest choice to avoid future failures.
Maintaining Your Multimeter
Keeping your multimeter in good shape ensures accurate readings and extends its life. Regular care helps avoid errors and device failure. Simple steps make maintenance easy and effective.
Calibration Tips
Check your multimeter’s accuracy regularly. Use a known voltage source or calibration device. Compare readings and adjust settings if needed. Many models have a calibration mode or require professional service. Keep a log of calibration dates for reference.
Battery Care
Replace batteries before they run out. Weak batteries cause wrong readings and damage the device. Remove batteries if you don’t use the multimeter for a long time. Use high-quality batteries recommended by the manufacturer. Keep spare batteries handy for uninterrupted work.
Storage And Handling
Store your multimeter in a dry, cool place. Avoid exposure to dust, moisture, and extreme temperatures. Use a protective case to prevent physical damage. Handle the device gently and avoid dropping it. Clean the multimeter with a soft, dry cloth after use.
Frequently Asked Questions
How Do I Test A Resistor With A Multimeter?
To test a resistor, set the multimeter to the resistance mode (ohms). Place probes on both resistor leads. Read the displayed value and compare it to the resistor’s color code or labeled resistance to check if it’s within tolerance.
Can A Multimeter Test Capacitors Accurately?
Yes, some multimeters have a capacitance mode. Set the multimeter to that mode, connect probes to capacitor leads, and read the value. This helps verify if the capacitor holds the correct capacitance and if it’s functional or faulty.
How To Test A Diode Using A Multimeter?
Set the multimeter to diode mode. Place the red probe on the anode and black on the cathode. A forward voltage drop will appear on the display. Reverse probes; it should show no conduction. This confirms if the diode works properly.
What Multimeter Setting Is Used For Testing Transistors?
Use the diode or transistor test mode if available. Connect probes to the transistor leads according to type (NPN or PNP). The multimeter measures junction voltage drops to determine if the transistor is functional or damaged.
Conclusion
Testing electronic components with a multimeter is simple and useful. You can find faults quickly and save time and money. Just follow the steps carefully and stay safe. Practice makes you better at reading measurements. Keep your multimeter ready for any small repair or project.
Understanding your tools helps you work with confidence. Try testing different parts to gain experience. This skill helps both beginners and hobbyists alike. Start now and see how easy it can be.
Leave a Reply