
Are you tired of messy cords and cluttered spaces around your electronics? Choosing the right shelving for your DIY electronics setup can make all the difference.
The perfect shelves not only keep your devices organized but also protect them and improve airflow to prevent overheating. You’ll discover simple, practical shelving options that fit your needs and budget. By the end, you’ll know exactly how to create a clean, efficient space for your electronics—making your DIY projects easier and more enjoyable.
Keep reading to find the shelving solution that works best for you!
Credit: www.tosize.se
Choosing The Right Materials
Choosing the right materials for your DIY electronics shelving is crucial for both functionality and style. The materials you select affect the shelf’s durability, weight capacity, and overall look. Think about the types of electronics you have and how much weight the shelves need to support before making your choice.
Wood Options For Durability
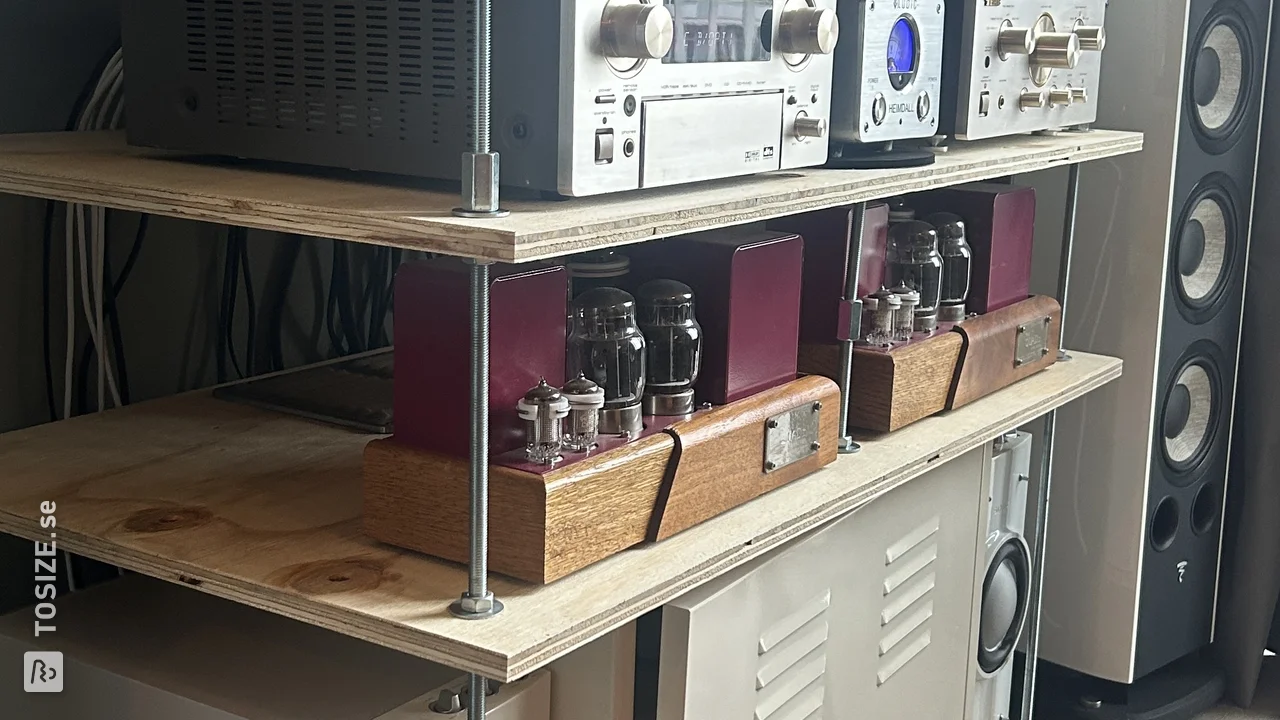
Wood is a popular choice because it offers a good balance of strength and aesthetic appeal. Hardwoods like oak, maple, and walnut provide excellent durability and can hold heavier electronics without sagging.
If you prefer something budget-friendly, pine or plywood can work well too, especially if you seal them properly to prevent warping. Wood shelves are also easy to customize with paint or stain, so you can match your room’s decor effortlessly.
Metal Shelves For Strength
Metal shelving is unbeatable when it comes to supporting heavy equipment like amplifiers or large gaming consoles. Steel or aluminum shelves resist bending and can often hold more weight than wood.
Metal tends to give a modern, industrial look, which might suit your workspace or entertainment area. You can find metal shelves with powder-coated finishes to prevent rust and add color.
Using Acrylic And Glass
Acrylic and glass shelves bring a sleek, minimalist vibe to your setup, perfect if you want your electronics to stand out. Acrylic is lighter and less fragile than glass, making it safer for a DIY project.
Glass shelves look elegant but require careful handling and sturdy brackets to support the weight. Both options show off your devices clearly, but consider dust and fingerprints as they can be more visible on these surfaces.
Designs For Small Spaces
Small spaces need smart shelving solutions for electronics. These designs save room and keep devices organized. They use walls, corners, and vertical space well. Each option blends function with style, perfect for compact areas.
Floating Shelves
Floating shelves mount directly on walls without visible supports. They create a clean, modern look. These shelves hold small electronics like speakers, routers, and chargers. They keep surfaces clear and free from clutter. Installation is simple, making them ideal for DIY projects.
Corner Shelving Units
Corners often go unused but offer great storage spots. Corner shelving units fit snugly into these spaces. They provide multiple levels for devices and accessories. These shelves maximize space without crowding the room. Perfect for placing gaming consoles or media players.
Stackable Modular Systems
Stackable modular shelves allow customization and flexibility. You can add or remove units as needed. These systems adapt to changing electronic setups easily. They fit well in narrow areas and can rise vertically. Ideal for organizing gadgets, cables, and small tools efficiently.
Customizing For Electronics
Customizing shelving for electronics enhances both functionality and appearance. Electronics need specific care to stay safe and work well. Tailoring shelves to meet these needs makes your setup neat and efficient.
Cable Management Solutions
Keeping cables organized prevents tangles and damage. Use built-in cable channels or clips on shelves. Holes in the back panel help route wires cleanly. Velcro straps or zip ties bundle cables together. This setup reduces clutter and makes devices easy to access.
Ventilation Considerations
Electronics produce heat and need air flow to stay cool. Leave space around devices for proper ventilation. Use shelves with open backs or sides to improve air circulation. Avoid stacking devices too close to each other. Cooling fans can be added if heat builds up.
Adjustable Shelf Heights
Electronics come in different sizes and shapes. Adjustable shelves let you change the space between levels. This flexibility fits larger items like gaming consoles or speakers. It also keeps smaller devices safe and stable. Easy adjustments help you update your setup as needed.

Credit: www.reddit.com
Tools And Techniques
Creating your own shelving for electronics requires the right tools and techniques to ensure a sturdy and clean finish. Knowing what tools to have on hand and how to use them can save you time and frustration. Let’s break down what you need and how to get the best results.
Basic Diy Tools Needed
Start with a reliable measuring tape and a pencil to mark your cuts accurately. A power drill is essential for drilling holes and driving screws quickly and efficiently.
You’ll also need a saw—either a handsaw for small projects or a circular saw for larger cuts. Sandpaper or a sanding block helps smooth rough edges after cutting. Finally, clamps are handy to hold pieces steady during assembly.
Have you checked if your drill bits match the screws you plan to use? Using the right size can make a big difference in how secure your shelves turn out.
Cutting And Assembly Tips
Measure twice and cut once is more than a saying—it’s a rule to avoid costly mistakes. Use a straight edge or guide to keep your cuts clean and straight.
When assembling, pre-drill holes to prevent wood from splitting, especially near edges. Tighten screws evenly to avoid warping the wood.
Think about how the electronics will fit on the shelves. Should you add extra support in the middle for heavier items? Planning ahead will save you from sagging shelves later.
Finishing And Painting
After sanding, wipe down the surfaces to remove dust before applying paint or finish. Choose paint that suits the environment—matte finishes hide fingerprints better, while glossy finishes are easier to clean.
Apply thin, even coats and let each layer dry completely before adding the next. This approach gives a smoother finish and reduces drips.
Consider sealing your shelves with a clear coat to protect against scratches and spills, especially if your electronics generate heat. How long do you want your shelves to last without needing touch-ups?
Creative Space-saving Ideas
Creative space-saving shelving ideas help keep your electronics organized and accessible. These ideas save room and reduce clutter in any workspace. They also make it easier to charge and store devices without taking up desk space.
Under-desk Shelving
Under-desk shelving uses the space below your work surface. It keeps electronics off the desk but close by. You can mount small shelves or baskets under your desk. This setup holds routers, external drives, and power strips.
It frees up desk space for more important tasks. It also hides cables and devices from plain sight. Easy to install and perfect for small rooms.
Wall-mounted Charging Stations
Wall-mounted charging stations combine storage and power access. They keep devices like phones and tablets in one spot. Mounting on the wall clears your desk and prevents tangled cords.
These stations often include slots or shelves for multiple devices. They make charging neat and efficient. Choose models with built-in cable management for a cleaner look.
Hidden Storage Compartments
Hidden storage compartments offer secret spaces for electronics. These compartments can be inside desks, behind panels, or within furniture. They keep devices safe and out of sight.
Great for protecting valuable gadgets from dust or damage. They also reduce visual clutter. Ideal for maintaining a clean, minimalist workspace.
Safety And Stability
Safety and stability are crucial when building shelving for electronics. Poorly designed shelves can lead to accidents or damage. Proper planning ensures that shelves hold devices securely. This section covers key points to keep your electronics safe.
Weight Capacity Guidelines
Each shelf has a limit on how much weight it can hold. Check the manufacturer’s weight rating before use. Avoid overloading shelves to prevent bending or collapse. Spread out heavy items evenly across the shelf. Consider thicker materials for heavier electronics like gaming consoles or speakers.
Anchoring Shelves Securely
Secure shelves to the wall to stop tipping or falling. Use strong brackets or wall anchors suitable for your wall type. Studs provide the best support for heavy shelves. Use a level to keep shelves straight and balanced. Tighten screws firmly but avoid damaging the wall.
Protecting Electronics From Damage
Place soft padding or rubber mats on shelves to reduce scratches. Leave space around devices for airflow to prevent overheating. Avoid direct sunlight to protect screens and plastics. Use cable organizers to keep cords neat and prevent tripping hazards. Clean shelves regularly to reduce dust buildup on devices.

Credit: mylifeonkayderosscreek.com
Frequently Asked Questions
What Shelving Materials Are Best For Electronics Diy?
Wood and metal are ideal materials for electronics shelving. Wood provides good insulation and aesthetics. Metal offers durability and heat dissipation. Choose based on weight capacity and ventilation needs. Both materials support secure mounting and cable management for DIY projects.
How To Ensure Proper Ventilation In Electronics Shelving?
Leave space between shelves for airflow. Use perforated or slatted shelves to improve ventilation. Avoid enclosing electronics tightly to prevent overheating. Adding small fans or vents can enhance cooling. Proper ventilation extends device lifespan and maintains performance.
What Weight Capacity Should Electronics Shelving Support?
Shelving must support the combined weight of your devices. Calculate total weight before choosing shelves. Heavy-duty metal or reinforced wood shelves suit heavier equipment. Ensure brackets and wall mounts match the weight capacity. Safety and stability are crucial for electronics shelving.
Can Diy Shelving Protect Electronics From Dust?
Yes, using closed cabinets or glass doors can reduce dust. Open shelves need regular cleaning to prevent dust buildup. Adding dust filters or covers helps protect sensitive electronics. Proper dust protection improves device longevity and performance.
Conclusion
Choosing the right shelving for electronics can be simple. Consider the space you have available. Measure carefully to avoid errors. Think about weight and size of your gadgets. Shelves should be sturdy and safe. Materials like wood or metal work well.
Look for ventilation to prevent overheating. Easy access to cables is important. A well-planned setup enhances your space. Saves time and reduces clutter. Take your time and enjoy the process. Your electronics deserve a good home.
Leave a Reply