Have you ever wanted to build your very own electronic robot right at home? Imagine creating a cool gadget that moves, lights up, or even follows your commands.
It’s easier than you think, and you don’t need to be an expert to start. In this guide, you’ll discover simple steps and easy tips that make building a robot fun and achievable. Ready to turn your ideas into a real, working robot?
Let’s dive in and make it happen together!
Choosing The Right Robot Project
Choosing a robot project that matches your skills and tools makes building easier and more fun. Start with simple designs to learn basic electronics and move to complex ones as you gain confidence. This approach helps create a successful home robot step by step.
Choosing the right robot project can be exciting and rewarding. It sets the stage for your journey into electronics and robotics. Picking a suitable project ensures a smooth learning curve. It also helps avoid frustration. Start with a project that matches your skill level and interests.Simple Robots For Beginners
Begin with simple robots if you’re new to robotics. These projects are easy to understand and build. They teach basic concepts. A line-following robot is a great start. It uses sensors to follow a path. A light-seeking robot is another fun option. It moves towards light sources. These projects use minimal components, making them ideal for beginners.Tools And Materials Needed
Gather basic tools and materials for your robot project. Essential tools include a soldering iron and a multimeter. Wire cutters and pliers are also helpful. You need materials like motors, sensors, and microcontrollers. Breadboards and jumper wires are crucial for connecting components. Check your project’s requirements before buying materials.Budget Considerations
Consider your budget when choosing a robot project. Simple robots are usually inexpensive. They often require common materials. Advanced projects can be costly. They may need specialized components. Set a realistic budget before starting. Compare prices from different suppliers. This helps manage costs effectively. Choosing the right project ensures an enjoyable experience. It boosts confidence and builds skills.
Credit: www.instructables.com
Basic Electronics And Components
Building a robot starts with knowing the basic electronics and components. These parts form the robot’s brain and body. Understanding them helps in creating a functional and efficient robot. Let’s explore the key elements that you need to start your project.
Common Electronic Parts
Robots need various electronic parts to work. Here are some common ones:
- Resistors:Control electric current flow.
- Capacitors:Store and release electrical energy.
- Diodes:Allow current to flow in one direction.
- Transistors:Act as switches or amplifiers.
- Microcontrollers:Small computers that control the robot.
- Motors:Provide movement to the robot parts.
- Sensors:Detect environmental changes like light or distance.
Understanding Circuit Boards
Circuit boards connect all electronic parts. They create paths for electricity to flow. Most robots use printed circuit boards (PCBs). PCBs are flat boards with copper tracks. These tracks link components without loose wires. A well-designed circuit board makes your robot reliable and easier to build.
Power Sources For Robots
Robots need power to run. Common power sources include:
- Batteries:Portable and widely used. Types include alkaline, lithium-ion, and NiMH.
- Power adapters:Provide continuous power from a wall outlet.
- Solar panels:Use sunlight to generate electricity.
Choosing the right power source depends on your robot’s size and purpose. Batteries offer mobility. Adapters provide steady power. Solar panels suit outdoor robots.
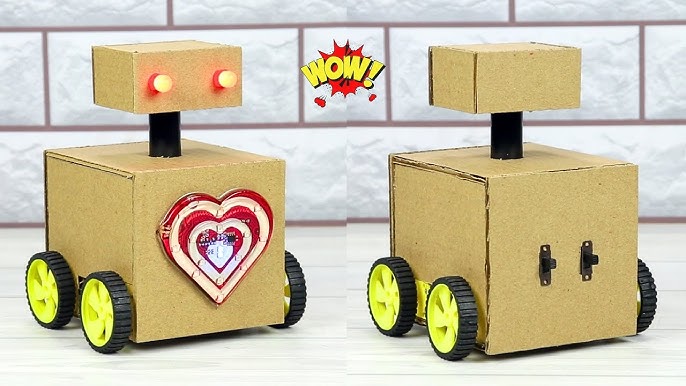
Assembling The Robot Body
Assembling the robot body is an important part of building your electronic robot at home. This phase shapes the robot’s structure and affects its movement and stability. A well-built body supports all the parts and makes the robot durable. Focus on strong materials and precise assembly for best results.
Selecting The Frame Material
Choose a frame material that is light but strong. Common choices include plastic, aluminum, and wood. Plastic is easy to cut and shape. Aluminum is durable and lightweight but needs special tools. Wood is cheap and easy to work with but can be heavy. Consider the tools and skills you have before selecting the material.
Building The Chassis
The chassis is the base that holds all robot parts together. Cut the frame material into the right size and shape. Drill holes for screws and wires. Use screws or strong glue to join parts securely. Make sure the chassis is flat and balanced. This helps the robot move smoothly and stay stable.
Attaching Motors And Wheels
Fix motors firmly to the chassis to avoid wobbling. Align the wheels properly with the motors. Use screws or brackets to attach the motors. Check that wheels spin freely without hitting the chassis. Test the motor and wheel connection by turning them manually. Proper attachment improves the robot’s movement and control.

Credit: interestingengineering.com
Wiring And Circuit Setup
Wiring and circuit setup form the backbone of your electronic robot. Without a clean and precise connection of components, your robot won’t function as intended. Taking time to organize and double-check your wiring saves hours of troubleshooting later on.
Connecting Sensors And Actuators
Sensors detect the environment, while actuators perform actions based on sensor input. Connect sensors like ultrasonic or infrared modules to the microcontroller’s input pins. Actuators such as motors or servos should link to output pins with proper power supply considerations.
Keep wires short and clearly labeled to avoid confusion. Use a breadboard for prototyping before finalizing connections. Have you noticed how a simple loose wire can stop everything from working? Avoid that by securing connections firmly.
Soldering Tips For Beginners
Soldering can feel intimidating, but it’s essential for durable circuits. Use a clean, well-heated soldering iron and thin solder wire. Apply heat to both the component lead and pad, then feed solder to the joint—not the iron tip.
Practice on spare wires before working on your robot’s parts. Too much solder creates shorts; too little leads to weak joints. Remember, a good solder joint looks shiny and smooth. What small adjustments have you found improve your soldering quality?
Testing The Circuit
Before powering your robot, test your circuit step by step. Use a multimeter to check continuity between points and verify power supply voltages. Testing each sensor and actuator individually helps isolate issues early.
Once everything checks out, power your circuit and observe behavior closely. Don’t ignore small irregularities—they often hint at wiring mistakes or faulty components. How often do you find that one wrong connection after hours of work? Catching it early changes everything.
Programming Your Robot
Programming your robot gives it the power to act and respond. It is the heart of any electronic robot project. Writing code tells your robot what to do and how to do it. This section explains the basics of programming your robot at home. Simple instructions can make your robot move, sense, and react.
Choosing A Programming Language
Pick a language that matches your robot’s hardware and your skill level. Some languages are easier for beginners. Popular choices include:
- Python – simple and widely used for robotics.
- Arduino C/C++ – great for microcontrollers like Arduino boards.
- Scratch – block-based and perfect for beginners and kids.
Check which language your robot’s controller supports. Choose one with lots of online tutorials and examples.
Basic Coding For Movement
Start with simple commands to move your robot forward, backward, left, or right. Use basic functions like:
- Set motor speed
- Start and stop motors
- Delay for specific time periods
Try writing code to make your robot follow a straight line or turn at corners. Testing small steps helps avoid errors.
Adding Sensor Inputs
Sensors help your robot understand its surroundings. Common sensors include:
- Ultrasonic for distance measurement
- Infrared for obstacle detection
- Light sensors for brightness levels
Program your robot to read sensor data and react. For example, stop moving when an obstacle is near. Use simple if-else statements to create these actions.
Troubleshooting Common Issues
Troubleshooting is a key part of building a robot at home. Problems can stop your robot from working well. Finding and fixing these issues saves time and frustration. This section helps you solve common problems easily.
Diagnosing Power Problems
Power issues often cause a robot to stop working. Check the battery first. Make sure it is charged and connected correctly. Look for loose wires at the power source. Use a multimeter to test battery voltage. Replace weak or dead batteries. Verify the power switch is in the ON position. Ensure the voltage matches the robot’s needs. Too low or too high power can damage parts.
Fixing Wiring Errors
Wiring mistakes are common in DIY robots. Check all wire connections carefully. Make sure each wire goes to the correct pin. Look for broken or frayed wires. Use a wiring diagram to compare your setup. Secure loose wires with tape or zip ties. Avoid crossing wires that may cause shorts. Test connections with a continuity tester. Correct any swapped or misplaced wires to prevent errors.
Debugging Code
Code bugs can stop the robot’s movements or sensors. Start by reading the error messages carefully. Check for simple typos or missing symbols. Use comments in your code to find logic errors. Test smaller parts of the program separately. Update your code libraries and software tools. Use debugging tools to trace problems step by step. Try running example codes to isolate issues. Fix errors and upload the code again for testing.
Enhancing Your Robot
Enhancing your electronic robot can make it smarter and more useful. You can add features that help it sense, move, and respond better. These upgrades make your robot more fun and interesting to build and use. Small changes can bring big improvements in how your robot works.
Adding Advanced Sensors
Sensors help your robot understand its environment. Use sensors like ultrasonic for distance or infrared for light detection. These sensors allow your robot to avoid obstacles or follow lines. Adding temperature or sound sensors can give your robot more abilities. Choose sensors that fit your robot’s tasks and space.
Improving Mobility
Better wheels or tracks improve your robot’s movement on different surfaces. Use motors with higher torque for climbing or rough terrain. Adding a suspension system helps smooth the ride over bumps. Adjust the robot’s weight balance to prevent tipping. Mobility upgrades increase your robot’s range and control.
Integrating Remote Controls
Remote control lets you guide your robot from a distance. Use Bluetooth or Wi-Fi modules for wireless control. Add a simple joystick or smartphone app for easy handling. Remote control helps in testing and operating your robot safely. It also adds fun by letting you explore robot actions in real-time.

Credit: www.youtube.com
Frequently Asked Questions
What Basic Materials Are Needed To Build A Home Robot?
You need a microcontroller, sensors, motors, batteries, and a chassis. These parts form the robot’s brain, senses, movement, and power. Basic tools like soldering iron and wires are also essential for assembly. Start simple and upgrade parts as you gain experience.
How Much Does It Cost To Make An Electronic Robot At Home?
Costs vary by complexity but expect to spend $30 to $150. Basic kits are affordable for beginners, while advanced components increase the price. Planning your budget helps avoid overspending. Using recycled parts can reduce expenses significantly.
Can Beginners Build A Robot Without Prior Experience?
Yes, beginners can build simple robots using starter kits. These kits include instructions and pre-made parts for easy assembly. Learning basic electronics and programming helps but isn’t mandatory initially. Practice and patience improve your skills over time.
How Long Does It Take To Build A Simple Robot At Home?
Building a basic robot usually takes a few hours to a day. Assembly depends on your experience and robot complexity. Following step-by-step guides speeds up the process. Taking breaks ensures better focus and accuracy.
Conclusion
Building an electronic robot at home can be fun and rewarding. Start with simple parts and follow clear steps. Take your time and learn from each mistake. You will see your robot come to life. This project helps you understand electronics and programming.
Keep practicing to improve your skills. Share your creation with friends or family. Enjoy the process and stay curious. Making robots at home is a great way to learn and have fun. Give it a try today!
Leave a Reply