
Are you fascinated by the world of electronics and eager to create your very own electronic circuit at home? Imagine the thrill of bringing your ideas to life, all with a few simple components and a touch of creativity.
Whether you’re a curious beginner or a seasoned hobbyist, the process of making an electronic circuit can be incredibly rewarding. It’s not just about connecting wires; it’s about understanding how things work and unleashing your inner inventor. In this guide, you’ll discover the step-by-step process to build a basic electronic circuit right at your kitchen table.
Get ready to dive into a hands-on experience that will not only boost your skills but also open a door to endless possibilities. Keep reading, and let’s light up your imagination together!
Materials Needed
Creating an electronic circuit at home requires specific materials. These materials fall into three main groups: basic electronic components, tools, and safety gear. Having the right items ensures your project goes smoothly. This section explains what you need to get started.
Basic Electronic Components
- Resistors: Control current flow in the circuit.
- Capacitors: Store and release electrical energy.
- Diodes: Allow current to flow in one direction only.
- Transistors: Act as switches or amplifiers.
- LEDs: Light up to show circuit activity.
- Wires: Connect all components together.
- Breadboard: A platform to build and test circuits.
- Battery or power supply: Provides electrical energy.
Tools Required
- Soldering iron: Joins components with melted solder.
- Wire cutters: Cut wires to needed lengths.
- Wire strippers: Remove insulation from wires.
- Multimeter: Measures voltage, current, and resistance.
- Screwdrivers: Tighten or loosen screws on components.
- Tweezers: Handle small parts easily.
- Helping hands tool: Holds parts in place while working.
Safety Gear
- Safety goggles: Protect eyes from solder splashes.
- Heat-resistant gloves: Prevent burns from hot tools.
- Ventilation fan or mask: Avoid inhaling fumes from solder.
- Fire extinguisher: Be ready for emergencies.

Credit: www.electronicsandyou.com
Choosing A Simple Circuit
Choosing a simple circuit is the first key to success when making an electronic circuit at home. Starting with something easy helps you understand the basics without feeling overwhelmed. It also builds your confidence and prepares you for more complex projects later.
Simple circuits usually use a few components and have clear, straightforward functions. They allow you to focus on learning how components like resistors, LEDs, and batteries work together. Have you ever wondered how a small switch can control a light bulb? Simple circuits can show you just that.
Popular Beginner Projects
- LED Blink Circuit:This project uses a timer IC to make an LED blink on and off. It’s perfect for learning how to use capacitors and resistors.
- Basic Light Sensor:Using a photoresistor, you can build a circuit that turns an LED on when it gets dark. It introduces sensors in a fun way.
- Simple Buzzer Alarm:Learn how to make noise with a buzzer that activates when a switch is pressed. It’s a great introduction to sound in electronics.
- Battery Tester:Test if your batteries still work by lighting up an LED when the battery is good. This project teaches voltage basics.
These projects don’t require expensive parts or complicated tools. You can find most components easily online or at local stores. Picking one that interests you will keep you motivated.
Circuit Diagrams To Follow
Clear circuit diagrams are your best friends when building circuits at home. They show how each component connects and where to place them. Without a good diagram, even a simple circuit can become confusing.
Look for diagrams that use standard symbols and labels. This helps you identify parts and connect them correctly. Many beginner kits come with easy-to-understand diagrams, which can save you lots of guesswork.
Try drawing the circuit diagram yourself before building. This exercise helps you remember connections and spot errors early. Have you tried sketching a circuit on paper to visualize how it works?
Keep your workspace organized and double-check the diagram as you go. A simple mistake like reversing an LED can stop the circuit from working. Patience and attention to detail make a big difference.
Preparing The Workspace
Preparing your workspace is key before building any electronic circuit. A clean, organized area helps you work faster and avoid mistakes. It also keeps your components safe and easy to find. Setting up the right tools and organizing parts can make the project smoother and more fun.
Organizing Components
Sort all electronic parts by type and size. Use small containers or boxes to keep resistors, capacitors, and chips separate. Label each container clearly to find parts quickly. Keep delicate components like ICs in anti-static bags to avoid damage. Arrange parts on a tray or mat to stop them from rolling away.
Setting Up Tools
Gather essential tools before you start. You will need a soldering iron, wire cutters, pliers, and a multimeter. Place tools within easy reach to avoid interruptions. Use a stand for the soldering iron to prevent burns. Have a clean cloth or sponge ready to clean the soldering tip. Good lighting is important to see small details clearly.

Credit: www.instructables.com
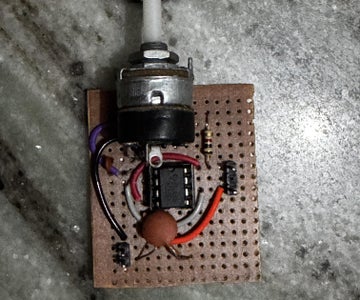
Building The Circuit
Building the circuit is where your project starts to come alive. This phase requires focus and patience as you transform a schematic diagram into a physical setup. Each small step you take here shapes the performance and reliability of your final electronic device.
Reading The Schematic
A schematic is like a map for your circuit. It shows how every component connects without showing the actual physical layout. Before picking up any tools, spend time understanding symbols for resistors, capacitors, and transistors.
Ask yourself: Can you trace the flow of electricity from power source to output? This mental walkthrough helps prevent errors later. Keep the schematic close and refer to it often while working.
Placing Components
Start by organizing your components on a breadboard or PCB. Position parts according to the schematic, paying attention to orientation—especially for diodes and polarized capacitors. Incorrect placement can cause your circuit to fail or behave unpredictably.
It’s helpful to place larger components like ICs first, then smaller ones. Leave space for soldering and avoid crowding. Have you noticed how neat layouts often lead to easier troubleshooting?
Soldering Basics
Soldering connects your components permanently. Use a clean, well-heated soldering iron and thin solder wire for best results. Heat the joint, then apply solder; avoid heating components directly to prevent damage.
- Keep your workspace ventilated.
- Practice on spare wires before working on your circuit.
- Check joints for a shiny, smooth finish—dull or cracked solder can cause poor connections.
Remember, patience is key. A well-soldered joint is the backbone of a reliable electronic device. Are you ready to create connections that last?
Testing The Circuit
Testing your electronic circuit is a crucial part of building it at home. It ensures that everything works as expected and helps you catch any mistakes early. Without proper testing, you might spend hours troubleshooting later or even damage your components.
Using A Multimeter
A multimeter is your best friend when testing circuits. It measures voltage, current, and resistance, helping you verify connections and component functionality.
Start by checking the power supply voltage. Make sure it matches the requirements of your circuit. Then, test continuity to confirm that wires and connections are properly linked.
When measuring resistance, ensure the circuit is powered off to avoid inaccurate readings. This step helps you identify broken components or bad solder joints. Have you ever found a tiny solder bridge causing a short? A multimeter reveals it instantly.
Troubleshooting Common Issues
If your circuit doesn’t work, don’t panic. Begin by double-checking all your connections against the circuit diagram. It’s easy to mix up pins or skip a wire.
Look for cold solder joints—these often appear dull or cracked and cause poor connections. Reheating and adding a bit of fresh solder can fix them quickly.
Sometimes, components like resistors or capacitors might be faulty or damaged. Swapping them out with known good parts can save you time. Is your LED not lighting up? Check if it’s connected in the correct direction.
- Verify power supply polarity.
- Ensure no components are overheating.
- Check for loose wires or shorts.
Testing your circuit carefully builds your confidence and skills. What’s the most surprising mistake you’ve uncovered during testing?
Improving Your Skills
Improving your skills in making electronic circuits at home is essential to become confident and creative. Practice and learning help you understand how components work together. This knowledge lets you build better and more complex circuits over time.
Experimenting With Designs
Try different circuit layouts to see what works best. Change the placement of parts to improve performance. Use breadboards to test new ideas without soldering. Keep notes on what changes give good results. Small experiments help you learn quickly and avoid big mistakes.
Learning Advanced Techniques
Study topics like soldering, using microcontrollers, and designing printed circuit boards (PCBs). Watch videos or read simple guides to understand these skills. Practice soldering on old or broken electronics first. Explore programming basics to control circuits with code. These techniques open new possibilities for your projects.
Credit: www.instructables.com
Frequently Asked Questions
What Tools Are Needed To Make An Electronic Circuit At Home?
Basic tools include a soldering iron, wire cutters, multimeter, breadboard, and jumper wires. These help build and test circuits effectively.
How Do I Choose Components For My Home Electronic Circuit?
Select components based on your circuit’s purpose, voltage, and current needs. Use datasheets for specifications to ensure compatibility and safety.
Can Beginners Make Electronic Circuits Without Prior Experience?
Yes, beginners can start with simple kits and tutorials. Hands-on practice helps build skills and understanding gradually and safely.
How To Test If My Homemade Circuit Works Correctly?
Use a multimeter to check voltage and continuity. Power the circuit carefully and observe if it performs the intended function.
Conclusion
Building an electronic circuit at home can be simple and fun. Start with basic parts and follow clear steps. Practice helps you learn and improve your skills. Mistakes are normal; they teach you what to fix. Soon, you will create useful and interesting projects.
Keep exploring and enjoy the process of making circuits. Your curiosity will lead to new ideas and success.
Leave a Reply