Are you ready to bring your electronic projects to life by securely attaching components to a box? Whether you’re building a DIY gadget or organizing your electronics, knowing the right way to mount parts can save you time, prevent damage, and make your work look professional.
In this guide, you’ll discover simple, effective methods to attach electronic components to any box. By the end, you’ll have the confidence to create neat, durable setups that keep your electronics safe and functioning perfectly. Let’s dive in and make your project stand out!
Choosing The Right Box Material
Selecting a sturdy box material ensures secure attachment of electronic parts. Materials like plastic or metal offer durability and ease for mounting components. Choose based on weight, protection needs, and mounting method compatibility.
Choosing the right box material is crucial for attaching electronic components. The material affects durability, protection, and ease of assembly. Below are some common materials and their benefits.Plastic Boxes
Plastic boxes are lightweight and cost-effective. They offer good insulation for electronic components. Many plastic boxes have pre-drilled holes. This makes attaching parts simple. They are resistant to moisture and corrosion. You can find them in various sizes and shapes. This variety makes them versatile for different projects.Metal Boxes
Metal boxes provide excellent protection and heat dissipation. They are strong and durable, ideal for heavy-duty projects. Metal boxes are often used for outdoor applications. They resist impact and protect sensitive components. They may require additional tools for drilling holes. This could be a consideration for ease of assembly.Wooden Boxes
Wooden boxes offer a natural and aesthetic appeal. They provide moderate protection and are easy to modify. You can drill holes without specialized tools. This makes customization straightforward. Wooden boxes may need additional treatments. This ensures they are suitable for electronic use. They are best for indoor projects where style matters.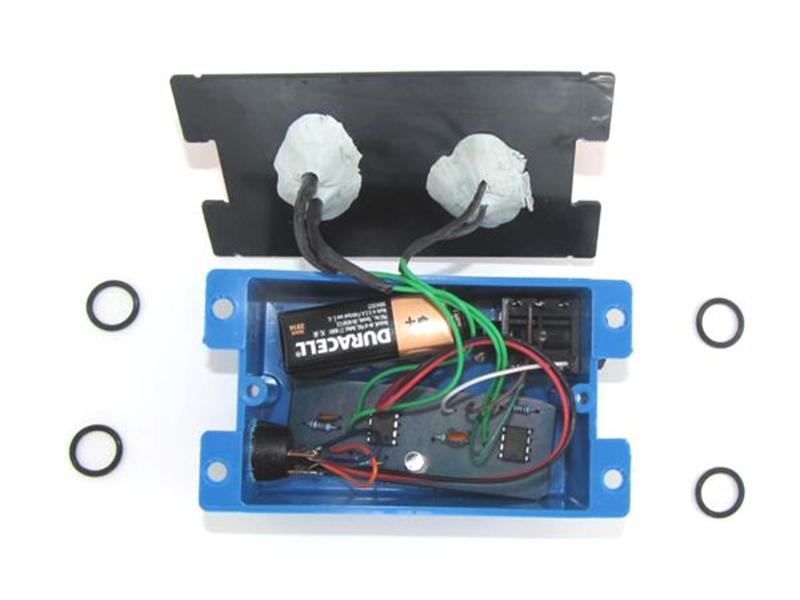
Credit: makezine.com
Preparing The Box Surface
Preparing the box surface is a crucial step before attaching any electronic components. A well-prepared surface ensures better adhesion, reduces the risk of damage, and helps keep your project neat and functional. Taking the time to clean and mark the box properly makes the assembly process smoother and more precise.
Cleaning And Smoothing
Start by removing any dust, grease, or residue from the box surface. Use a soft cloth dampened with isopropyl alcohol for effective cleaning. Avoid harsh chemicals that might damage the material of the box.
After cleaning, check for any rough spots or sharp edges that could interfere with component placement. Lightly sand these areas with fine-grit sandpaper until the surface feels smooth to the touch. This step helps adhesives stick better and prevents accidental cuts or scratches during assembly.
Marking Component Positions
Before attaching components, precisely mark their positions on the box. Use a pencil or a fine-tip marker to outline where each component will go. This helps avoid mistakes and makes installation faster.
Consider measuring twice and marking once. Double-check the spacing and alignment to ensure everything fits as planned. Have you ever struggled with misaligned parts? Taking this small extra step can save you from that frustration.
Using Adhesives For Attachment
Using adhesives is a simple and effective way to attach electronic components to a box. Adhesives provide a strong bond without needing screws or soldering. They hold parts securely and reduce the risk of damage to delicate components. Selecting the right adhesive and applying it correctly ensures a durable connection.
Types Of Adhesives
- Epoxy:A two-part adhesive that forms a very strong bond. Good for heavy or metal components.
- Super Glue (Cyanoacrylate):Bonds quickly and works well on plastic and small parts.
- Silicone Adhesive:Flexible and heat-resistant. Ideal for parts that may expand or contract.
- Hot Glue:Melts and solidifies quickly. Suitable for temporary or light attachments.
- Acrylic Adhesive:Strong and fast-curing. Works well on many surfaces including plastic and metal.
Application Tips
- Clean surfaces before applying adhesive to remove dust and grease.
- Use small amounts to avoid excess glue spilling over components.
- Apply adhesive evenly to cover the contact area fully.
- Hold parts in place firmly until the adhesive sets.
- Use clamps or tape to secure parts if needed during curing.
Curing Times
| Adhesive Type | Typical Curing Time |
|---|---|
| Epoxy | 5 to 30 minutes (fast cure), 24 hours (full strength) |
| Super Glue | 10 to 30 seconds (initial bond), 24 hours (full strength) |
| Silicone Adhesive | 30 minutes (skin dry), 24 hours (full cure) |
| Hot Glue | Seconds to 1 minute |
| Acrylic Adhesive | 5 minutes (initial), 24 hours (full strength) |
Mechanical Fastening Techniques
Mechanical fastening techniques provide a reliable way to attach electronic components to a box without relying on adhesives or soldering. These methods allow you to secure parts firmly while maintaining the option for easy removal or adjustment later. Choosing the right fastener depends on the type of component, the box material, and the level of durability you need.
Screws And Nuts
Screws and nuts are among the most common fasteners used for attaching electronic components. They offer a strong hold and are easy to install with basic tools like screwdrivers and wrenches.
If you’re mounting a circuit board inside a metal or plastic box, using screws with nylon or metal nuts can prevent movement and vibration. You can also add washers to distribute pressure evenly and avoid damaging delicate parts. Have you checked if your box has pre-drilled holes or if you’ll need to drill them yourself?
Rivets
Rivets provide a permanent and vibration-resistant fastening solution. They work well when you want to secure components without the risk of them loosening over time.
Blind rivets are especially useful if you can only access one side of the box. When using rivets, make sure the component and box materials are compatible to avoid cracking or warping. Think about whether you might need to remove the component later—rivets are not ideal for easy disassembly.
Clips And Clamps
Clips and clamps offer a flexible and quick way to attach components without drilling holes or using screws. They are perfect for temporary setups or when you need to swap parts frequently.
Spring clips or plastic clamps can hold wires, sensors, or small PCBs securely inside the box. Since these fasteners don’t require tools, they speed up assembly and maintenance. Have you considered how much space the clip or clamp will take inside your box?
Mounting With Double-sided Tape
Mounting electronic components inside a box can be tricky, especially when you want a clean, secure setup without drilling holes or using screws. Double-sided tape offers a simple and effective solution. It holds components firmly while keeping your project neat and easy to adjust.
Choosing Tape Strength
Not all double-sided tapes are created equal. The strength you need depends on the weight and size of your electronic components. Lightweight sensors might only need thin foam tape, while heavier circuit boards require industrial-grade tapes.
Look for tapes labeled as “high bond” or “heavy duty” if your components are larger. Also, consider the temperature range of your working environment, since some tapes lose stickiness in heat or cold. Have you tested the tape’s hold on your component before final placement? A quick trial can save headaches later.
Surface Preparation
Clean surfaces are the foundation of a strong bond. Dust, oils, or moisture can weaken adhesion, causing components to fall off unexpectedly. Use isopropyl alcohol or a mild cleaner to wipe down the box’s interior and the component’s mounting area.
After cleaning, let the surfaces dry completely. Avoid touching the tape or cleaned surfaces with your fingers to keep oils away. This simple step improves tape performance dramatically and makes sure your components stay put.
Long-term Durability
Will your mounted components stay secure after weeks or months? Environmental factors like humidity, vibration, and temperature changes can affect tape longevity. Choose tapes specifically designed for electronics or outdoor use to improve durability.
Consider adding a small mechanical support like a clip or bracket for critical parts. This hybrid approach reduces stress on the tape and prevents sudden failures. How often do you revisit your projects to check mounting integrity? Regular checks catch problems before they cause damage.
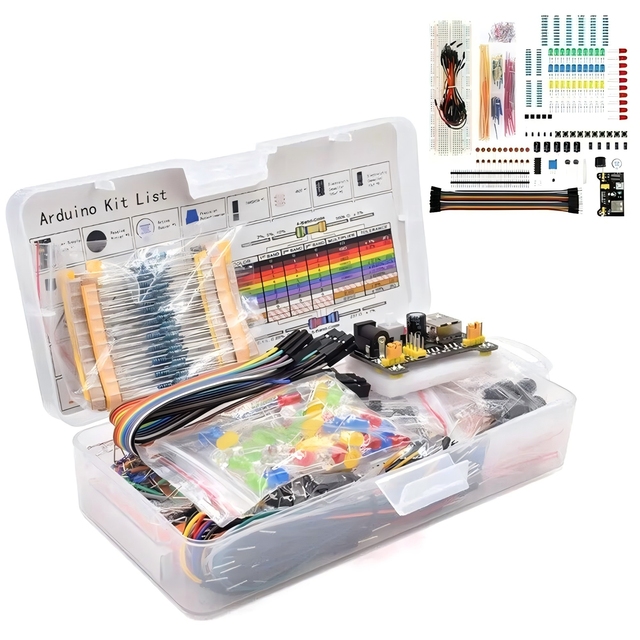
Credit: www.accio.com
Using Heat Shrink And Sleeves
Using heat shrink and sleeves offers a simple way to secure and protect electronic parts inside a box. These materials provide insulation and keep wires tidy. They also prevent damage from dust, moisture, and friction. Heat shrink tubes shrink tightly around wires or components when heated, creating a strong bond. Sleeves can slide over wires or bundles to keep them organized and safe.
Securing Wires
Heat shrink tubes hold wires firmly in place. Slide the tube over the wire before connecting it. After making the connection, apply heat using a heat gun or lighter. The tube shrinks and grips the wire tightly. This stops wires from moving or pulling loose. Sleeves can bundle several wires together, making them easier to manage. Use different colors of heat shrink or sleeves to identify wires quickly.
Protecting Components
Heat shrink covers exposed parts like solder joints and terminals. It insulates against short circuits and electrical shocks. Sleeves protect wires from cuts and wear inside the box. Use thicker or double layers of heat shrink for extra protection. Sleeves made from flexible material adapt well to irregular shapes. Both materials help extend the life of your electronics by guarding against damage.
Creating Custom Mounts And Brackets
Creating custom mounts and brackets allows you to securely attach electronic components inside or on a box while maintaining a clean, organized setup. This approach gives you flexibility to fit components of different shapes and sizes exactly where you want them. It also helps protect your electronics from movement or damage during use.
Custom mounts can be designed to hold circuit boards, sensors, batteries, and more, ensuring each part stays firmly in place. You can tailor these mounts to your project’s specific needs instead of relying on generic solutions that may not fit perfectly. Have you ever struggled with components shifting inside a case? Custom mounts solve that problem effectively.
3d Printing Options
3D printing offers an excellent way to create precise, custom mounts and brackets for your electronics. You can design mounts that snap around your parts or have holes for screws exactly where needed. This method lets you experiment with different shapes and sizes without a large upfront cost.
Many free or affordable 3D modeling tools make it easy to design your mounts, even if you’re new to CAD software. Once printed, these mounts can be attached to your box using screws, adhesive, or even integrated clips. Have you considered how 3D printing could speed up your prototyping process?
- Design mounts to fit specific components perfectly
- Create integrated cable management features
- Use durable materials like PLA or PETG for strength
- Print multiple versions quickly to test fit and function
Using Off-the-shelf Brackets
If you need a quicker or simpler solution, off-the-shelf brackets are widely available and can work well for many projects. These brackets come in various shapes, sizes, and materials, often designed for mounting electronics or other hardware. Choosing the right one depends on your component’s dimensions and how you want to secure it.
You can modify these brackets by drilling extra holes or trimming edges to fit your box better. Combining these brackets with zip ties or Velcro straps can add extra stability. Have you tried mixing off-the-shelf parts with custom pieces to save time while keeping flexibility?
- Look for L-shaped or U-shaped brackets made from metal or plastic
- Use self-tapping screws or nuts and bolts for secure attachment
- Consider brackets with rubber padding to reduce vibration
- Combine with adhesive pads for non-permanent mounting
Ensuring Electrical Safety
Ensuring electrical safety is crucial when attaching electronic components to a box. Proper safety measures reduce risks of electric shock and damage. It also extends the lifespan of your device. Taking the right steps protects both the user and the components.
Insulation Techniques
Insulation prevents accidental contact between wires and metal parts. Use heat shrink tubing to cover exposed wires. Electrical tape works well for small gaps or joints. Silicone sleeves offer durable protection for connectors.
Secure insulation around solder joints and terminals. Avoid loose wires that can touch other components. Use plastic standoffs to keep wires separate from the box. Proper insulation keeps current flow safe and controlled.
Preventing Short Circuits
Short circuits can cause sparks, fires, or component failure. Keep wires organized using cable ties or clips. Make sure no bare wire ends are exposed. Use terminal blocks for neat and safe wire connections.
Check the box for sharp edges that might cut wires. Add rubber grommets around holes where wires pass through. Test connections with a multimeter before powering the device. These steps help avoid dangerous short circuits inside the box.
Testing And Final Adjustments
After securely attaching your electronic components to the box, it’s time to focus on testing and making final adjustments. This step ensures that your setup functions as intended and remains durable over time. Skipping this can lead to unexpected failures or safety hazards.
Checking Stability
Start by gently shaking or tapping the box to see if any components move or feel loose. Even a small wobble can cause connection issues later, especially in portable projects.
Use your hands to apply slight pressure on each component. If anything shifts, tighten screws or add extra adhesive. I once overlooked this step, and a loose sensor caused erratic readings until I re-secured it properly.
Think about the environment your box will be in—will it be moved around often or stay stationary? This affects how firmly you need to attach everything.
Verifying Electrical Connections
Power up your circuit and check each component one by one. A multimeter can help verify continuity and correct voltage levels at different points.
Look for signs like flickering LEDs, unexpected heat, or unresponsive parts. These clues often point to weak solder joints or poor wiring.
Try bending wires slightly to test if connections remain stable. Loose wires can cause intermittent failures that are hard to diagnose later.
- Double-check polarity on components like LEDs and capacitors.
- Confirm that wires aren’t touching where they shouldn’t, to avoid shorts.
- Ensure grounding is solid—it’s often overlooked but crucial for safety and function.
Have you ever had a project fail because of a tiny wiring mistake? Taking time now to verify saves hours of frustration later.
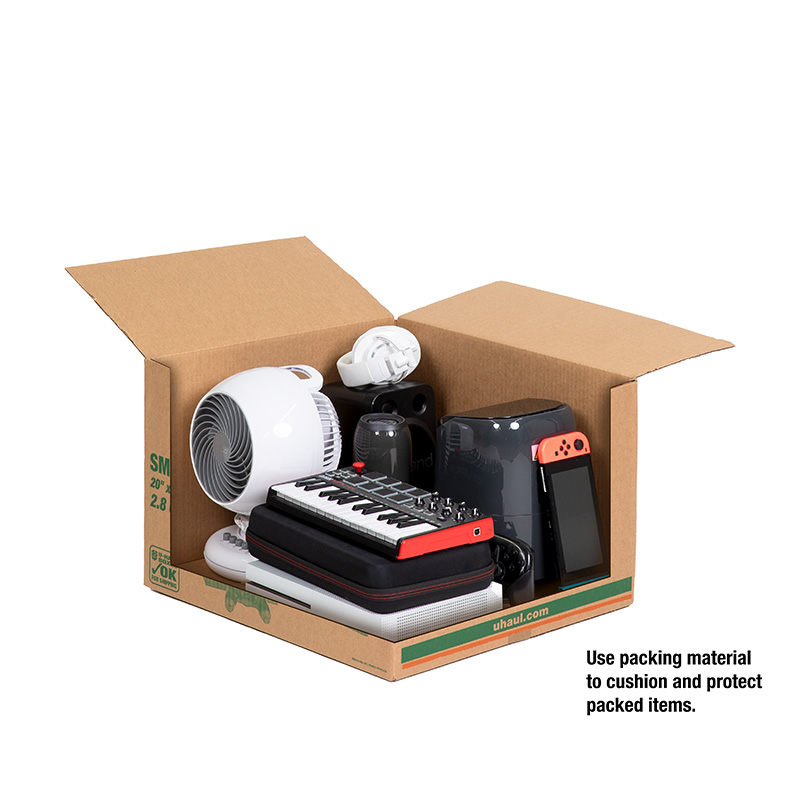
Credit: www.uhaul.com
Frequently Asked Questions
How Do I Choose The Right Adhesive For Electronic Components?
Select an adhesive that is non-conductive and heat-resistant. Epoxy and silicone adhesives are popular choices. Ensure it bonds well with both the component and box materials. Always check the manufacturer’s specifications for compatibility and durability.
Can I Mount Components Without Soldering?
Yes, you can use conductive tapes or clamps to mount components. These methods provide temporary or semi-permanent attachment. However, soldering offers a more reliable electrical connection and mechanical stability for most projects.
What Tools Are Essential For Attaching Components To A Box?
Basic tools include a soldering iron, adhesive applicator, wire cutters, and screwdrivers. You may also need a drill for mounting holes. Proper tools ensure secure attachment and prevent damage to components.
How To Prevent Damage When Attaching Components To A Plastic Box?
Use low-heat adhesives or mechanical fasteners like screws. Avoid excessive heat or pressure during installation. Ensure components are insulated to prevent short circuits and stress on the plastic surface.
Conclusion
Attaching electronic components to a box is simple with the right steps. Start by choosing the best method for your project. Use screws, glue, or soldering, depending on the parts. Take your time to secure each component firmly. Check connections to avoid loose wires or parts.
A well-attached component lasts longer and works better. Practice makes it easier and faster over time. Keep your workspace clean and organized for safety. This process helps you build reliable electronic projects at home.
Leave a Reply