Have you ever faced a gadget that just won’t work right, and you wonder if a tiny part inside is to blame? Knowing how to detect faulty electronic components can save you time, money, and frustration.
Imagine fixing your device yourself without guessing or buying new parts blindly. You will discover simple, clear ways to spot those troublemakers inside your electronics. Stick with me, and you’ll gain the confidence to troubleshoot like a pro and keep your devices running smoothly.
Common Signs Of Faulty Components
Components that are faulty often show signs like overheating, strange smells, or visible damage. Devices may also behave oddly or stop working completely. Spotting these clues helps prevent bigger problems.
Detecting faulty electronic components is crucial for ensuring the longevity and performance of your devices. Understanding the common signs of faulty components can save you time, money, and prevent potential hazards. By identifying these signs early, you can address issues before they escalate.Visual Damage Indicators
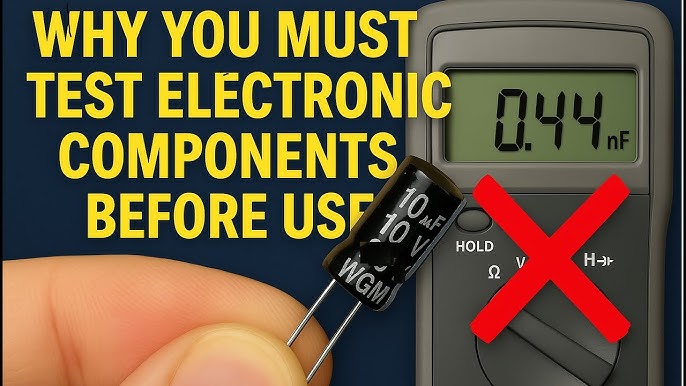
Visual inspection is one of the easiest ways to detect faulty components. Look for any signs of burns, cracks, or bulges on the components. Have you ever noticed a capacitor that looks swollen? That’s a clear sign it’s gone bad. Corrosion or discoloration might also indicate trouble. If you spot these signs, it’s time to replace the component.Unusual Heat Generation
Electronic components naturally generate some heat, but excessive heat is a red flag. If a component is too hot to touch, it’s likely malfunctioning. This could be due to overloading or internal damage. Consider using a thermal camera to identify hotspots without direct contact.Unexpected Noise Or Smell
Strange noises or smells can also indicate faulty components. Buzzing or humming sounds often mean something isn’t right. A burnt smell is a more obvious indicator and should never be ignored. Have you ever opened a device and been greeted by an acrid odor? That’s your cue to investigate further. Regular checks can prevent these issues from catching you off guard. Are you ready to take a closer look at your electronics?
Credit: www.youtube.com
Essential Testing Tools
Detecting faulty electronic components requires the right tools. These tools help find issues quickly and accurately. Using essential testing tools saves time and avoids wrong replacements. They provide clear results on component conditions.
Multimeter Usage
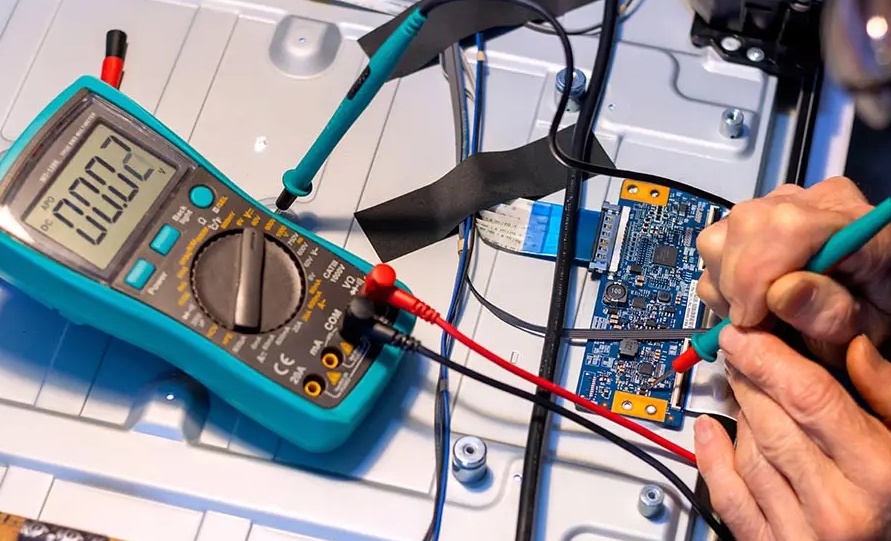
A multimeter measures voltage, current, and resistance. It checks if a component is working or broken. Set the multimeter to the correct mode before testing. Test resistors by measuring resistance values. Check diodes and transistors for proper voltage drop. Use continuity mode to find broken wires or connections.
Oscilloscope Basics
An oscilloscope shows electrical signals as waveforms on a screen. It helps find signal problems in circuits. Connect the probe to the test point to see the waveform. Look for irregular shapes or missing signals. Oscilloscopes display frequency, amplitude, and noise levels. They are useful for testing capacitors, ICs, and timing circuits.
Component Testers
Component testers identify many parts like transistors, capacitors, and diodes. They give quick readings of component values and conditions. Insert the component leads into the tester slots. The tester shows if the component is good or faulty. This tool is simple and handy for fast checks. It reduces guesswork and improves repair accuracy.
Step-by-step Testing Procedures
Testing electronic components requires a clear and organized approach. Knowing exactly how to check each part can save you hours and prevent costly mistakes. Below are detailed procedures to help you identify faulty components with confidence and precision.
Testing Resistors And Capacitors
Start by visually inspecting resistors and capacitors for signs of damage like discoloration or cracks. Use a multimeter set to measure resistance to check resistors. Compare the reading to the resistor’s color-coded value; significant deviations usually indicate a fault.
For capacitors, measure capacitance using a multimeter with a capacitance function or a dedicated LCR meter. If the meter shows a much lower or higher value than specified, the capacitor may be failing. Don’t forget to discharge capacitors before testing to avoid damage to your meter or yourself.
Checking Diodes And Transistors
Diodes should be tested with the multimeter’s diode test mode. Place the probes on the diode’s leads; a good diode will show a low reading in one direction and high in the other. If readings are low or high both ways, the diode is likely faulty.
When testing transistors, identify the base, collector, and emitter leads first. Use the diode test mode to check junctions between base-emitter and base-collector. Both should behave like diodes. Unexpected results may indicate a damaged transistor.
Assessing Integrated Circuits
Testing integrated circuits (ICs) can be tricky without specialized equipment. Start by checking the power supply pins for correct voltage levels while the circuit is powered. Look for signs of overheating or physical damage on the IC.
If you suspect an IC is faulty, compare signals at input and output pins using an oscilloscope or logic analyzer. In some cases, swapping the IC with a known good one is the fastest way to confirm a fault. Always refer to the datasheet for pin configuration and expected signals.
Credit: www.allpcb.com
Safety Tips For Testing
Testing electronic components requires careful attention to safety. Faulty parts can cause shocks, burns, or damage to your tools. Follow these safety tips to protect yourself and your equipment during testing.
Handling High Voltage Components
High voltage parts hold dangerous electric charge. Always turn off power before touching them. Use insulated tools to avoid electric shocks. Never test components with wet hands or in damp areas. Keep one hand in your pocket to reduce shock risk. Wear rubber gloves for extra protection. Stand on an insulated mat if possible.
Preventing Electrostatic Discharge
Static electricity can ruin sensitive electronics. Touch a grounded metal object before working on devices. Use an anti-static wrist strap connected to ground. Work on an anti-static mat to keep parts safe. Avoid wearing clothes that build static, like wool or polyester. Store components in anti-static bags when not in use.
Proper Workspace Setup
Keep your workspace clean and organized. Remove clutter to prevent accidents. Use good lighting to see parts clearly. Place components on non-conductive surfaces like wood or plastic. Have a fire extinguisher nearby for emergencies. Keep liquids away from your testing area. Make sure tools and meters are in good condition.
Interpreting Test Results
Interpreting test results is a crucial skill when diagnosing faulty electronic components. It goes beyond simply reading numbers on a meter or screen; you must understand what those numbers mean in relation to the component’s normal behavior. This section will help you recognize signs of trouble and decide the next steps with confidence.
Identifying Out-of-spec Values
Every electronic component has a range of acceptable values, whether it’s resistance, capacitance, or voltage drop. When your measurements fall outside these ranges, it’s a strong indicator that the component may be faulty.
For example, a resistor labeled 1kΩ should measure close to 1000 ohms. If your reading is 500 ohms or 2k ohms, that’s a clear red flag. It’s important to check the manufacturer’s datasheet or standard values before jumping to conclusions.
Have you ever seen a capacitor with a capacitance value way off from its rating? That’s often a sign of internal damage or leakage. Keep a reference chart handy to quickly spot out-of-spec values during your testing.
Distinguishing Intermittent Faults
Intermittent faults can be tricky because the component might test fine one moment and fail the next. These faults often occur due to loose connections, temperature changes, or internal cracks.
To catch these, try testing the component multiple times and under different conditions, such as gently tapping the device or warming it slightly. Notice if the readings fluctuate or suddenly change—that’s a clue to an unstable or damaged part.
Consider how a loose solder joint might behave when you move the circuit board. If the readings jump around during movement, you’ve likely found an intermittent fault. This approach saves you from replacing good components unnecessarily.
Confirming Component Replacement
After identifying a suspect component, don’t rush to replace it immediately. Confirm your diagnosis by cross-checking test results with known working parts or using a secondary testing method.
For instance, swapping the questionable component with a new or known-good one can verify if the fault disappears. If the circuit works perfectly after replacement, you’ve found your culprit.
Always document your findings to avoid repeating tests later. This habit makes troubleshooting faster and builds your confidence in interpreting results accurately. Have you tried this double-checking step before discarding parts?
Preventive Measures To Avoid Faults
Preventing faults in electronic components saves you time, money, and frustration. Taking steps before issues arise can keep your devices running smoothly and extend their lifespan. You don’t need to be an expert to apply simple measures that protect your components from damage and failure.
Proper Storage Techniques
How you store your electronic components matters more than you might think. Moisture, dust, and extreme temperatures can degrade parts even before you use them.
Keep components in anti-static bags or containers to protect against static electricity. Store them in a cool, dry place away from direct sunlight. Label everything clearly to avoid confusion and mishandling later.
Regular Maintenance Checks
Routine inspections help you spot potential problems early. You don’t have to dismantle the entire device; simple visual checks can reveal corrosion, burn marks, or loose connections.
Schedule regular times to clean and test your equipment. Use a multimeter to check voltage and continuity, ensuring components function as expected. Catching faults early means you can replace parts before they cause bigger issues.
Quality Sourcing Of Components
Where you buy your components directly affects their reliability. Cheap or counterfeit parts often fail quickly and can damage other components in your system.
Choose suppliers with good reputations and warranties. Ask for datasheets and verify specifications before purchase. Investing in quality parts might cost more upfront but saves headaches and repairs down the road.

Credit: www.reddit.com
Frequently Asked Questions
How Can I Identify A Faulty Electronic Component?
Look for physical damage, discoloration, and burnt smell. Test components with a multimeter for continuity and resistance. Faulty parts often cause circuit malfunction or no power flow.
What Tools Are Essential For Detecting Faulty Components?
A digital multimeter, oscilloscope, and soldering iron are key tools. They help measure voltage, current, and resistance accurately. These tools reveal component failures or circuit issues effectively.
Can Visual Inspection Alone Detect Faulty Electronics?
Visual inspection helps find obvious damage like cracks or burns. However, it cannot detect internal faults or subtle failures. Testing with instruments is necessary for accurate diagnosis.
How Does A Multimeter Help In Fault Detection?
A multimeter measures voltage, current, and resistance to check component health. It identifies open circuits, shorts, or incorrect resistance values. This tool is crucial for precise fault detection.
Conclusion
Detecting faulty electronic components helps save time and money. Use simple tools like a multimeter for quick checks. Pay attention to signs like burns or cracks on parts. Testing components regularly keeps devices working well. Learning these steps makes repairs easier and safer.
Stay patient and careful during each test. This skill improves your confidence with electronics. Keep practicing to spot problems faster each time. Small efforts lead to better results in electronics care.
Leave a Reply