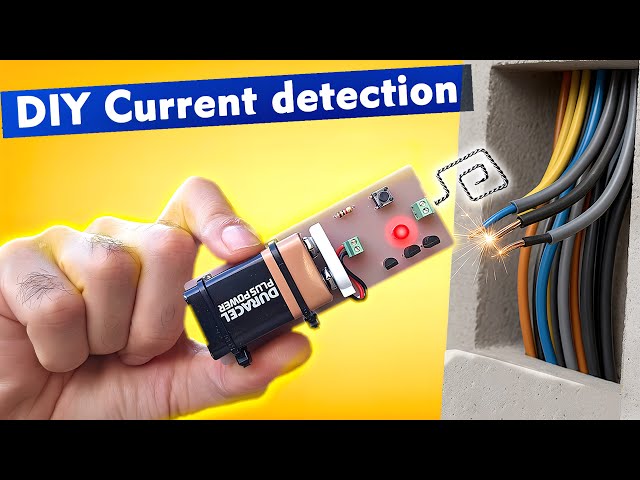
Are you fascinated by the electronic gadgets around you and ever thought, “I could make that”? Imagine the thrill of building your own gadgets right at home, tailored to your needs and preferences.
Whether you’re a tech enthusiast or someone looking to try something new, creating electronic devices can be both exciting and rewarding. You’ll not only save money but also gain valuable skills and a sense of accomplishment. In this guide, we’ll show you how to make electronic gadgets at home, step by step, with easy-to-follow instructions and tips.
So, grab your curiosity and let’s dive into the world of DIY electronics together!
Credit: www.instructables.com
Basic Tools And Materials
Starting your journey in making electronic gadgets at home means getting familiar with the basic tools and materials. These are the building blocks that will bring your ideas to life. Without the right equipment and supplies, even the simplest project can become frustrating or impossible.
Essential Tools For Diy Electronics
Every electronics hobbyist needs a reliable set of tools. A good soldering iron is crucial for joining components securely. You’ll also want wire cutters and strippers to prepare your wires neatly.
Other helpful tools include:
- Multimeter – to test voltage, current, and resistance
- Helping hands or a PCB holder – for steady work on tiny parts
- Screwdrivers and tweezers – for assembling and handling small components
- Heat shrink tubing and a heat gun – for safe insulation of connections
Think about your workspace too. Proper lighting and a clean surface can save you hours of frustration.
Common Components And Supplies
Knowing which components to stock up on can speed up your projects. Basic parts like resistors, capacitors, LEDs, and transistors are your toolkit staples. These small parts often appear in nearly every circuit you build.
Microcontrollers such as Arduino or Raspberry Pi can bring your gadget to life with programming. Don’t forget breadboards and jumper wires for testing circuits before soldering. Buying kits that bundle these essentials can save money and time.
Safety Tips For Home Projects
Working with electronics involves risks you need to respect. Always unplug devices before working on them to avoid electric shocks. Use safety glasses to protect your eyes when soldering or cutting wires.
Keep your workspace ventilated to avoid inhaling fumes from soldering. Avoid loose clothing or jewelry that might get caught in tools. Have a fire extinguisher nearby—you never know when a small spark could ignite a fire.
What safety steps will you add to your routine to keep your projects both fun and safe?

Credit: www.instructables.com
Simple Circuits To Start With
Starting with simple circuits builds a strong base for making electronic gadgets at home. These circuits use few components and are easy to understand. They help you learn how electricity flows and how parts work together.
Simple circuits also give quick results. You see your project working fast, which keeps motivation high. Experimenting with these basics prepares you for more complex projects later.
Led Blinkers And Indicators
LED blinkers are great beginner projects. They show how to control light using a circuit. You only need an LED, a resistor, a battery, and a switch. By connecting these parts, you make the LED turn on and off repeatedly.
Indicators help show the status of a device. For example, a power indicator light shows if a gadget is on. Learning to build these circuits teaches you about current and voltage control.
Basic Sound Devices
Simple sound circuits create noise or tones using buzzers or speakers. These projects demonstrate how electricity can produce sound waves. Use a battery, a buzzer, and a switch to make a basic sound device.
Such circuits explain how signals move through components. They also introduce concepts like frequency and amplitude in a fun way.
Simple Sensors
Sensors detect changes in the environment. Basic sensors can sense light, temperature, or touch. For example, a photoresistor changes its resistance based on light levels.
Building simple sensors helps you understand how gadgets respond to the world. These circuits use parts like resistors, transistors, and sensors. They prepare you to create interactive electronics at home.
Building A Portable Charger
Building a portable charger at home is a rewarding project that blends creativity with practical skills. It gives you the freedom to customize your device according to your power needs and budget. Plus, it’s a great way to understand the fundamentals of electronics and battery management.
Choosing The Right Battery
Your portable charger’s performance hinges on the battery you pick. Lithium-ion batteries are popular because they offer high energy density and long life. But if safety is your priority, consider lithium-polymer batteries—they’re less prone to leaks and swelling.
Think about the charger’s capacity in milliampere-hours (mAh). A higher mAh means longer charging times for your devices but also larger size and weight. What devices do you want to charge, and how often? Answering this helps you select the perfect battery size.
Assembling The Circuit
Once you have your battery, it’s time to connect the parts. You’ll need a charging module (like a TP4056 board) to safely recharge the battery from a USB power source. Adding a boost converter ensures the output voltage stays steady, usually at 5V for most gadgets.
Keep your wiring neat and secure—loose connections can cause failures or even hazards. Use a small soldering iron for precise joints, and always double-check polarity to avoid damaging components. Have you tried laying out your circuit on a breadboard first? It’s a great way to test before soldering.
Testing And Troubleshooting
After assembly, test your portable charger with a multimeter to check voltage output and ensure there are no shorts. Connect a low-power device first to confirm the charger works without overheating or shutting off unexpectedly.
If the charger doesn’t work as expected, inspect each connection and component. Common issues include reversed polarity, faulty wiring, or a damaged charging module. Patience is key—each problem you solve sharpens your skills for the next project.
Creating A Diy Bluetooth Speaker
Creating a DIY Bluetooth speaker is a fun and rewarding project. It lets you build a personalized device that plays music wirelessly. This project teaches basic electronics and soldering skills. It also gives you a useful gadget for home or travel.
The process involves gathering parts, wiring the components, and designing an enclosure. Each step is simple with the right guidance. Anyone with basic tools and curiosity can try it.
Required Parts And Components
- Bluetooth audio receiver module
- Amplifier board (compatible with speaker output)
- Speaker drivers (one or two, depending on size)
- Rechargeable battery (lithium-ion preferred)
- Charging circuit (USB charger module)
- Wires and connectors
- Switch for power control
- Soldering iron and solder
- Small screws and mounting brackets
Wiring The Speaker System
Start by connecting the Bluetooth receiver output to the amplifier input. Use short wires to reduce signal loss. Next, connect the amplifier output to the speaker terminals. Make sure polarity matches to avoid sound issues.
Attach the battery to the charging circuit input. Connect the output from the charger to the amplifier’s power input. Add a power switch between the battery and amplifier for easy control. Test connections before final assembly.
Enclosure Ideas
Choose a box that fits your speakers and components snugly. Wooden boxes offer good sound quality and look nice. Plastic containers are lightweight and easy to modify. Cardboard can work for prototypes or low-cost builds.
Drill holes for the speakers and charging port. Add ventilation slots to prevent overheating. Use glue or screws to secure parts inside. Customize with paint or stickers to make it unique.
Home Automation Starter Projects
Home automation projects are a fantastic way to get hands-on experience with electronics while making your living space smarter. These starter projects don’t require advanced skills or expensive tools, making them perfect for beginners. You’ll see how small changes can bring big convenience to your daily routine.
Smart Light Switch
A smart light switch lets you control your home lighting remotely or set schedules, saving energy and adding comfort. You can build one using a microcontroller like Arduino or ESP8266, a relay module, and a basic wiring setup. I once replaced a regular switch with a DIY smart switch and loved turning lights on from my phone without leaving the couch.
Start by wiring the relay to the light circuit and connecting it to your microcontroller. Then, program the microcontroller to respond to commands via Wi-Fi. You’ll need some basic coding, but plenty of tutorials are available online to guide you step-by-step.
Temperature Monitoring Device
Knowing your room’s temperature in real-time can help you manage heating or cooling efficiently. A simple temperature monitoring device can be made with a temperature sensor like the DS18B20 or DHT11 connected to a microcontroller. You can display the data on an LCD screen or send it to your smartphone.
This project taught me how important sensor calibration is for accurate readings. Try placing your sensor in different locations to see how temperature changes around your home. What unexpected patterns could you discover?
Remote Control Outlets
Remote control outlets allow you to power devices on and off without physically unplugging them. You can create these using smart plugs or by building your own with a relay controlled through Wi-Fi or Bluetooth. This project helped me reduce phantom energy use by turning off chargers and appliances when not in use.
To build this, connect a relay to your outlet’s wiring and control it with a microcontroller programmed to receive commands. Consider adding an app interface for easier control. What devices in your home would benefit the most from this simple upgrade?

Credit: www.instructables.com
Tips For Enhancing Your Skills
Enhancing your skills in making electronic gadgets at home takes time and effort. Focus on learning new techniques and gaining practical experience. Small steps lead to big improvements.
Stay curious and open to trying different approaches. Practice regularly to build confidence. Use every project as a chance to learn something new.
Learning From Online Resources
The internet offers a vast range of tutorials and guides. Choose videos and articles that explain concepts clearly. Follow step-by-step instructions to avoid confusion.
Use websites dedicated to electronics for detailed explanations. Download free ebooks or join online courses to deepen your knowledge. Bookmark helpful resources for quick reference during projects.
Joining Maker Communities
Maker communities bring together people who share similar interests. Participate in forums to ask questions and share your progress. Learn from others’ successes and mistakes.
Attend local meetups or online group chats to connect with experienced makers. Collaborate on projects to gain hands-on experience. Networking can open doors to useful advice and tools.
Experimenting With New Components
Trying different electronic parts boosts your understanding of how circuits work. Use new sensors, microcontrollers, and modules in your projects. Observe how each component affects the overall design.
Keep a journal to note what works and what doesn’t. Testing various setups sharpens problem-solving skills. This exploration makes your projects more creative and functional.
Frequently Asked Questions
What Basic Tools Are Needed To Make Electronic Gadgets At Home?
You need a soldering iron, multimeter, wire cutters, and screwdrivers. These tools help assemble and test electronic components safely and accurately.
Can Beginners Make Electronic Gadgets Without Prior Experience?
Yes, beginners can start with simple kits and tutorials. Basic knowledge of circuits and patience helps in learning effectively.
How To Source Affordable Components For Homemade Gadgets?
Buy components from online stores, local electronics shops, or salvage parts from old devices. Compare prices to find the best deals.
What Safety Precautions Are Essential When Making Electronics At Home?
Always work in a well-ventilated area, wear safety goggles, and avoid touching live circuits. Follow instructions carefully to prevent accidents.
Conclusion
Making electronic gadgets at home can be fun and rewarding. Start with simple projects and learn step by step. Use common parts and basic tools to build your devices. Practice helps you improve and understand electronics better. Stay curious and try new ideas often.
Enjoy the process and create useful gadgets on your own. Keep experimenting, and you will get better each time. Home-made electronics bring learning and fun together. Give it a try today.
Leave a Reply