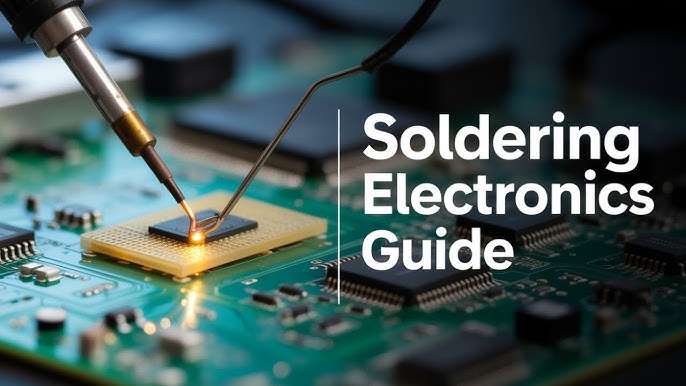
Are you ready to take your electronics skills to the next level? Learning how to solder electronic components like a professional can open doors to endless creative projects and repairs.
Imagine confidently joining wires and parts with precision, making your circuits reliable and long-lasting. This course will guide you step-by-step, breaking down complex techniques into simple, easy-to-follow lessons. By the end, you’ll have the skills to tackle your own projects and impress others with your craftsmanship.
Keep reading, and discover how you can master soldering quickly and effectively.

Credit: www.reed.co.uk
Essential Tools And Materials
Mastering soldering means having the right tools and materials at your fingertips. Without them, even the best technique can fall short. Let’s dive into what you really need to get professional results every time you work on electronic components.
Soldering Irons And Stations
Your soldering iron is your main tool—it must feel comfortable and heat quickly. A soldering station offers adjustable temperature control, making it easier to handle delicate components without damage. I once switched from a basic iron to a station and saw my joint quality improve instantly.
Look for irons with interchangeable tips. Fine tips help with tiny surface-mount parts, while broader tips work better for larger connectors. Temperature control between 350°C and 400°C is ideal for most electronics.
Types Of Solder
Not all solder is created equal. Lead-free solder is popular due to regulations, but it melts at a higher temperature and behaves differently than traditional leaded solder. I recommend starting with a 60/40 tin-lead solder if you’re practicing on non-critical projects because it flows smoothly and is easier to work with.
Consider the diameter of solder wire too; thinner wire (around 0.6mm) gives you better control on small joints. Also, rosin-core solder has flux inside, which helps clean the metal and improves the bond.
Desoldering Tools
Making mistakes is part of learning, so desoldering tools are essential. A solder sucker or desoldering pump quickly removes molten solder, allowing you to fix errors without damaging components. I’ve saved countless boards thanks to a good-quality solder sucker.
Desoldering braid or wick is another great option. It works by absorbing excess solder through capillary action. Choose one with a copper braid and rosin flux for best results.
Safety Equipment
Soldering involves heat and fumes, so protecting yourself is crucial. Always use safety glasses to shield your eyes from accidental splashes of molten solder. A fume extractor or even a simple fan can reduce your exposure to harmful smoke.
Wear heat-resistant gloves if you’re handling hot components or tips. Keep a fire-resistant mat under your workspace to avoid accidents. Your safety gear isn’t just a recommendation—it’s a must for professional-quality work.

Credit: www.electronicsandyou.com
Understanding Electronic Components
Understanding electronic components is essential before you start soldering like a pro. Knowing what each component does helps you handle them carefully and place them correctly on your circuit board. It also makes troubleshooting easier when your project doesn’t work as expected.
Resistors And Capacitors
Resistors control the flow of electric current by providing resistance. They come in different values, measured in ohms, and their color bands indicate their resistance level. Capacitors store and release electrical energy, smoothing out voltage fluctuations in your circuit.
When soldering, resistors are usually easy to handle, but capacitors require attention to polarity—some have a positive and negative side. Have you ever mixed up capacitor leads and seen your circuit behave oddly? That’s a common beginner mistake.
Diodes And Transistors
Diodes allow current to flow in only one direction, protecting your circuit from damage. Transistors work as switches or amplifiers, controlling larger currents with smaller signals. Both components are sensitive to orientation, so you must place them correctly.
Pay close attention to the markings on diodes and transistors. Reversing them can cause your device to malfunction or even damage other parts. Have you checked the datasheet for pin configuration before soldering? It’s a simple step that saves headaches.
Integrated Circuits
Integrated circuits (ICs) are small chips that can contain thousands of components inside. They perform complex tasks and simplify your circuit design. Handling ICs requires care to avoid static damage and correct alignment of pins.
Make sure to identify the notch or dot on the IC to align it properly on the board. I once spent hours troubleshooting only to find the IC was inserted backwards—don’t let that happen to you. Use an anti-static wrist strap to protect sensitive ICs during soldering.
Printed Circuit Boards
Printed circuit boards (PCBs) hold your components and connect them with copper traces. Understanding PCB layout helps you plan where to place components and route wires effectively. Good solder joints on PCBs ensure strong electrical connections and long-lasting circuits.
Inspect your PCB for solder pads and holes before starting. Have you noticed how clean, well-organized PCBs make soldering much easier? Practice placing components neatly and avoid overcrowding to maintain reliability.
Preparing For Soldering
Preparing for soldering is a crucial phase that sets the foundation for your entire project. Skipping this step can lead to mistakes that are hard to fix later. Taking time to organize, understand your components, and prepare your tools can make the difference between a clean, professional joint and a frustrating mess.
Reading Circuit Schematics
Before you pick up your soldering iron, you need to understand the circuit schematic thoroughly. These diagrams are blueprints showing how components connect and interact. If you struggle to read them, your soldering can become guesswork.
Focus on identifying key symbols like resistors, capacitors, and transistors, and trace their connections. Ask yourself: do I understand where each component fits? This clarity helps avoid costly errors and saves time during assembly.
Organizing Workspace
Your workspace should be neat, well-lit, and free from distractions. A cluttered area leads to misplaced components and accidental burns. Arrange your tools—soldering iron, wire cutters, tweezers—within easy reach.
Use small containers or magnetic mats to keep components sorted by type and value. This simple step minimizes the chance of mixing parts and speeds up your workflow. How often have you lost a tiny resistor only to find it hours later?
Pre-tinning Tips
Pre-tinning is the process of coating component leads and the soldering iron tip with a thin layer of solder before joining parts. This practice improves heat transfer and helps the solder flow smoothly. It might feel like an extra step, but it drastically improves joint quality.
Use just a small amount of solder and wipe the iron tip on a damp sponge regularly to prevent oxidation. If you’ve ever struggled with cold solder joints, pre-tinning is likely your missing ingredient. Try it on a practice board—you’ll notice the difference immediately.
Soldering Techniques
Soldering techniques are the foundation of electronic assembly. Proper skills ensure strong, reliable connections. Each technique suits different components and circuit boards. Understanding these methods helps avoid common mistakes and improves your work quality.
Through-hole Soldering
Through-hole soldering joins components with leads passing through the circuit board. Insert the component leads into holes on the PCB. Heat the lead and pad simultaneously with a soldering iron. Apply solder to the joint, not directly to the iron. Remove the iron once the solder flows smoothly.
This method provides strong mechanical bonds. It suits larger components and prototypes. Clean joints are shiny and smooth, without excess solder blobs.
Surface Mount Soldering
Surface mount soldering attaches components directly to the board surface. Components have small metal pads instead of leads. Place components carefully on solder paste applied to the pads. Heat the board with a reflow oven or hot air gun. The solder paste melts and forms solid joints.
This technique works for compact, high-density circuits. It requires steady hands and good eyesight. Proper placement ensures good electrical contact.
Bga And Qfn Techniques
BGA (Ball Grid Array) and QFN (Quad Flat No-lead) are advanced surface mount types. BGAs use tiny solder balls under the component. QFNs have pads under the chip edges. Both need precise alignment and controlled heating.
- Use X-ray or microscope for inspection.
- Apply solder paste evenly before placement.
- Use a reflow oven for uniform heating.
These techniques provide excellent electrical and thermal performance. They demand specialized tools and skills.
Avoiding Cold Joints
Cold joints cause weak, unreliable connections. They occur when solder doesn’t melt properly or cools too fast. Signs include dull, grainy, or cracked solder.
- Heat both pad and lead evenly.
- Use clean, well-tinned soldering iron tips.
- Apply enough solder to cover the joint fully.
- Let the joint cool naturally without movement.
Proper technique and patience prevent cold joints. Strong joints last longer and ensure circuit reliability.
Troubleshooting Common Issues
Troubleshooting common soldering issues can save you hours of frustration and improve the quality of your electronic projects. Recognizing problems early helps you fix them efficiently and avoid damaging components. Let’s look at some typical challenges and how you can tackle them like a pro.
Identifying Bad Solder Joints
Bad solder joints often look dull or cracked instead of shiny and smooth. They might also feel loose if you gently wiggle the component lead. A poor joint can cause intermittent connections or complete failure of the circuit.
Check for these signs:
- Grainy or rough surface texture
- Insufficient solder covering the pad and lead
- Gaps or holes in the solder
Using a magnifying glass or a soldering microscope helps spot these defects quickly. Have you ever tested a circuit only to find one joint was the culprit? Taking time to inspect every joint can save your project.
Fixing Bridges And Shorts
Solder bridges happen when excess solder connects two or more adjacent pads or leads, causing a short circuit. This can lead to malfunction or even damage your components if power flows where it shouldn’t.
To fix bridges:
- Use desoldering braid or a solder sucker to remove extra solder.
- Carefully reheat the joint with the iron and pull away excess solder.
- Separate connected pins with a clean, fine-tipped iron if necessary.
Sometimes, the tiniest bridge can cause huge headaches. Do you double-check your work under good lighting to catch these invisible traps?
Dealing With Overheating
Overheating can damage both the component and the PCB pad. Signs include discoloration of the board, burnt smells, or melted solder masks. Components may lose functionality if exposed to too much heat.
Prevent overheating by:
- Using a soldering iron with adjustable temperature control.
- Limiting contact time between the iron and the joint to just a few seconds.
- Using heat sinks or tweezers to draw heat away from sensitive parts.
Have you noticed some components get warm quickly? Managing heat is key to preserving your electronics and ensuring long-lasting connections.
Advanced Soldering Skills
Mastering advanced soldering skills sets you apart from basic hobbyists and turns you into a true electronics craftsman. These skills require precision, patience, and a deep understanding of various techniques that go beyond simple joints. Developing these abilities will boost your confidence and open doors to complex projects and repairs.
Reworking And Repairing
Reworking involves fixing or modifying existing solder joints without damaging the components. You’ll learn to remove old solder cleanly using desoldering pumps or braided wick, which helps prevent heat damage. Repairing broken traces or replacing tiny components demands steady hands and sharp eyes—skills you sharpen with practice.
Think about a time when you had a faulty board but hesitated to fix it because you feared making it worse. Tackling rework teaches you how to approach such challenges calmly and effectively.
Custom Circuit Design
Building your own circuits requires more than just placing components on a board. You’ll practice creating neat, organized layouts that minimize signal interference and make troubleshooting easier. Soldering in custom designs often means working with unique component arrangements—this hones your ability to adapt and innovate.
Can you imagine the pride of powering up a circuit you designed and soldered yourself? Every clean joint is proof of your skill and attention to detail.
Soldering In Tight Spaces
Many advanced projects involve compact PCBs where components sit close together. Learning to solder in these tight spaces requires precision tools and techniques like using fine-tipped irons and angled tweezers. You’ll discover ways to avoid accidental bridges and ensure solid connections without overcrowding.
Have you ever struggled to reach a tiny pad buried between other parts? Developing this skill will help you overcome those frustrating moments with ease and accuracy.
Maintenance And Care
Maintaining your soldering equipment is as important as mastering the soldering technique itself. Proper care ensures your tools work efficiently and last longer, saving you time and money. Let’s look at how you can keep your soldering gear in top shape with simple habits.
Cleaning Soldering Equipment
Regular cleaning prevents buildup that can affect solder flow and joint quality. Use a damp sponge or brass wire cleaner to wipe the soldering iron tip frequently during use. This keeps the tip shiny and ready for precise work.
After each session, remove any leftover solder and flux residue with isopropyl alcohol and a soft cloth. Avoid abrasive materials that can damage the tip’s coating. Have you noticed how a clean tip makes your solder joints smoother and easier?
Storing Tools Properly
Proper storage protects your tools from damage and corrosion. Always turn off and unplug your soldering iron before storing it. Let it cool completely and place it in a stand or holder designed for soldering irons.
Keep solder wire and flux in airtight containers to prevent oxidation and contamination. Avoid tossing your tools into a drawer with other equipment — tangles and knocks can ruin delicate parts. How often do you check if your tools are stored safely?
Extending Tool Lifespan
Use the right temperature settings for your soldering projects. Excessive heat wears out the tip and internal components faster. Many professionals recommend working at the lowest effective temperature to protect your equipment.
Replace worn-out tips promptly instead of forcing them to work. Investing in quality replacement parts pays off in consistent results. Have you tried scheduling regular maintenance as part of your routine to avoid unexpected breakdowns?
Best Practices For Professionals
Mastering the art of soldering electronic components requires more than just technical skill. Professionals know that best practices go beyond the basics to ensure reliability, efficiency, and continuous growth. Paying attention to how you manage your time, control quality, and keep learning can set you apart in your projects.
Time Management In Projects
Efficient time management is crucial when working on electronic projects. Prioritize tasks by breaking down the project into smaller, manageable steps. This helps you avoid feeling overwhelmed and keeps your workflow steady.
Set realistic deadlines for each stage, including preparation, soldering, and testing. You might find that spending a few extra minutes on careful preparation saves hours of troubleshooting later. Have you ever rushed through a solder joint only to fix it twice later?
Use tools like timers or project management apps to track your progress. This keeps you accountable and highlights areas where you might be losing time unnecessarily.
Quality Control Techniques
Quality control ensures your solder joints are reliable and your components function correctly. Always inspect joints visually for smooth, shiny surfaces without cracks or excess solder. A poor joint can look dull or grainy—never ignore these signs.
Use a multimeter to check for continuity and proper connections. Testing immediately after soldering helps catch mistakes before they cause bigger issues. You can also create a checklist for each project to verify all critical points are inspected.
Consider documenting your quality checks. Keeping notes on common errors you encounter can help you improve your technique over time.
Continuous Learning And Improvement
Even seasoned professionals never stop learning. New components, techniques, and tools emerge regularly. Stay curious—try out new soldering tips or experiment with different solder alloys to see what works best for you.
Join online communities or attend workshops to exchange ideas and troubleshoot problems with peers. Sometimes, a fresh perspective reveals a simple fix you hadn’t considered.
Reflect on each project by asking yourself: What went well? What could be improved? Keeping a learning journal can turn every project into a stepping stone for better skills.

Credit: www.electronicsandyou.com
Frequently Asked Questions
What Tools Do I Need For Professional Soldering?
You need a quality soldering iron, solder wire, flux, tweezers, and a soldering stand. These tools ensure precision and safety.
How Do I Prepare Electronic Components Before Soldering?
Clean component leads and PCB pads with isopropyl alcohol. Apply a small amount of flux to improve solder flow and adhesion.
What Is The Best Soldering Technique For Beginners?
Start by heating the joint, then apply solder to the heated area. Avoid overheating to prevent damage and ensure a solid connection.
How Can I Avoid Cold Solder Joints?
Use the right temperature and heat both parts evenly. Ensure solder flows smoothly and forms a shiny, solid joint without gaps.
Conclusion
Soldering electronic parts needs practice and patience. Start with simple projects to build your skills. Use the right tools and keep your workspace clean. Pay attention to safety to avoid accidents. Each solder joint should be neat and strong. Mistakes help you learn and improve faster.
Keep practicing to gain confidence and speed. Soon, you will handle electronics like a pro. Enjoy creating and fixing gadgets with your new skills.
Leave a Reply