Have you ever faced a sudden glitch in your electronic device and wondered if there’s a quick fix before spending money on repairs? What if you could bring your faulty components back to life with a simple kitchen trick?
Baking electronic components might sound strange, but it’s a method many tech enthusiasts use to revive malfunctioning parts. You’ll discover how to safely bake your electronic components and potentially save your gadgets without complicated tools or costly replacements. Keep reading—you might just learn a surprising skill that could rescue your devices when you need it most.
Why Bake Electronic Components
Baking electronic components removes moisture trapped inside, preventing damage during soldering. This process helps improve device reliability and performance. It’s essential for fixing moisture-related issues in sensitive electronics.
Baking electronic components may sound unusual, but it’s a critical step in ensuring the longevity and reliability of these tiny powerhouses. Moisture can be a silent adversary, subtly infiltrating the components and leading to failures that are both costly and inconvenient. Understanding why and when to bake components can save you from unwanted headaches and expenses.Moisture And Its Impact
Moisture is more than just a nuisance; it’s a genuine threat to electronic components. When components absorb moisture, they become prone to “popcorning” during soldering. This occurs when trapped moisture rapidly expands, causing damage. Imagine assembling a circuit board, only to hear a faint popping sound. That’s the sound of your work being compromised by moisture. By baking components, you effectively evaporate this moisture, ensuring stability and reliability.Common Scenarios For Baking
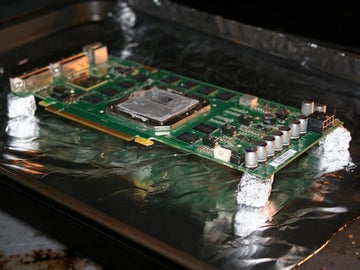
You might wonder when baking is necessary. Components that have been exposed to humid environments often require baking. Consider a scenario where components have been stored improperly, or you received them from a supplier in a humid region. Baking becomes a crucial step before assembly. Another common instance is when components are left out for extended periods before use. Time can be a silent contributor to moisture absorption. Regular baking sessions can mitigate this risk and enhance performance. Have you ever experienced unexpected component failure? It might have been preventable with a simple baking process.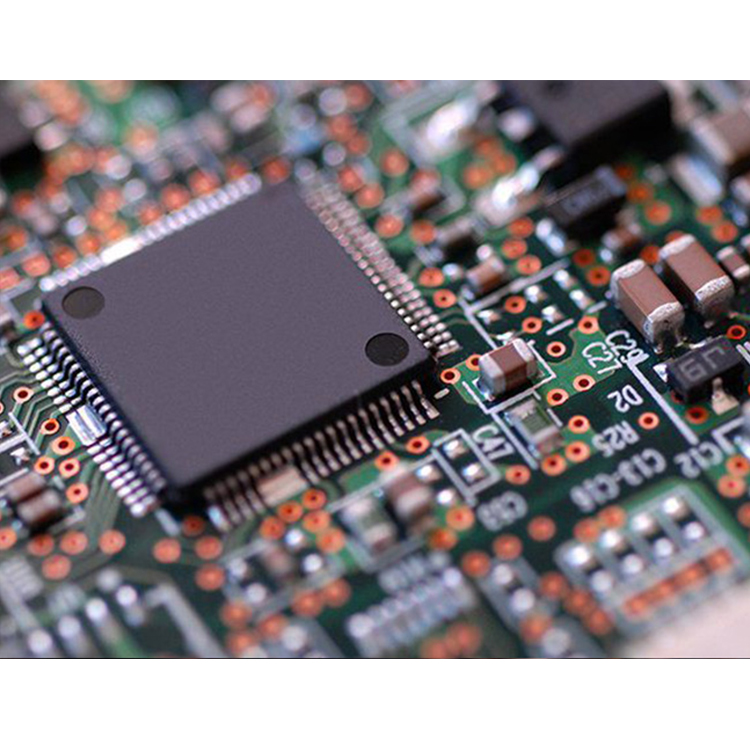
Credit: www.gms-industrial.com
Choosing The Right Equipment
Choosing the right equipment is key to baking electronic components safely and effectively. The right tools ensure even heat distribution and prevent damage. Careful selection helps maintain component quality and extends their lifespan.
Precision and reliability matter most. The equipment must reach and maintain specific temperatures. It should also offer consistent performance to avoid overheating or underheating.
Types Of Ovens
Several oven types suit baking electronics. Each has unique features and benefits for different needs.
- Convection Ovens:Circulate hot air evenly. Ideal for uniform heating and quick temperature changes.
- Infrared Ovens:Use radiant heat. Good for fast surface heating but less uniform inside.
- Reflow Ovens:Designed for soldering. Provide precise temperature profiles for delicate components.
- Vacuum Ovens:Remove air to reduce oxidation. Useful for moisture-sensitive parts.
Choose based on component type and baking requirements.
Temperature Control Tools
Accurate temperature control prevents damage during baking. Use tools that measure and regulate heat precisely.
- Thermocouples:Attach directly to components. Provide real-time temperature data.
- Digital Thermometers:Easy to read and accurate. Suitable for monitoring oven temperature.
- PID Controllers:Maintain steady temperature. Adjust heat automatically based on sensor input.
- Data Loggers:Record temperature over time. Help verify baking process consistency.
Combine these tools with ovens for the best results.
Preparing Components For Baking
Preparing electronic components for baking is a crucial step. It ensures the parts are clean and ready for the process. Proper preparation prevents damage and improves results. Focus on two main areas: cleaning and inspection, and packaging and placement.
Cleaning And Inspection
Start by cleaning the components carefully. Remove dust, dirt, and grease using a soft brush or lint-free cloth. Avoid harsh chemicals that can harm the parts. Inspect each component closely. Look for cracks, corrosion, or bent pins. Discard any damaged items before baking. Clean and intact components help prevent failure after baking.
Packaging And Placement
Use proper packaging to protect components during baking. Place parts in anti-static bags or trays designed for heat. Avoid stacking items directly on top of each other. Leave space for air circulation to ensure even heating. Label packages clearly with component type and batch number. Correct placement reduces risk of damage and improves baking efficiency.
Credit: www.auspienterprises.com
Setting Temperature And Time
Setting the right temperature and time is crucial when baking electronic components. The goal is to remove moisture without causing damage. Too high heat or too long exposure can harm delicate parts. Too low or short may leave moisture inside. Precision matters to ensure components work well after baking.
Recommended Temperature Ranges
Most electronic components require gentle heat. Typical ranges fall between 50°C and 125°C (122°F to 257°F). Certain sensitive parts need lower temperatures around 50°C to 70°C. Others, like circuit boards, tolerate higher heat up to 125°C.
Here is a simple guide:
- Plastic components: 50°C to 70°C
- Resistors and capacitors: 70°C to 100°C
- Circuit boards and chips: 100°C to 125°C
Always check manufacturer guidelines for exact temperature limits. Avoid exceeding these to prevent damage.
Optimal Baking Durations
Baking time depends on component type and moisture level. Times typically range from 2 to 24 hours. Shorter times suit mildly damp parts. Heavily moisture-absorbed components need longer baking.
Example durations include:
| Component Type | Baking Time |
|---|---|
| Plastic parts | 2 to 4 hours |
| Resistors and capacitors | 4 to 6 hours |
| Circuit boards and chips | 6 to 24 hours |
Keep track of time closely. Overbaking may cause component failure.
Baking Process Tips
Baking electronic components is a delicate task. It requires careful attention to avoid damage and ensure proper moisture removal. Following some simple tips during the baking process improves results and protects sensitive parts.
Understanding how to monitor progress and avoid common mistakes helps maintain the quality of your components. Here are key points to keep in mind during baking.
Monitoring Progress
Check the oven temperature regularly. Use a reliable thermometer for accuracy.
Keep track of the baking time precisely. Overbaking can harm components.
Observe any unusual smells or smoke. Stop immediately if you notice them.
Use timers and alarms to avoid distractions. Consistent timing leads to better outcomes.
Avoiding Common Mistakes
- Do not exceed recommended temperatures. Heat can damage or warp parts.
- Avoid rapid temperature changes. Sudden shifts cause stress and cracks.
- Do not bake components with plastic parts unless specified safe.
- Never place components directly on metal racks. Use a tray or baking sheet.
- Ensure components are dry before baking. Excess moisture can cause steam damage.

Credit: www.instructables.com
Post-baking Handling
After baking electronic components, proper handling is crucial. It ensures the parts remain reliable and ready for use. Careless handling can cause damage or moisture absorption. Follow clear steps to maintain component quality after baking.
Cooling Procedures
Let components cool slowly at room temperature. Avoid sudden temperature changes to prevent thermal shock. Place the components on an anti-static mat or tray. Do not expose them to humidity or direct air flow. Wait until components reach a stable temperature before touching or moving.
Storage Recommendations
Store baked components in moisture barrier bags with desiccant packs. Seal the bags tightly to prevent moisture entry. Label bags with baking date and component details. Keep stored components in a dry, cool environment. Avoid stacking heavy items on top to prevent physical damage.
Safety Precautions
Baking electronic components requires careful attention to safety. Heat can cause burns or damage parts. Taking precautions protects you and your devices. Follow these safety tips to handle components safely and avoid damage.
Handling Hot Components
Always use heat-resistant gloves when touching hot parts. Avoid direct skin contact to prevent burns. Use tweezers or pliers for small components. Place hot items on heatproof surfaces to cool. Keep a fire extinguisher nearby in case of emergencies.
Preventing Damage
Preheat the oven to the correct temperature before baking. Avoid sudden temperature changes to prevent cracking. Use an anti-static mat to protect sensitive parts from static electricity. Check component specifications for safe temperature limits. Monitor the baking time closely to avoid overheating.
Troubleshooting Baking Issues
Baking electronic components is a precise process. Even small mistakes can cause damage or reduce the lifespan of your parts. Knowing how to troubleshoot common baking problems will save you time and money, and ensure your components work perfectly after baking.
Signs Of Overheating
Overheating can silently ruin your components if you don’t catch it early. Watch out for discoloration, melted solder, or a burnt smell—these are clear red flags. Sometimes, the component might look fine but fail during testing, which means overheating damaged the internal structure.
If you notice any of these signs, check your oven’s temperature calibration immediately. Are you sure your baking temperature matches the recommended specs? Using a separate, reliable thermometer inside the oven can help verify this.
Dealing With Moisture Problems
Moisture is a silent enemy for electronics. It causes corrosion and can lead to sudden failures after baking. If your components show rust spots or inconsistent solder joints, moisture might be the cause.
To fight moisture, dry your components longer at a slightly lower temperature before the final bake. You can also store parts in moisture barrier bags with desiccants after baking. Have you ever tested baking times by increasing them just a bit to see if moisture issues disappear? It often makes a big difference.
Frequently Asked Questions
What Does Baking Electronic Components Mean?
Baking electronic components removes moisture trapped inside them. This prevents damage during soldering or reflow processes. It ensures better reliability and performance of the components.
Why Is Baking Necessary For Electronic Parts?
Moisture can cause soldering defects and circuit failures. Baking drives out absorbed moisture, reducing risks of cracks or shorts. It helps maintain component integrity and prolongs device lifespan.
How Long Should I Bake Electronic Components?
Baking time depends on component type and moisture level. Typically, 1 to 4 hours at 125°C (257°F) is effective. Always follow manufacturer guidelines for precise timing and temperature.
Can All Electronic Components Be Baked Safely?
Most components tolerate baking if done correctly. However, sensitive parts like batteries or displays may get damaged. Always check datasheets before baking to avoid harming components.
Conclusion
Baking electronic components helps fix moisture and improve performance. Always follow the correct temperature and time guidelines. Avoid overheating to protect your devices from damage. Use an oven designed for electronics or a controlled environment. This simple step can extend the life of your components.
Remember to handle parts carefully before and after baking. Keep your workspace clean and organized for best results. Small care steps make a big difference in electronics repair. Try baking only when necessary and with proper knowledge. It saves money and keeps your devices working longer.
Leave a Reply