Have you ever faced the challenge of removing a tiny electronic component from a crowded circuit board without causing damage? Whether you’re fixing a gadget or reclaiming parts for a new project, knowing how to desolder electronic components is a skill that can save you time and money.
In this guide, you’ll discover simple, step-by-step techniques that make desoldering easier and safer. By the end, you’ll feel confident handling your own repairs and upgrades like a pro. Keep reading to unlock the secrets to clean, precise desoldering every time.
Tools And Equipment
Having the right tools and equipment makes desoldering electronic components from circuit boards much easier and safer. Each tool plays a specific role in removing solder without damaging the board or components. Understanding what each tool does will help you choose the best approach for your project and avoid common pitfalls.
Soldering Iron
A soldering iron is essential for heating the solder until it melts. Choose one with adjustable temperature control to avoid overheating delicate components. A fine tip helps you target small solder joints precisely, making the process cleaner and quicker.
Desoldering Pump
A desoldering pump, or solder sucker, is a handy tool for quickly removing molten solder. After heating the solder with your iron, you use the pump to suck up the liquid solder. It’s especially effective on through-hole components and can save you from repeated heating.
Desoldering Braid
Desoldering braid is a copper wire mesh that absorbs solder when heated. Place it over the solder joint and press your heated soldering iron on top. The braid pulls solder away from the joint, leaving it clean without the need for suction.
Tweezers And Pliers
Tweezers help you hold and lift tiny components safely once the solder is melted. Pliers come in handy for gripping larger components or bending leads. Using these tools keeps your hands steady and prevents accidental damage to the circuit board.
Safety Gear
Protecting yourself is just as important as protecting the board. Wear safety glasses to shield your eyes from hot solder splashes. A fume extractor or working in a well-ventilated area helps you avoid inhaling harmful fumes during desoldering.
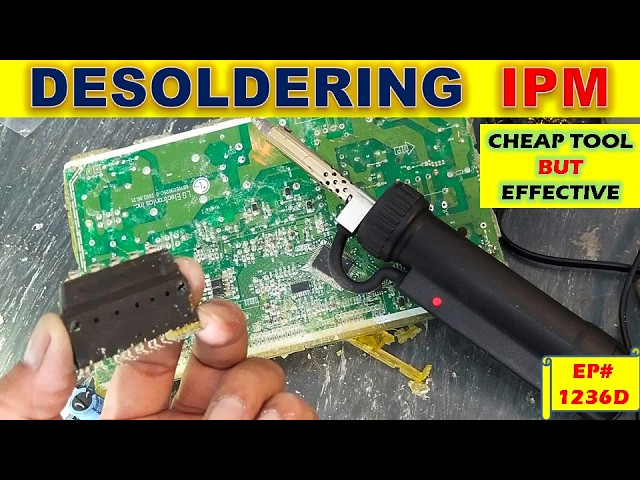
Credit: www.allpcb.com
Preparing The Workspace
Preparing your workspace before desoldering electronic components sets the stage for a smooth and safe process. A well-organized area improves your focus and minimizes mistakes. Let’s look at how to get your space ready with the right ventilation, lighting, tool setup, and safety measures.
Ventilation And Lighting
Good ventilation is crucial because solder fumes can be harmful. Position a fan to blow fumes away from your face or work near an open window. If you have a fume extractor, make sure it’s running before you start.
Lighting makes a huge difference when you’re dealing with tiny components. Use a bright desk lamp or an adjustable LED light to clearly see what you’re working on. Shadows can hide solder joints, so adjust your light to avoid them.
Organizing Tools
Keep your tools within reach to avoid interruptions. Arrange your soldering iron, desoldering pump, tweezers, and solder wick neatly on a non-slip mat. This setup saves time and prevents accidental burns or drops.
Try grouping tools by task to make it easier to grab what you need. For example:
- Heating tools: soldering iron, heat gun
- Removal tools: desoldering pump, solder wick
- Handling tools: tweezers, pliers
Protective Measures
Protect yourself and your workspace. Wear safety glasses to guard against solder splashes. Use heat-resistant gloves if you’re new to soldering or handling hot components.
Cover your work surface with a heatproof mat or old newspaper to catch solder drips. Keep a small container nearby for used solder and component leads to avoid clutter. How do you currently protect your workspace? Small changes here can prevent accidents and save cleanup time.
Identifying Components
Identifying the right components before desoldering is crucial to avoid damaging your circuit board. Knowing what you’re dealing with helps you choose the right tools and techniques. It also saves time and reduces frustration during the process.
Reading The Circuit Board
Circuit boards often have labels printed next to each component. These labels—like R for resistors, C for capacitors, and Q for transistors—guide you to the right parts. You might also find a reference designator such as R1, C3, or U2, which helps you cross-check with the schematic if you have one.
Look closely for values printed on the components themselves, such as 10k on a resistor or 100µF on a capacitor. These details confirm you’re targeting the correct part, especially when similar components sit side by side. If the markings are worn or missing, a magnifying glass or good lighting can reveal faint prints you might otherwise miss.
Marking Components For Removal
Once you identify the components, mark them clearly to avoid confusion during desoldering. Use a fine-tip permanent marker or small sticky labels that won’t smudge or fall off. This step is especially helpful when working with many parts or on complex boards.
Consider creating a simple checklist or diagram on paper to track which components you’ve already removed. This practice keeps you organized and reduces the chance of accidentally removing the wrong piece. Have you ever started desoldering only to realize halfway through that you missed a tiny but critical part? Marking helps prevent that.

Credit: www.reddit.com
Desoldering Techniques
Removing electronic components from circuit boards requires precision and the right technique. Desoldering techniques help you avoid damage to both the component and the board. Each method suits different situations, so knowing how to use them can save time and frustration.
Using A Soldering Iron
Using a soldering iron for desoldering is straightforward but demands steady hands. Heat the solder joint until the solder melts completely, then gently lift the component with tweezers. You must avoid overheating to protect the board’s traces and pads.
Have you noticed how some soldering irons heat up faster? Investing in a temperature-controlled iron can improve your results significantly. It helps you apply just the right amount of heat without burning the board.
Applying A Desoldering Pump
A desoldering pump, also called a solder sucker, is a handy tool for clearing melted solder quickly. After heating the solder joint with your iron, place the pump’s nozzle nearby and trigger it to suck up the molten solder. This method is excellent for through-hole components where solder pools around the pins.
Using a pump reduces the risk of leaving solder bridges that cause shorts. Have you ever struggled with stubborn solder that just won’t come off? A good desoldering pump can make that problem disappear in seconds.
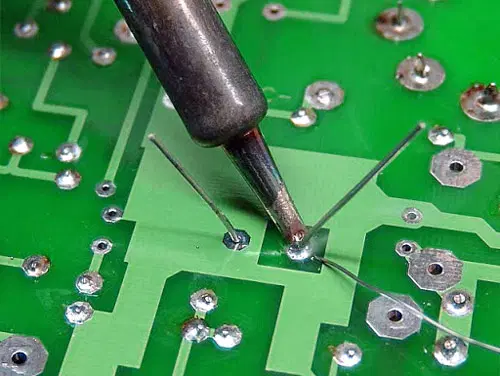
Employing Desoldering Braid
Desoldering braid is a fine copper mesh that absorbs molten solder when heated. Place the braid on the solder joint and press your soldering iron on top. The solder melts and wicks into the braid, cleaning the joint effectively.
This technique is perfect for small, delicate components or tight spaces where a pump might not fit. Do you find it tricky to remove solder without pulling up pads? Desoldering braid helps maintain the integrity of your circuit board.
Removing Components
Removing components from a circuit board requires precision and care. The process isn’t just about melting solder; it’s about preserving the integrity of both the board and the parts. How you handle each element during removal can make the difference between a successful repair and a costly mistake.
Handling Delicate Parts
Electronic components like capacitors, resistors, and ICs are often fragile. Applying too much heat or force can damage them beyond repair.
Use tools designed specifically for electronics, such as fine-tipped soldering irons and tweezers with gentle grips. Hold components steadily but avoid squeezing too hard.
Consider using a heat sink clip on sensitive components to protect them from overheating. Have you ever tried removing a tiny SMD resistor without proper tools? It quickly becomes clear how delicate this process is.
Avoiding Damage
Damage can occur not just to components but also to the circuit board itself. Lifting pads or traces off the board is a common issue when desoldering.
Make sure to heat the solder joint just enough to melt the solder without overheating the board. Excessive heat can cause the PCB layers to separate or pads to lift.
Use a solder sucker or braided wick efficiently to remove solder without prolonged heating. If you notice the pad starting to peel, stop immediately and reassess your approach.
Have you checked the condition of your soldering iron tip? A clean, well-tinned tip transfers heat more effectively, reducing the risk of damage.
Cleaning The Circuit Board
Cleaning the circuit board after desoldering is a crucial step that often gets overlooked. A clean board ensures better connections for new components and helps prevent future electrical issues. Taking a few extra minutes to clean can save you hours of troubleshooting later.
Removing Residual Solder
Residual solder can block pads and make it difficult to place new components properly. Use a solder wick or desoldering pump to gently remove leftover solder from the pads. Be careful not to apply too much heat, as it can damage the board or lift pads.
Once the bulk of solder is removed, clean the area with isopropyl alcohol and a soft brush. This removes flux and tiny solder particles that might interfere with soldering. I once skipped this step and ended up with a weak joint that kept failing—don’t let that happen to you.
Inspecting For Damage
After cleaning, closely examine the board for any lifted pads, burnt traces, or cracked solder mask. Use a magnifying glass or a microscope if you have one. Damage in these areas can cause shorts or open circuits, making your repair ineffective.
If you spot damaged pads or traces, consider using conductive ink or jumper wires to restore connections. It’s better to catch and fix these issues now rather than after soldering new components. Have you ever soldered over a damaged pad only to find the component didn’t work? That’s a frustration easily avoided by thorough inspection.
Safety Considerations
Working with circuit boards means handling tools and materials that can pose risks if you’re not careful. Safety should be your top priority to avoid burns, inhaling harmful fumes, or damaging components. Understanding the right precautions will keep your workspace safe and your projects successful.
Handling Hot Tools
Your soldering iron or desoldering tool gets extremely hot—often over 400°C (750°F). Never touch the metal tip or the heated area directly. Always hold the tool by its insulated handle to avoid burns.
Set your soldering station on a stable, heat-resistant surface. Use a stand to hold the tool when not in use—this prevents accidental contact and fire hazards.
Have a small bowl of water or a damp sponge nearby to clean the tip, but be careful not to splash water on hot electronics or yourself. Remember, a moment’s carelessness can cause serious injury. Have you ever felt the sting of a soldering iron burn? It’s a sharp reminder to stay alert.
Dealing With Toxic Fumes
Solder and flux release fumes that can irritate your eyes, throat, and lungs. Avoid breathing them in directly by working in a well-ventilated area. Open windows or use a fan to keep air moving.
If your workspace is enclosed, consider using a fume extractor or wearing a mask rated for chemical vapors. Some lead-based solders are particularly hazardous—choose lead-free solder when possible for safer handling.
Never let fumes build up around your face. Have you noticed a metallic or sharp smell when soldering? That’s a cue to improve ventilation immediately to protect your health.

Credit: www.youtube.com
Troubleshooting Common Issues
Troubleshooting is a key part of desoldering electronics. Problems can slow the work or cause damage. Knowing how to fix common issues saves time and parts. Focus on typical problems to keep the circuit board safe. Here are two common issues and how to handle them.
Stubborn Solder
Stubborn solder resists melting and removal. It often forms strong bonds or thick blobs. Use a soldering iron with enough heat power. A tip with a larger surface area helps heat the joint well. Adding fresh solder can improve heat transfer. This seems counterintuitive but it works. Use desoldering braid or a pump immediately after solder melts. Work quickly to avoid overheating the board. Repeat heating and removal in short bursts. Avoid pushing or pulling hard to prevent damage.
Damaged Traces
Traces are thin metal lines that connect components. They can lift or break during desoldering. Use a soldering iron with temperature control to avoid excess heat. If a trace lifts, stop immediately. Let the board cool before handling. Repair with conductive ink or thin wire if broken. Secure repairs with clear nail polish or epoxy. Always test continuity after repair. Prevent damage by heating only the solder joint, not the trace.
Tips For Success
Success in desoldering electronic components depends on careful technique and proper tools. Small habits can make the process easier and safer. Focus on building skill and taking care of your equipment.
Practice On Scrap Boards
Start with old circuit boards before working on important projects. This helps you learn how heat affects different parts. Practice removing different components to build confidence. Mistakes on scrap boards do not cause loss or damage.
Try these tips while practicing:
- Use a steady hand to avoid lifting pads.
- Apply the right amount of heat without rushing.
- Remove solder with a wick or pump cleanly.
Maintaining Equipment
Keep your soldering iron tip clean and well-tinned. A dirty or worn tip makes heating uneven. Replace tips when they become pitted or damaged. Check your solder sucker or wick regularly for wear.
Proper tool care includes:
- Wiping the soldering tip on a damp sponge often.
- Using fresh solder for better heat transfer.
- Storing tools in a safe, dry place to avoid rust.
Frequently Asked Questions
What Tools Do I Need For Desoldering Components?
You need a soldering iron, desoldering pump or wick, tweezers, and safety gear. These tools help remove solder safely and efficiently from circuit boards.
How Do I Avoid Damaging The Circuit Board When Desoldering?
Use the right temperature and avoid prolonged heat on pads. Apply solder wick gently and never force components to prevent damage.
Can I Reuse Components After Desoldering?
Yes, many components can be reused if removed carefully. Avoid overheating and mechanical stress to preserve component integrity.
What Is The Safest Method To Desolder Small Components?
Using a soldering iron with a fine tip and solder wick offers precise heat control and less risk of damage.
Conclusion
Desoldering parts from circuit boards takes patience and care. Use the right tools and keep the board safe. Apply heat gently to avoid damage. Practice helps you get better each time. Follow safety steps to protect yourself and the device.
With steady hands and focus, you can remove parts cleanly. Small efforts lead to good results. Keep trying and learn from each attempt. This skill supports many repair and DIY projects. You can fix and reuse electronics more easily now.
Leave a Reply